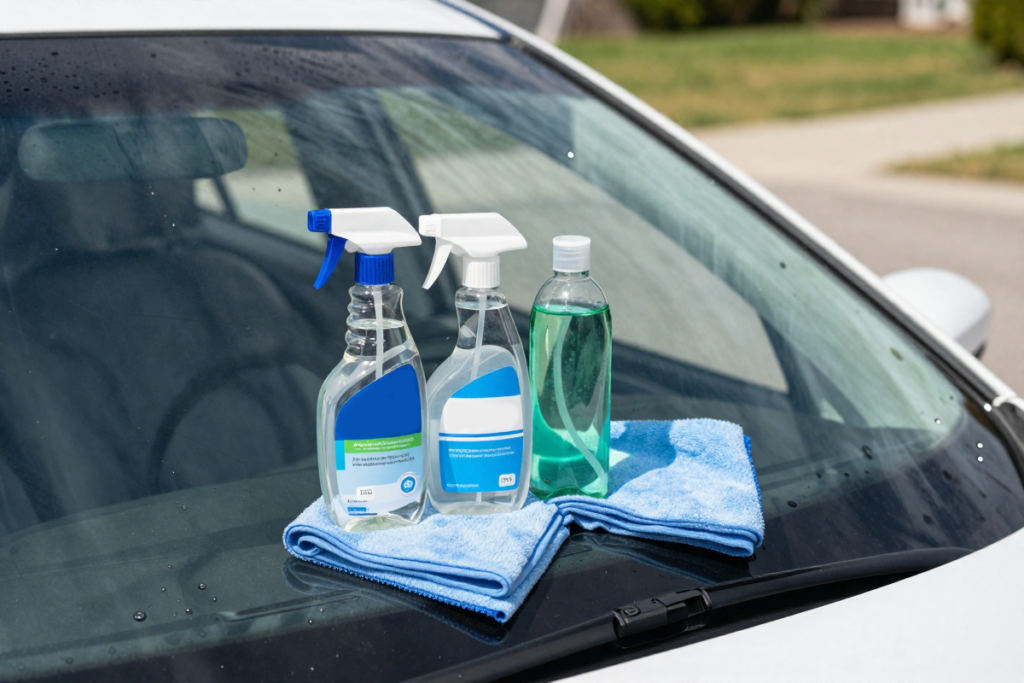
DIY Car Window Cleaner: Make Your Glass Sparkle at Home (Plus the Best Products to Use)

Introduction

There’s nothing more frustrating than climbing into your car on a sunny morning only to be greeted by streaky, smudged windows that obstruct your view and make your vehicle look neglected. Clean car windows aren’t just about aesthetics—they’re essential for safe driving, especially when sunlight hits at just the wrong angle or during nighttime driving when oncoming headlights create glare on dirty glass.

The good news? You don’t need to spend a fortune at professional detailing shops to achieve crystal-clear, streak-free windows with that professional sparkle. Whether you’re a DIY enthusiast who loves mixing your own cleaning solutions or someone who prefers the convenience of grabbing a proven product off the shelf, this comprehensive guide has you covered.

In this article, we’ll explore both approaches to car window cleaning: homemade DIY cleaners that cost pennies per batch and high-quality commercial products that deliver professional results with minimal effort. You’ll learn exactly when each option makes the most sense, discover foolproof recipes you can make at home, and find out which ready-made products actually live up to their promises. By the end, you’ll have everything you need to keep your car windows sparkling year-round, regardless of which approach fits your lifestyle and budget.

DIY vs Store-Bought Car Window Cleaners: Which Is Better?

Before we dive into recipes and product recommendations, let’s settle the fundamental question: should you make your own car window cleaner or buy a commercial product? The answer isn’t one-size-fits-all—it depends on your specific situation, priorities, and the condition of your windows.

When DIY Makes Sense

Homemade car window cleaners shine in several scenarios. If you’re budget-conscious, DIY solutions are unbeatable—you can make a full bottle of effective cleaner for less than a dollar using ingredients you probably already have in your pantry. For environmentally conscious drivers, mixing your own cleaner means controlling exactly what goes into it, avoiding harsh chemicals and excess packaging.

DIY cleaners are also perfect for light cleaning jobs and routine maintenance. If your windows just need a quick refresh to remove fingerprints, light dust, or minor smudges, a simple homemade window cleaner works beautifully. Additionally, if you enjoy the satisfaction of creating effective products from scratch and don’t mind spending a few extra minutes mixing ingredients, the DIY route can be genuinely rewarding.

When Commercial Products Are Better

The best car window cleaner products truly earn their place when you’re dealing with challenging cleaning situations. Heavy grime, nicotine film, tree sap, bug splatter, road film buildup, or the stubborn residue that accumulates over winter months often requires the specialized formulations found in commercial products. These cleaners contain surfactants and solvents specifically engineered to break down tough contaminants that homemade mixtures struggle with.

Commercial products also save significant time and eliminate trial-and-error. Instead of experimenting with ingredient ratios or dealing with inconsistent results, quality store-bought glass cleaners deliver predictable, professional-level performance every single time. For car enthusiasts who want that showroom finish or professionals who detail cars regularly, the convenience and reliability of commercial products justify the higher cost.

Quick Verdict

The smartest approach for most car owners is actually a hybrid strategy. Use DIY cleaners for weekly or bi-weekly maintenance cleaning to keep windows fresh between deep cleans, then turn to commercial products when you need to tackle serious buildup or want that extra-impressive streak-free finish before a special occasion. This combination gives you the cost-effectiveness of homemade solutions while ensuring you have the heavy-duty power of professional products when you really need them.

Key Ingredients for DIY Car Window Cleaner
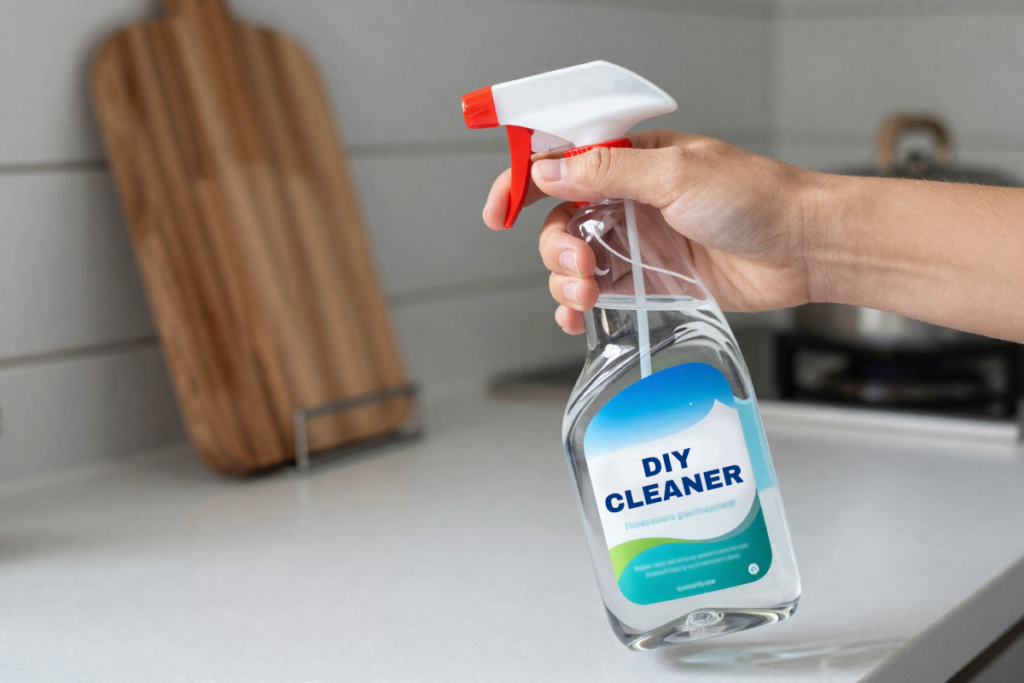
Creating effective homemade car glass cleaner doesn’t require a chemistry degree or exotic ingredients. In fact, you probably have everything you need already sitting in your kitchen or bathroom cabinets. Understanding these core ingredients and their chemical functions will help you achieve professional-grade sparkle at home.

Distilled Water forms the mineral-free base of virtually every homemade window cleaner recipe. Why distilled instead of tap water? Tap water contains minerals like calcium and magnesium that can leave deposits and hard water spots on glass, especially in hard water areas. Distilled water eliminates this problem entirely, ensuring a truly streak-free finish. It’s inexpensive and available at any grocery store.

White Vinegar is the MVP of DIY cleaning solutions. This mild acetic acid (typically 5% concentration) cuts through grease, dissolves mineral deposits, and leaves glass sparkling with crystal-clear clarity. The natural acid neutralizes alkaline deposits and provides excellent cleaning power for decalcification. The smell dissipates quickly as it dries, and it’s completely safe for use around children and pets. Use regular white vinegar with 5% acidity—nothing fancy required.

Isopropyl Alcohol (rubbing alcohol) is the secret weapon for achieving streak-free car windows every time. This primary solvent offers high volatility—meaning it evaporates quickly through what’s called “flash-off,” preventing water spots and streaks while helping dissolve oils and stubborn grime. Look for 70% or 91% concentration, which you can find at any pharmacy or grocery store. The rapid evaporation is key to professional results.

Dish Soap adds cleaning power as a surfactant for tackling greasy residue and breaking surface tension, but use it sparingly—just a drop or two per recipe. Too much soap creates suds that are difficult to rinse and leave streaks behind. The surfactant action helps the cleaner “wet” the surface and encapsulate dirt particles. Choose a clear, gentle dish soap like Dawn without added moisturizers or fragrances.

Cornstarch (optional) acts as a mild abrasive that adds sparkle and helps prevent streaking by buffing away film. Just one tablespoon can transform your cleaner’s performance, creating that professional detailer-quality finish.

If you’d rather skip the measuring and mixing altogether, don’t worry—we’ll cover ready-made alternatives that deliver excellent results without any preparation. Keep reading to discover the top-rated commercial cleaners that thousands of car owners swear by.

Best DIY Car Window Cleaner Recipes

Ready to mix your own homemade car window cleaner? These proven recipes use different combinations of the ingredients we just discussed, each optimized for specific cleaning situations. These formulas deliver professional sparkle without the professional price tag.

Basic Vinegar Cleaner

This is the simplest, most economical recipe that works beautifully for regular maintenance cleaning and light grime removal.

Recipe:

  • 1 cup distilled water
  • 1 cup white vinegar
  • 1 tablespoon cornstarch (optional, helps prevent streaking and adds sparkle)

Mix ingredients in a spray bottle and shake well before each use. The vinegar smell disappears as it dries. This formula effectively removes fingerprints, light dust, and everyday grime while costing just pennies per batch. It’s perfect for routine maintenance between deep cleaning sessions.

Alcohol-Based Streak-Free Cleaner

When you want absolutely zero streaks and that crystal-clear professional finish, this alcohol-heavy formula delivers exceptional results through rapid flash-off evaporation.

Recipe:

  • 1 cup distilled water
  • 1 cup isopropyl alcohol (70% or higher)
  • 1 tablespoon white vinegar

The high alcohol content ensures rapid evaporation, leaving behind nothing but crystal-clear glass with professional sparkle. This recipe works exceptionally well in humid conditions where water-based cleaners tend to streak, and it’s ideal for achieving streak-free car windows every time.

Heavy-Duty Grime Remover

For windows with significant buildup from road film, bugs, tree sap, or stubborn outdoor grime, this boosted formula provides extra cleaning power with enhanced surfactant action.

Recipe:

  • 2 cups distilled water
  • ¼ cup white vinegar
  • ½ cup isopropyl alcohol
  • 2 drops dish soap (Dawn works best)

The addition of dish soap as a surfactant helps break down greasy, sticky residues and heavy-duty contaminants that other formulas struggle with. Remember to shake well before using, and buff thoroughly to prevent soap residue from causing streaks.

Tinted Window-Safe Cleaner

If your car has window tinting, avoid ammonia-based cleaners (which includes some commercial products). This gentle, ammonia-free formula is completely tint-safe and won’t damage window film.

Recipe:
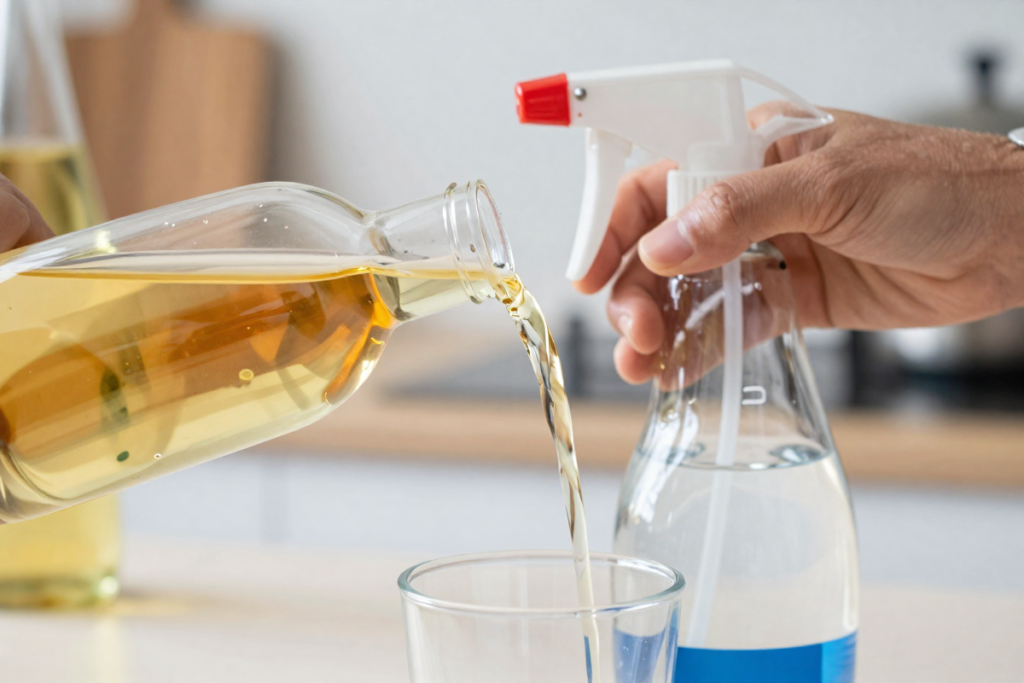
  • 2 cups distilled water
  • 2 tablespoons white vinegar
  • 2 tablespoons isopropyl alcohol

This milder mixture effectively cleans without risking damage to window film or factory tinting. Unlike ammonia, which can cause purpling or bubbling of tint film, this formula is gentle enough for regular use on tinted windows without any concerns about adhesive degradation.

Not interested in mixing these yourself? We completely understand—convenience matters, especially when you want guaranteed results without trial-and-error. Scroll down to the next section where we break down the top-rated ready-made alternatives that deliver consistent, professional results straight from the bottle with zero preparation time.

Best Commercial Car Window Cleaners

For those who want guaranteed results without the mixing, or when DIY solutions aren’t cutting through serious grime, these commercial car window cleaners represent the best options available today. Each has been chosen based on real-world performance, user reviews, and specific use cases for achieving that professional sparkle.

Best Overall Car Glass Cleaner: Invisible Glass Premium Glass Cleaner

[Recommendation 1 – Invisible Glass Premium]

Invisible Glass has earned its reputation as the gold standard for automotive glass cleaning. This ammonia-free formula delivers absolutely streak-free results even in challenging conditions like direct sunlight or high humidity, making it the best glass cleaner for cars in virtually any situation.

Key Benefits:

  • Professional-grade streak-free formula with rapid flash-off
  • No ammonia, making it completely safe for tinted windows
  • Repels water, dust, and fingerprints with hydrophobic properties
  • Available in aerosol and trigger spray formats
  • Creates crystal-clear clarity that rivals professional detailing

Who It’s For: Car enthusiasts who want the absolute best results, drivers with tinted windows, and anyone tired of fighting streaks with lesser products.

Why It Beats DIY: The proprietary formula contains advanced surfactants and solvents that DIY mixtures simply can’t replicate, making it significantly more effective on heavy buildup and delivering consistently perfect results without the trial-and-error of homemade solutions.

Best Budget Option: Stoner Glass Cleaner

[Recommendation 2 – Stoner Glass Cleaner]

Don’t let the affordable price fool you—Stoner delivers impressive performance that rivals products costing twice as much, making it an excellent best car window cleaner for budget-conscious drivers.

Key Benefits:

  • Exceptional value for money with professional results
  • Ammonia-free and tint-safe formulation
  • Effective on light to moderate grime and road film
  • Readily available at most auto parts stores
  • Fast-drying for quick streak-free finish

Who It’s For: Budget-conscious drivers, those new to car detailing, or anyone who cleans their windows frequently and goes through cleaner quickly.

Why It Beats DIY: While similarly priced to the cost of making your own cleaner when factoring in ingredient purchases, Stoner eliminates the mixing step and delivers more consistent results with less effort.

Best for Streak-Free Finish: Sprayway Glass Cleaner

[Recommendation 3 – Sprayway Glass Cleaner]

If streaks are your nemesis, Sprayway’s ammonia-based formula (for non-tinted windows) creates an incredibly clear, film-free finish that rivals professional detailing results with exceptional clarity.

Key Benefits:

  • Foaming action clings to vertical surfaces for better coverage
  • Cuts through heavy soil, grease, and nicotine film
  • Extremely fast-drying with high volatility
  • Leaves zero residue for perfect sparkle
  • Professional detailer favorite

Who It’s For: Drivers without tinted windows who want the clearest possible glass, those dealing with heavy nicotine film or greasy buildup from off-gassing, and perfectionists who notice every minor imperfection.

Why It Beats DIY: The foaming action provides better coverage and dwell time on vertical glass surfaces, while the commercial-grade solvents break down contaminants that homemade cleaners struggle with. Note: Contains ammonia—not suitable for tinted windows.

Best for Tinted Windows (Ammonia-Free): 303 Glass Cleaner and Repellent

[Recommendation 4 – 303 Glass Cleaner]

Specifically formulated as a tint-safe glass cleaning solution, 303 not only cleans beautifully but adds a protective repellent coating that keeps windows cleaner longer.

Key Benefits:

  • 100% ammonia-free and completely tint-safe
  • Adds a water-repellent hydrophobic coating
  • Reduces future buildup and road grime adhesion
  • UV protectants help preserve tint and prevent fading
  • Streak-free formula designed for automotive glass

Who It’s For: Anyone with window tinting (aftermarket or factory), drivers in rainy climates who want water-repelling properties, and those looking to extend time between cleanings.

Why It Beats DIY: The added repellent technology and UV protection go far beyond what any homemade cleaner can provide, actually reducing your cleaning frequency while protecting your tinting investment from degradation.

Best Multi-Surface Cleaner: Meguiar’s Perfect Clarity Glass Cleaner

[Recommendation 5 – Meguiar’s Perfect Clarity]

This versatile formula works equally well on automotive glass, interior mirrors, and even household windows, making it perfect for those who want one product for multiple purposes.

Key Benefits:

  • Works on all glass surfaces (automotive and household)
  • Ammonia-free formulation safe for all applications
  • Anti-fog properties for interior windshields
  • Professional detailer favorite with proven results
  • Leaves crystal-clear clarity with professional sparkle

Who It’s For: Multi-vehicle households, people who want one cleaner for both car and home, and those who value versatility without sacrificing performance.

Why It Beats DIY: The anti-fog properties are particularly valuable for interior windshields and bathroom mirrors, providing functionality that homemade cleaners simply can’t match while delivering consistent streak-free results.

Must-Have Tools for Cleaning Car Windows

Even the world’s best window cleaner—homemade or commercial—won’t deliver great results if you’re using the wrong tools. The towels, cloths, and applicators you choose make an enormous difference in achieving that streak-free, crystal-clear finish with professional sparkle. Understanding proper tool selection is crucial for lint-free, professional results.

Microfiber Cloths

Not all microfiber cloths are created equal. Quality matters enormously when it comes to achieving streak-free glass and avoiding the frustration of lint and residue.

What Makes Good Microfiber: Look for tightly woven, high-density microfiber (300+ GSM) with split fibers that trap dirt and absorb moisture rather than just pushing it around. The best microfiber cloth for cleaning car windows features superior absorbency and minimal lint shedding. Cheap microfiber cloths often leave lint and fail to absorb properly, essentially re-depositing dirt across your glass.

Recommended Options:

[Chemical Guys Professional Grade Microfiber Towels]

Chemical Guys Professional Grade Microfiber Towels offer the quality and absorbency needed for perfect glass cleaning with minimal lint.

[Meguiar’s Supreme Shine Microfiber Towels]

Meguiar’s Supreme Shine Microfiber Towels both offer the quality and absorbency needed for perfect glass cleaning. Keep dedicated glass-only microfiber cloths separate from those you use on painted surfaces to prevent cross-contamination of waxes or polishes.

Glass Cleaning Towels (Waffle Weave)

Waffle weave microfiber towels represent the next level in glass cleaning technology, and once you try them, you’ll never go back to standard cloths. These are truly the best glass cleaning towels for achieving professional results.

Why They Outperform Regular Cloths: The textured waffle pattern creates tiny pockets that trap moisture and contaminants more effectively than smooth microfiber through superior mechanical action. They’re also incredibly absorbent, reducing the number of towels you need to finish the job while preventing streaking. The waffle-weave texture provides better polishing action for that final sparkle.

Best Choice:

[Griots Garage Glass Waffle Weave Towel]

The Griots Garage Glass Waffle Weave Towel is purpose-built for automotive glass and consistently earns top marks from professional detailers for its combination of cleaning power and streak-free performance. The superior absorbency makes it ideal for the two-towel method.

Squeegees

While not necessary for every cleaning session, a quality squeegee can be invaluable for removing excess cleaner from large windshields and rear windows, especially during heavy-duty cleaning sessions.

When and Why to Use: Squeegees work best on exterior glass when you’ve applied generous amounts of cleaner or when dealing with particularly dirty windows requiring multiple passes. They remove the bulk of the cleaner and dissolved dirt, allowing your microfiber cloth to simply buff and polish rather than soak up large amounts of liquid. This fast water removal prevents streaking caused by cleaner drying too quickly.

Quality Matters:

[Unger ErgoTec Glass Cleaning Squeegee]

Look for squeegees with soft, flexible rubber blades that conform to curved automotive glass. The Unger ErgoTec Glass Cleaning Squeegee offers professional-grade performance in a compact size perfect for car windows.

Spray Bottles (for DIY Users)

If you’re making your own cleaners, investing in quality spray bottles makes the application process significantly easier and more effective, ensuring your homemade solutions perform like professional products.

Features to Look For: Choose bottles with adjustable nozzles (spray to stream), chemical-resistant construction that withstands alcohol and vinegar, and leak-proof caps. Continuous spray bottles that don’t require repetitive trigger pulling can reduce hand fatigue during larger cleaning projects. Chemical resistance is crucial for preventing degradation from isopropyl alcohol.

Durable Options:

[Harris Professional Spray Bottles]

[Tolco Empty Spray Bottles]

The Harris Professional Spray Bottles and Tolco Empty Spray Bottles both offer chemical-resistant construction that stands up to alcohol and vinegar-based solutions while providing reliable spray patterns for even application.

How to Clean Car Windows Properly (Step-by-Step Guide)

Having the right cleaner—whether your homemade mixture or one of the recommended commercial products—and quality tools is only half the battle. Proper technique transforms good products into exceptional results with that professional sparkle and streak-free clarity. Let’s walk through the professional detailer’s method for achieving crystal-clear windows.

Prep Your Tools and Products

Before you begin, gather everything you’ll need: your chosen cleaner (try the alcohol-based DIY recipe above or grab a bottle of Invisible Glass for guaranteed results), at least two quality microfiber cloths or waffle-weave towels (one for cleaning, one for buffing), and a spray bottle if you’ve made your own solution. Having everything within reach prevents interruptions that can cause your cleaner to dry prematurely.

Pro Tip: If you’re using a commercial product for the first time, test it on a small, inconspicuous area first—particularly important with tinted windows to ensure material compatibility.

Step-by-Step Process

1. Park in the Shade: Never clean car windows in direct sunlight. Heat causes cleaners to evaporate too quickly through premature flash-off, leaving streaks behind before you can wipe them away. This is one of the most common cleaning mistakes. Choose a shaded area or work during early morning or evening hours when temperatures are cooler.

2. Roll Down Windows Slightly: Lower each window about an inch so you can clean the top edge where dirt accumulates but is usually missed. This hidden area collects significant grime that can streak down your freshly cleaned glass.

3. Apply Cleaner Generously: Spray your cleaner liberally across the entire window surface. Don’t be stingy—adequate product is essential for loosening and dissolving contaminants without excessive scrubbing. For the DIY recipes mentioned earlier, shake well before each spray to ensure proper mixing.

4. Wipe Using Proper Technique: Using your first microfiber cloth, wipe the glass in straight lines—vertical strokes on the outside, horizontal strokes on the inside. This directional difference helps you identify which side any remaining streaks are on, making troubleshooting easier. This is called the cross-hatch pattern. Apply moderate pressure to remove stubborn spots without scratching.

5. Buff Dry Immediately: Using your second, completely dry microfiber cloth or waffle-weave towel, buff the glass using circular motions until completely dry and clear. This critical second pass (the two-towel method) is where streak-free perfection happens. The dry buff prevents water spots and removes any remaining residue before flash-off occurs.

6. Clean the Edges: Use a folded section of your cloth to clean along the window edges, weatherstripping, and corners where grime accumulates. These areas often harbor dirt that can streak onto your freshly cleaned glass. Raise windows back up and clean the top edge you exposed in step 2.

7. Check Your Work: Step back and look at the glass from different angles in good lighting. Any remaining streaks or spots will be immediately visible and can be buffed away with a clean section of your microfiber cloth. Check both interior and exterior surfaces for complete clarity.

8. Address Interior Film: For the inside of your windshield, which often develops a greasy film from plastic off-gassing (dashboard plasticizers), you may need a dedicated degreaser or a 50/50 mix of isopropyl alcohol and distilled water to “strip” the glass before your final polish. This oily residue is a common cause of streaking on interior glass.

Pro Tips for Streak-Free Results

The Two-Towel Method is Recommended: Always use one cloth for applying and removing cleaner, and a separate dry cloth for the final buff. Using the same cloth for both steps essentially spreads moisture around, making streaks inevitable through re-depositing dirt and preventing proper drying.

Quality Glass Towels Make the Difference: If you’re still getting streaks despite proper technique, your cloths are likely the culprit. Upgrade to dedicated glass cleaning microfiber or waffle-weave towels (like those mentioned earlier) and you’ll immediately notice improved results with better absorbency and lint-free performance.

Less is More with Product (But Not Too Little): While you should apply cleaner generously, over-saturation creates problems. If cleaner is dripping down the glass in rivers, you’ve used too much. This excess liquid pools in corners and seals, creating streaking issues and wasting product.

Clean Your Tools Regularly: Dirty microfiber cloths can’t clean effectively and will re-deposit contamination. Wash your glass cleaning cloths separately from other laundry using mild detergent and no fabric softener (which ruins the microfiber’s absorbency by coating the fibers). Air dry or tumble dry on low heat to preserve fiber structure.

Master the Reach Tool for Dashboard Angles: The bottom corners of your windshield where it meets the dashboard represent an ergonomic challenge. Consider a glass cleaning wand or reach tool to access these tight angles without contorting yourself.

Common Mistakes to Avoid

Even with quality products and good intentions, several common mistakes can sabotage your window cleaning efforts and prevent you from achieving that professional sparkle and streak-free clarity.

Cleaning in Direct Sunlight: We mentioned this earlier, but it bears repeating because it’s the most common cause of streaking. Sunlight and heat cause cleaner to dry through premature flash-off before you can wipe it away, essentially baking on streaks. The rapid evaporation doesn’t allow proper cleaning. Always work in shade or during cooler parts of the day.

Using Paper Towels: Paper towels might seem convenient, but they’re a low-quality option that leaves lint behind, doesn’t absorb effectively, and can actually scratch glass over time with repeated use due to wood-pulp fibers. They’re also wasteful compared to reusable microfiber cloths. Make the one-time investment in quality microfiber—your windows (and wallet) will thank you.

Using the Wrong Cleaner for Tinted Windows: Ammonia-based cleaners can damage, discolor, or cause bubbling and purpling in window tinting by degrading the adhesives and film. If your car has any tinted windows, stick with ammonia-free formulas like the tinted window-safe DIY recipe above or commercial products specifically labeled as tint-safe like 303 Glass Cleaner. This ensures material compatibility and prevents costly tint damage.

Using Low-Quality Tools: Cheap microfiber cloths from dollar stores often create more problems than they solve, leaving lint and streaks while barely absorbing moisture through poor fiber construction. Similarly, using old t-shirts or shop rags introduces oils and contaminants that streak glass and reduce clarity. Quality tools genuinely deliver better results—it’s not marketing hype.

Neglecting the Interior Glass: Many people focus exclusively on exterior windows while ignoring interior surfaces. Interior glass accumulates oils from off-gassing dashboard materials (plasticizers), fingerprints, and residue from air fresheners. This greasy film significantly reduces visibility, especially at night with oncoming headlights creating glare, and requires dedicated attention with proper degreasing.

Not Addressing Hard Water Spots Promptly: Hard water spots are mineral deposits (calcium and magnesium) that can eventually “etch” into the glass if not removed promptly. These alkaline deposits require acidic cleaners like vinegar for proper removal. Don’t let them sit—address them quickly.

Re-depositing Dirt with Contaminated Towels: If you use a single towel for the entire car, it quickly becomes saturated with grime and cleaning solution, essentially spreading a thin layer of “dirty water” across the glass. This re-depositing creates streaking and reduces clarity. Use the two-towel method and rotate towels frequently.

Many of these frustrating issues can be completely avoided by using a high-quality glass cleaner like Invisible Glass or Sprayway combined with proper microfiber towels like these waffle-weave options. The investment in quality products and tools quickly pays for itself in time saved and frustration eliminated.

Maintenance Tips for Crystal-Clear Windows

Keeping your car windows consistently clean requires less effort than you’d think—it’s all about establishing simple maintenance routines that prevent buildup and maintain that professional sparkle between deep cleaning sessions.

Weekly Quick Clean: Dedicate just five minutes each week to a quick wipe-down of all windows using your basic vinegar DIY cleaner for these maintenance sessions. This regular attention prevents buildup from accumulating to the point where heavy-duty cleaning becomes necessary. Alternatively, keep a bottle of Meguiar’s Perfect Clarity in your garage for grab-and-go convenience with streak-free results.

Monthly Deep Clean: Once a month, perform a thorough cleaning of all windows, inside and out, using your heavy-duty DIY formula or a commercial product like Invisible Glass. This monthly deep clean catches anything your weekly maintenance missed, addresses off-gassing film on interior surfaces, and keeps windows in optimal condition with crystal-clear clarity.

Keep Supplies in Your Car: Maintain a small cleaning kit in your vehicle with a travel-size bottle of glass cleaner and a microfiber cloth stored in a plastic bag. This allows you to quickly address bird droppings, bug splatter, or unexpected smudges before they bake onto the glass and become difficult to remove. A small bottle of Stoner Glass Cleaner and a quality microfiber cloth takes up minimal space but provides maximum convenience for on-the-go cleaning.

Address Issues Immediately: When you notice tree sap, tar, or bug residue, clean it as soon as possible. These outdoor contaminants become exponentially harder to remove after they’ve sat in the sun for days or weeks, sometimes requiring heavy-duty solvents or polishing compounds. Quick action prevents difficult cleaning sessions later and maintains your windows’ clarity.

Seasonal Attention: Adjust your cleaning frequency based on conditions. Winter road salt and summer bug season both require more frequent cleaning, while mild spring and fall weather may allow you to extend time between thorough cleanings. Winter windshield care often requires more aggressive approaches due to road grime and salt buildup.

Protect Your Investment: Consider applying a water-repellent treatment like 303 Glass Cleaner and Repellent which adds hydrophobic properties that cause water to bead and roll off, keeping your windows cleaner longer and improving visibility in rain.

Frequently Asked Questions (FAQ)

What’s the best homemade window cleaner for cars?

The best homemade car window cleaner recipe combines equal parts distilled water and isopropyl alcohol with a tablespoon of white vinegar. This alcohol-based formula provides rapid flash-off for streak-free results, while the vinegar breaks down mineral deposits and hard water spots. For heavy-duty cleaning, add 2 drops of dish soap for enhanced surfactant action.

How do I clean inside of car windshield without streaks?

To clean the inside of your car windshield without streaks, use the two-towel method with a quality microfiber cloth. First, address any greasy film from off-gassing by using a 50/50 mix of isopropyl alcohol and distilled water. Wipe horizontally with one cloth, then immediately buff dry with a second, bone-dry waffle-weave towel using circular motions. Working in shade prevents premature flash-off that causes streaking.

Can you use Windex on tinted car windows?

No, you should not use Windex on tinted car windows because most Windex formulations contain ammonia, which can damage window tinting by causing purpling, bubbling, or degrading the adhesives. Instead, use ammonia-free cleaners like the tinted window-safe DIY recipe (distilled water, vinegar, and alcohol) or commercial products specifically labeled as tint-safe to ensure material compatibility.

Why does my windshield get a film on the inside?

The greasy film on the inside of your windshield is caused by off-gassing—the release of plasticizers and other chemicals from your dashboard and interior plastics. This oily residue accumulates on the glass, especially in hot weather. It requires a dedicated degreaser or alcohol-based cleaner to properly remove, as standard glass cleaners often just smear this film around.

DIY vs Store-Bought: Which Lasts Longer on the Shelf?

Commercial glass cleaners typically have a shelf life of 2-3 years when stored properly, thanks to preservatives and stabilizers in their formulations. DIY cleaners made from vinegar and alcohol remain effective for several months when stored in a cool, dark place, though some separation may occur (just shake before using). The basic ingredient shelf life is excellent—vinegar and isopropyl alcohol both last indefinitely when stored properly in sealed containers.

Can I Use Household Glass Cleaner (Like Windex) in My Car?

While household glass cleaners work in a pinch, they’re not ideal for automotive use. Many contain ammonia that can damage window tinting and leave residue on plastics and rubber seals. They also tend to streak more on automotive glass because they’re formulated for vertical household windows rather than the varied angles of car glass. For best results, stick with automotive-specific products or the DIY formulas designed for car windows.

What’s the Best Cloth for Streak-Free Results?

High-quality waffle weave microfiber towels specifically designed for glass deliver the best streak-free results with superior absorbency and lint-free performance. These specialized towels outperform standard microfiber, paper towels (which are low-quality and leave lint), newspapers, and cotton cloths by a significant margin. The Griots Garage Glass Waffle Weave Towel mentioned earlier represents the gold standard, though any quality waffle weave microfiber designated for glass will dramatically improve your results.

Are Expensive Cleaners Actually Worth the Cost?

Premium glass cleaners like Invisible Glass and 303 Glass Cleaner justify their higher price through superior formulations that work faster, handle tougher grime, and deliver more consistent streak-free results than budget alternatives. That said, mid-range options like Stoner offer excellent value. The price difference becomes worthwhile when you’re dealing with challenging cleaning situations, have tinted windows requiring ammonia-free specialized products, or simply value your time and want guaranteed first-time results with professional sparkle. For basic maintenance between deep cleans, DIY solutions work beautifully and cost pennies.

How Often Should I Clean My Car Windows?

Exterior windows benefit from weekly light cleaning and monthly deep cleaning under normal conditions. Increase frequency during winter (road salt and grime) and summer (bugs and tree sap) or if you park under trees or drive frequently on dirt roads. Interior windows need less frequent attention—typically every 2-4 weeks unless you notice film buildup from off-gassing affecting visibility. Your windows will tell you when they need attention: if you’re getting glare from oncoming headlights at night or struggling with visibility in bright sunlight, it’s definitely time for a thorough cleaning.

How to remove hard water stains from car glass at home?

Hard water spots are mineral deposits (calcium and magnesium) left behind when water evaporates. Remove them using an acidic cleaner like white vinegar, which breaks down these alkaline deposits through decalcification. For stubborn hard water stains, apply undiluted vinegar, let it dwell for 2-3 minutes, then scrub with a microfiber cloth. In severe cases where minerals have etched into the glass, you may need a glass polishing compound or professional restoration.

Can I clean my car windows in the sun?

No, you should never clean car windows in direct sunlight. Heat causes cleaners to evaporate too quickly through premature flash-off, leaving streaks behind before you can wipe them away. This rapid evaporation is one of the most common cleaning mistakes. Always work in shade or during early morning or evening hours when temperatures are cooler to allow proper dwell time and prevent streaking.

How do I reach the bottom corners of my windshield?

The bottom corners where the windshield meets the dashboard present an ergonomic challenge due to tight dash-to-glass angles. Use a dedicated glass cleaning wand or reach tool (essentially a micro-mop on an extended handle) to access these areas without contorting yourself. Alternatively, try wrapping a microfiber cloth around a thin, flexible tool to extend your reach while maintaining proper cleaning pressure.

What do professional detailers use for glass?

Professional detailers typically use commercial-grade products like Invisible Glass, Sprayway, or Meguiar’s combined with high-quality waffle-weave microfiber towels and the two-towel method. They prioritize products with rapid flash-off, superior surfactants, and consistent performance. Many also use reach tools for ergonomic access and follow strict wiping patterns (vertical outside, horizontal inside) for diagnostic efficiency. The professional standards emphasize technique as much as product quality.

Conclusion
Achieving crystal-clear, streak-free car windows with professional sparkle isn’t complicated or expensive—it simply requires the right approach for your specific situation and needs. DIY car window cleaners offer an affordable, eco-friendly, and genuinely effective solution for regular maintenance and light cleaning. The recipes we’ve shared use simple ingredients you probably already have at home and deliver results that rival many commercial products for a fraction of the cost, proving that homemade solutions can provide professional-grade clarity.

At the same time, quality commercial glass cleaners earn their place in your detailing arsenal. When you’re facing heavy grime, nicotine film, stubborn road buildup, or challenging off-gassing residue, products like Invisible Glass, Sprayway, and 303 Glass Cleaner deliver professional-level results with minimal effort and maximum consistency. For drivers with tinted windows, ammonia-free commercial formulas provide the peace of mind that you’re protecting your investment while achieving perfect clarity and material compatibility.

The hybrid approach we’ve recommended throughout this guide—using DIY cleaners for weekly maintenance while keeping a quality commercial product on hand for deep cleaning and tough challenges—gives you the best of both worlds: cost-effectiveness for routine care and professional-grade power when you need it. This balanced strategy ensures you always have the right tool for the job, whether it’s a quick touch-up or a complete restoration.

Remember that products are only part of the equation. Proper technique, quality microfiber towels (especially waffle-weave options), understanding the two-towel method, and consistent maintenance routines matter just as much as which cleaner you choose. Avoiding common mistakes like cleaning in direct sunlight, using paper towels, or neglecting interior glass will dramatically improve your results regardless of your product choice.

Whether you decide to mix up a batch of the alcohol-based streak-free formula for cost-effective maintenance, grab a bottle of Invisible Glass for guaranteed professional results, invest in proper glass cleaning tools, or combine both approaches for optimal flexibility, you now have everything you need to keep your car windows sparkling year-round with that coveted crystal-clear clarity.

Ready to get started? Try one of the DIY recipes for your next weekly cleaning, or check out the recommended commercial products if you’re facing seriously dirty windows and want professional results right out of the bottle. Either way, you’re now equipped to achieve the crystal-clear visibility, streak-free finish, and beautiful professional sparkle that clean car windows provide—transforming both your driving safety and your vehicle’s appearance.

Disclaimer: This article contains affiliate links. If you purchase an item through the link I will earn a small commission at no extra cost to you.
Step-by-Step Guide: Restoring Faded Plastic Bumper Trim on Any Car

Introduction

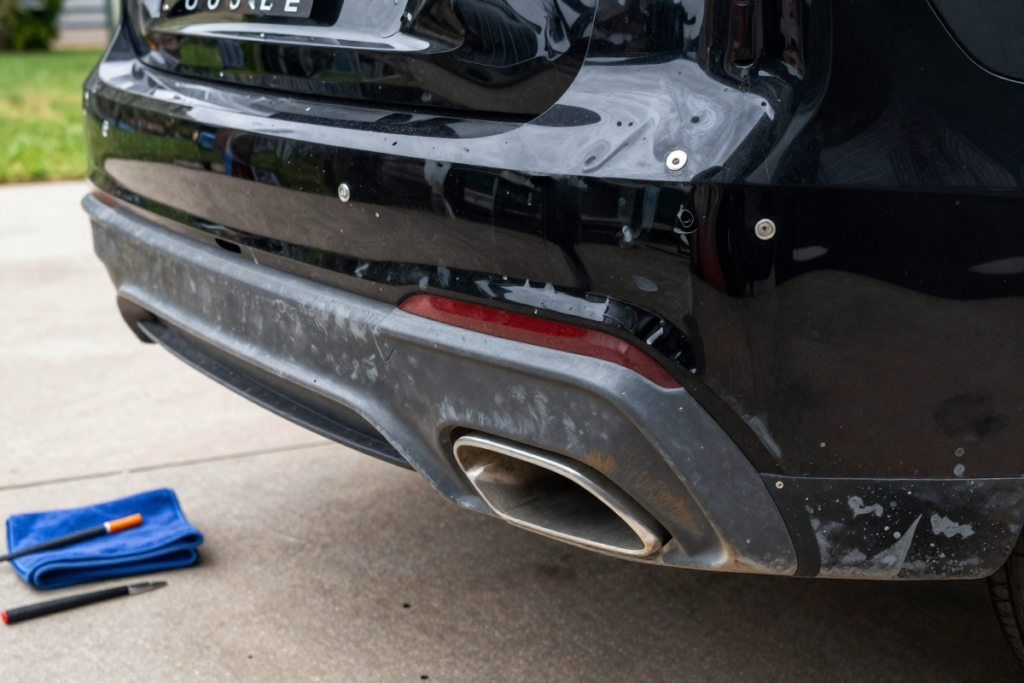
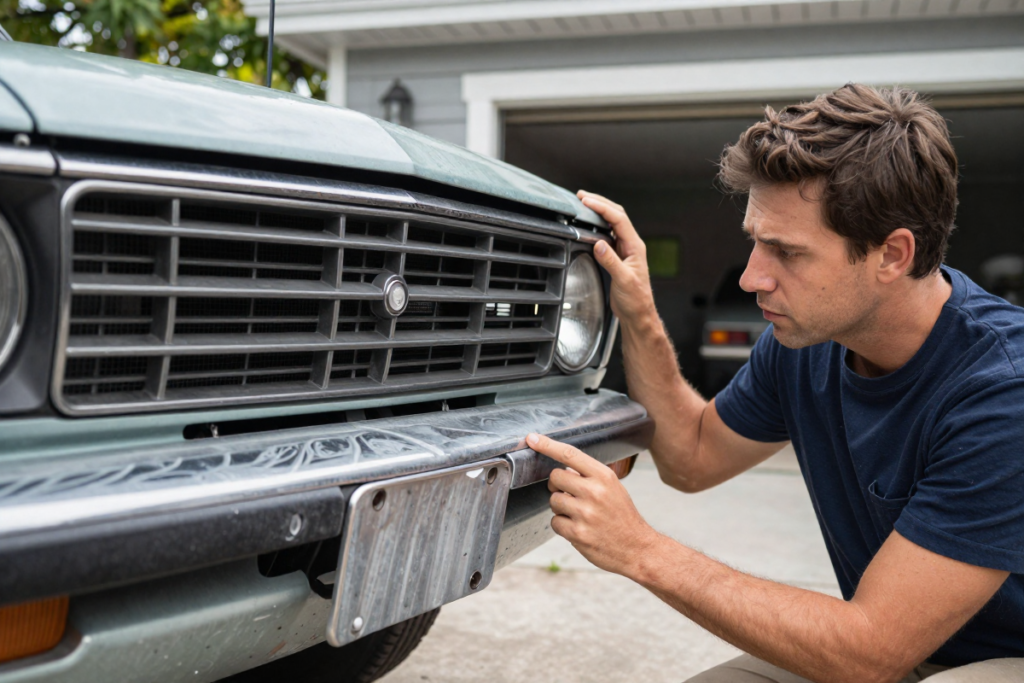
If you’ve ever taken a step back to admire your car only to notice the once-glossy black plastic bumper trim has faded to an unsightly gray, you’re not alone. Faded plastic trim instantly ages your vehicle’s appearance, making even a well-maintained car look worn and neglected.

This discoloration isn’t just cosmetic disappointment—it’s the result of UV exposure and oxidation breaking down the plastic’s molecular structure. Environmental contaminants like road salt, pollution, and harsh chemicals accelerate this degradation, while poor maintenance habits allow the damage to compound over time.

The good news? You can restore your faded plastic bumper trim to like-new condition in under an hour, and you don’t need professional detailing experience to do it.

This comprehensive guide is designed for everyone from DIY beginners tackling their first car care project to experienced enthusiasts looking for the most effective restoration methods. We’ll cover everything from temporary quick fixes to long-lasting solutions that can keep your trim looking fresh for years.

Whether you’re preparing your vehicle for resale, restoring an older car’s curb appeal, or simply maintaining your pride and joy, this step-by-step guide will walk you through the entire process—from understanding what causes the problem to choosing the right products and applying professional-grade techniques.


What Causes Plastic Trim to Fade?

Understanding why your black plastic bumper trim turns white and grey is the first step toward choosing the most effective restoration method. Several factors contribute to this common automotive issue:

UV Exposure and Oxidation

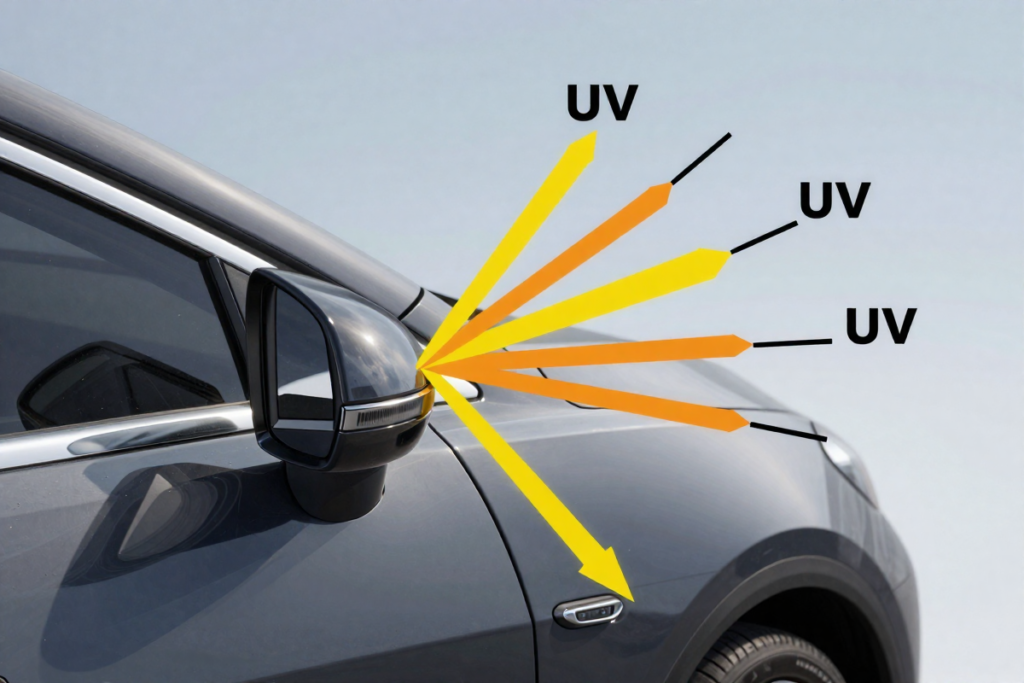
The primary culprit behind faded plastic trim is ultraviolet (UV) radiation from sunlight. UV rays penetrate the plastic’s surface, breaking down the chemical bonds in the polymer structure. This process, called oxidation, causes the plastic to lose its original color and develop a chalky, whitish appearance.

Most automotive bumper trim is made from polypropylene or thermoplastic olefin (TPO)—materials chosen for their durability and impact resistance. However, these plastics contain oils and pigments that gradually migrate to the surface and evaporate under constant sun exposure, leaving behind a degraded, faded surface.

Environmental Contaminants

Your car’s exterior plastic trim faces constant assault from:

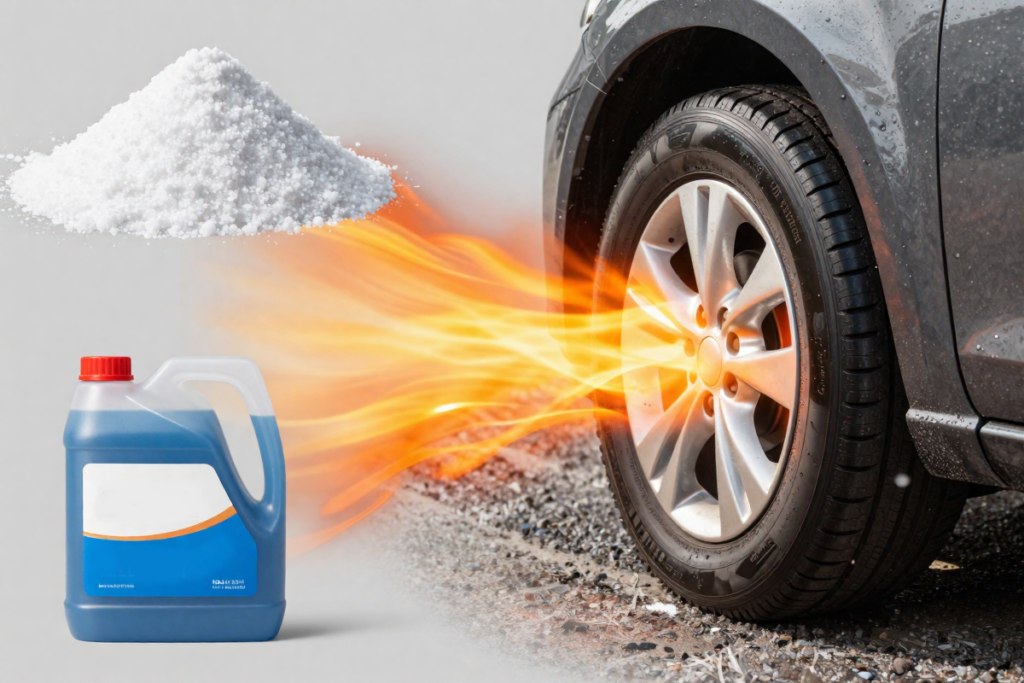
  • Road salt (especially in winter climates)
  • Industrial pollution and acid rain
  • Harsh cleaning chemicals and automatic car washes
  • Dirt, dust, and road grime that abrases the surface

These contaminants accelerate the oxidation process and can cause uneven fading patterns, particularly on lower bumper sections exposed to road splash.

Poor Maintenance Habits

Many car owners unknowingly contribute to trim degradation by:

  • Using silicone-based tire shine products on trim (which provide temporary results but accelerate long-term fading)
  • Neglecting to apply UV protectant after washing
  • Parking in direct sunlight without protection
  • Using abrasive cleaners that strip protective coatings

Coated vs. Uncoated Plastic Trim

Understanding your trim type matters for restoration success:

  • Factory-coated trim has a protective clear coat or paint layer that, once compromised, exposes bare plastic underneath
  • Uncoated (textured) trim shows oxidation more readily but responds better to most restoration methods
  • Pre-colored plastic has pigment mixed throughout the material and is generally more forgiving to restore

Knowing which type you’re working with will help you select the appropriate restoration technique and set realistic expectations for results.


Tools & Materials You’ll Need

Choosing the right products and tools makes the difference between a restoration that lasts weeks versus one that lasts years. Here’s everything you’ll need, organized by budget tier:

Basic DIY Kit (Budget-Friendly)

Cleaning Supplies:

Estimated Cost: $15-25

Restoration Products

Trim Restorer Options (choose one):

Product TierExample ProductsDurabilityPrice Range
BudgetMeguiar’s Ultimate Black, Mothers Back-to-Black2-6 weeks$8-12
Mid-RangeSolution Finish Trim Restorer, CarGuys Plastic Restorer3-6 months$15-25
PremiumCerakote Trim Coat, Chemical Guys VRP1-2+ years$20-40

Application Tools:

Advanced Method Tools

Heat Gun Method:

Dyeing/Coating Method:

  • Plastic trim dye (like Forever Black or SEM Trim Black)
  • Degreaser and surface prep cleaner
  • Spray application equipment or aerosol cans
  • Fine-grit sandpaper (600-800 grit) if needed

Protection Products

Long-term success requires sealing your restoration work:

Complete Professional Kit: $60-120


Preparation: Cleaning the Trim Properly

Why proper preparation is critical: No restoration product—regardless of price—will perform well on dirty, contaminated plastic. Proper cleaning ensures maximum product absorption and adhesion, directly impacting how long your results last.

Step-by-Step Cleaning Process

Step 1: Initial Rinse

  • Park your car in a shaded area (never work in direct sunlight)
  • Rinse the trim thoroughly with water to remove loose dirt and debris
  • This prevents scratching the plastic during scrubbing

Step 2: Apply Cleaning Solution

  • Spray your chosen cleaner liberally on all trim surfaces
  • Let it dwell for 30-60 seconds to break down contaminants
  • For heavily soiled trim, apply a second coat

Step 3: Agitate with Brush

  • Using your soft-bristle brush, scrub the trim in circular motions
  • Pay special attention to textured areas where grime hides
  • Work in small sections (one panel at a time)
  • You should see dirty residue lifting from the surface

Step 4: Rinse Thoroughly

  • Rinse each section completely before moving to the next
  • Ensure no soap residue remains (it will interfere with restoration products)
  • Use a clean microfiber towel to dry the trim

Step 5: Final Degreasing

  • Dampen a clean microfiber towel with isopropyl alcohol
  • Wipe down all trim surfaces to remove any remaining oils, wax, or silicone
  • Allow to air dry for 5 minutes

Pro Tip: The Silicone Problem

Avoid silicone-based dressings before restoration! Products like tire shine contain silicone that creates a slippery coating. If you’ve recently used these products, you’ll need to thoroughly degrease with isopropyl alcohol or a dedicated silicone remover. Restoration products cannot penetrate or bond to silicone-contaminated surfaces, resulting in blotchy, short-lived results.

Test for silicone contamination: Spray water on the cleaned trim. If water beads up instead of spreading evenly, silicone is still present—clean again.


Method 1: Using a Plastic Trim Restorer (Most Recommended)

For most DIYers, chemical trim restorers offer the best balance of ease, effectiveness, and durability. This method works by penetrating the oxidized plastic surface and depositing oils, polymers, or pigments that restore the original dark color.

Step-by-Step Instructions

Step 1: Prepare Your Work Area

  • Ensure trim is completely clean and dry (see preparation section)
  • Protect adjacent painted surfaces with masking tape if desired
  • Have multiple clean microfiber towels ready

Step 2: Apply Product to Applicator

  • Shake the restorer bottle well before use
  • Apply a moderate amount to your foam applicator pad
  • Start with less product—you can always add more

Step 3: Work Into Trim Evenly

  • Using moderate pressure, work the product into the plastic in overlapping straight lines
  • For textured trim, use circular motions to ensure penetration
  • Cover all faded areas systematically, panel by panel
  • You should see immediate color transformation as you work

Step 4: Allow Absorption Time

  • Let the product sit for the manufacturer’s recommended time (typically 5-15 minutes)
  • During this period, the active ingredients penetrate the plastic’s porous surface
  • Avoid touching or disturbing the treated areas

Step 5: Buff Off Excess

  • Using a clean, dry microfiber towel, gently buff away any excess product
  • Use light pressure—you’re removing surface excess, not the absorbed treatment
  • For best results, allow the product to cure for 1-2 hours before exposing to water

Step 6: Apply Second Coat (Optional)

  • For severely faded trim, a second application after the first has cured often produces superior results
  • Some premium products specifically recommend two thin coats

Results Timeline

  • Immediate: Color restoration visible within seconds of application
  • 24 hours: Full cure and maximum color depth achieved
  • Durability: 2 weeks to 12+ months depending on product quality and protection

Pros of Chemical Restorers

✅ Beginner-friendly – requires no special skills or equipment
✅ Immediate visual improvement – see results as you apply
✅ No risk of damage – unlike heat guns, improper application won’t harm plastic
✅ Works on textured and smooth surfaces
✅ Reversible – can be removed or reapplied as needed

Cons of Chemical Restorers

❌ Requires reapplication – temporary solution without additional protection
❌ Quality varies significantly – budget products may last only 2-3 weeks
❌ Can attract dust if over-applied
❌ Some products leave greasy residue that transfers to clothing

Recommended Products for Different Needs

Best for Beginners:
Meguiar’s Ultimate Black Plastic Restorer – affordable, forgiving, widely available

Best Value:
Solution Finish Trim Restorer – excellent durability-to-price ratio, 3-6 month results

Best Long-Term:
Cerakote Trim Coat – ceramic-based formula offering 1-2+ years of protection

Best for Quick Touch-Ups:
CarGuys Plastic Restorer – spray-and-wipe application, good for regular maintenance


Method 2: Heat Gun Restoration (Advanced Technique)

The heat gun method has gained popularity thanks to dramatic before-and-after results shared online. This technique works by reheating oils within the plastic that have migrated to the surface, causing them to redistribute and temporarily restore the original dark color.

How It Works: The Science

Automotive plastics like polypropylene contain plasticizers and oils that provide flexibility and color. UV exposure causes these compounds to migrate to the surface where they evaporate. Carefully applied heat temporarily reverses this process by:

  1. Liquefying remaining subsurface oils
  2. Drawing them back to the surface
  3. Re-saturating the oxidized outer layer

Important: This provides a cosmetic restoration but doesn’t replace lost material—protection is essential afterward.

Step-by-Step Heat Gun Process

Step 1: Safety Preparation

  • Work in a well-ventilated area
  • Wear heat-resistant gloves
  • Clear flammable materials from your work zone
  • Keep a fire extinguisher nearby (serious precaution for serious heat)

Step 2: Heat Gun Settings

  • Set temperature to LOW (around 500-700°F to start)
  • Use the lowest effective setting—you can always increase
  • Attach a concentrator nozzle if available for focused heat

Step 3: Maintain Proper Distance

  • Hold heat gun 4-6 inches from plastic surface
  • Too close = melting and permanent damage
  • Too far = insufficient heat for restoration

Step 4: Even Application

  • Keep the heat gun moving constantly in slow, sweeping motions
  • Never hold it stationary on one spot
  • Work in 6-12 inch sections at a time
  • You’ll see the plastic darken as oils resurface—this is your visual cue

Step 5: Monitor the Surface

  • Watch for color change (gray to black)
  • If you see glossing, rippling, or surface distortion, immediately pull back
  • The plastic should darken without changing texture

Step 6: Allow Cooling

  • Let each section cool for 30-60 seconds before touching
  • The restoration effect continues slightly as it cools
  • Don’t rush to the next section—patience prevents mistakes

Step 7: Inspect and Touch Up

  • Check for missed spots or uneven results
  • Make additional passes only after complete cooling
  • Light, repeated passes are safer than one aggressive application

Pros of Heat Gun Method

✅ Dramatic, immediate results – the transformation is often stunning
✅ No chemicals required – works with the plastic’s existing oils
✅ Cost-effective if you already own a heat gun
✅ Works on severely faded trim that chemicals alone can’t fix
✅ Satisfying DIY experience with visible real-time results

Cons of Heat Gun Method

❌ Risk of permanent damage – melted or warped plastic cannot be fixed
❌ Not permanent – results last only 2-4 weeks without sealant
❌ Requires skill and practice – best to test on inconspicuous areas first
❌ Uneven results possible – inconsistent heat application creates blotchy appearance
❌ Doesn’t work on all plastic types – some modern TPO blends don’t respond well
❌ Time-intensive – much slower than chemical restorers for whole-vehicle applications

Safety Warnings

⚠️ Never heat plastic on hot days or in direct sun – ambient heat adds to heat gun temperature
⚠️ Avoid heating near fuel filler doors or vents – potential fire hazard
⚠️ Don’t heat painted surfaces – you’ll damage the clear coat
⚠️ Be extremely careful with thin plastic sections – they melt faster
⚠️ Will a heat gun damage plastic bumper trim during restoration? Yes, if used incorrectly. Always start with low heat and maintain constant motion.

Best Heat Gun for Trim Restoration

Wagner HT1000 Heat Gun – dual temperature settings (750°F/1000°F), affordable, widely available


Method 3: Dyeing or Re-Coating Trim (Long-Term Fix)

When chemical restorers and heat guns aren’t enough—or you want a truly permanent solution—plastic trim dye or coating is your answer. This method essentially repaints the plastic with a specialized, flexible coating designed specifically for automotive exterior use.

When to Use This Method

This approach is ideal for:

  • Severely faded or completely gray trim that’s beyond simple restoration
  • Older vehicles where you want multi-year results
  • Show cars or resale preparation requiring perfect appearance
  • Trim that’s been repeatedly restored and no longer responds to other methods
  • Situations where you want paint vs dye for plastic trim as a permanent solution

Understanding Your Options

Trim Dyes:

Trim Coatings/Paints:

  • Sit on top of the plastic as a protective layer
  • More durable than dyes against abrasion
  • Ceramic-based options offer extreme longevity
  • Examples: SEM Trim Black, Cerakote Trim Coat

Process Overview

Step 1: Deep Clean and Degrease

  • Clean as described in the preparation section
  • Use plastic cleaner/prep spray specifically designed for adhesion
  • Remove all wax, silicone, oils, and contaminants
  • This step is absolutely critical—coating adhesion depends on it

Step 2: Light Surface Scuffing (if needed)

  • For extremely smooth or glossy plastic, lightly scuff with 600-800 grit sandpaper
  • This creates a mechanical bond for better adhesion
  • Sand gently in one direction, don’t create deep scratches
  • Wipe with tack cloth to remove sanding dust
  • Skip this step for textured trim

Step 3: Masking and Protection

  • Thoroughly mask all painted surfaces, glass, and rubber seals
  • Use quality automotive masking tape and plastic sheeting
  • Be generous—overspray travels farther than you think
  • Cover wheels and wheel wells if spraying lower bumpers

Step 4: Apply First Coat

  • Shake aerosol can for 2 full minutes (or prepare spray gun per instructions)
  • Hold can/gun 6-8 inches from surface
  • Apply thin, even coats with 50% overlap
  • Multiple thin coats always beat one heavy coat
  • Keep the can/gun moving—don’t dwell in one spot

Step 5: Allow Flash Time

  • Let first coat dry per manufacturer specs (typically 5-15 minutes)
  • Surface should be dry to touch but not fully cured
  • This allows chemical bonding between coats

Step 6: Additional Coats

  • Apply 2-4 total coats depending on coverage needed
  • Severely faded trim may require more coats for complete opacity
  • Each coat should improve uniformity and depth of color

Step 7: Cure Properly

  • Allow full cure time before touching (usually 1 hour)
  • Avoid water exposure for 24-48 hours for full hardness
  • Some products cure faster with heat—check instructions
  • Park in garage or covered area during cure period

Pros of Dyeing/Coating

✅ Longest-lasting solution – can provide 1-3+ years of results
✅ Completely uniform appearance – covers all imperfections
✅ High-quality finish resembles factory-fresh trim
✅ Chemical and UV resistant – especially ceramic-based coatings
✅ Cost-effective over time – no repeated product purchases

Cons of Dyeing/Coating

❌ Most time-intensive method – requires extensive prep and cure time
❌ Higher upfront cost – products and materials are more expensive
❌ Requires more skill – poor application shows immediately
❌ Difficult to remove if you’re unhappy with results
❌ Masking is tedious but essential for professional appearance

Recommended Products

Best Aerosol Dye:
Forever Black Bumper & Trim Dye – penetrating formula, flexible finish

Best Ceramic Coating:
Cerakote Trim Coat Kit – professional-grade durability, 2+ year results

Best Professional Spray:
SEM Trim Black (aerosol or spray gun) – OEM-quality refinishing product

Best Surface Prep:

SEM 38353 Plastic Prep Spray – ensures maximum coating adhesion


Sealing & Protecting the Restored Trim

Regardless of which restoration method you choose, proper sealing is the difference between results that last weeks versus years. UV protection prevents the oxidation process from immediately restarting, dramatically extending your work.

Why Protection Matters

Think of restoration as surgery and protection as medication. You’ve healed the damaged plastic, but without ongoing UV defense, the same environmental factors will quickly degrade it again. Protection products:

  • Block harmful UV radiation from penetrating the plastic
  • Repel water, dirt, and contaminants
  • Prevent oils from evaporating out of the plastic
  • Create a sacrificial barrier that wears away instead of the trim

Protection Product Types Explained

Trim Dressings:

  • What they are: Lightweight oils or polymers that sit on the surface
  • Protection level: Low to moderate (2-4 weeks)
  • Appearance: Glossy to satin finish
  • Best for: Regular maintenance touch-ups between major restorations
  • Application: Spray or wipe-on, quick and easy
  • Example: Chemical Guys VRP

Trim Sealants:

  • What they are: Polymer-based products that bond to plastic
  • Protection level: Moderate to good (2-6 months)
  • Appearance: Natural matte to semi-gloss
  • Best for: Most DIY applications and regular drivers
  • Application: Requires clean surface, light buffing
  • Example: Wolfgang Exterior Trim Sealant

Ceramic Coatings for Plastic:

  • What they are: Silicon dioxide (SiO2) or silicon carbide (SiC) nanocoatings
  • Protection level: Excellent (1-2+ years)
  • Appearance: Deep, natural finish matching factory trim
  • Best for: Long-term protection, show cars, enthusiasts
  • Application: More complex, requires proper prep and curing
  • Example: Gtechniq C4 Permanent Trim Restorer

Comparison Table

Product TypeDurabilityUV ProtectionEase of ApplicationPriceBest Use Case
Dressings2-4 weeksModerateVery Easy$Quick touch-ups
Sealants2-6 monthsGoodEasy$$Regular maintenance
Ceramic Coatings1-2+ yearsExcellentModerate$$$Maximum longevity

Step-by-Step Protection Process

Step 1: Timing is Everything

  • Apply protection after your restoration method has fully cured
  • For chemical restorers: wait 2-4 hours
  • For heat gun method: wait 30 minutes for cooling
  • For dyes/coatings: wait 24-48 hours for complete cure

Step 2: Final Surface Check

  • Ensure restored trim is clean and free of dust
  • If any contaminants settled during cure time, wipe gently with clean microfiber
  • Verify no excess restoration product remains on the surface

Step 3: Apply Protective Layer

  • Follow your chosen product’s specific instructions
  • For spray products: 6-8 inch distance, even coverage
  • For wipe-on products: use applicator pad, work in small sections
  • Apply thin, uniform coats—excess doesn’t add protection

Step 4: Allow Curing Time

  • Dressings: 10-15 minutes before buffing
  • Sealants: 30-60 minutes before exposure
  • Ceramic coatings: 1-12 hours depending on formulation
  • Keep vehicle dry during cure period

Step 5: Buff to Desired Finish

  • Some products require buffing for even appearance
  • Use clean microfiber towel with light pressure
  • Remove any high spots or streaks
  • Achieve uniform sheen across all trim pieces

Maintenance Schedule

To maintain your restored trim:

Weekly:

  • Rinse trim during regular car washing
  • Avoid direct pressure washer spray on trim
  • Pat dry with microfiber

Monthly:

  • Inspect for any fading or protection breakdown
  • Touch up small areas as needed
  • Remove any accumulated wax from painted surfaces onto trim

Every 2-3 Months:

  • Reapply dressing or sealant-type protection
  • Clean trim thoroughly before reapplication
  • Check for any damage needing full restoration

Annually:

  • Deep clean and assess overall trim condition
  • Consider full restoration cycle if significant fading returns
  • Reapply ceramic coating if that’s your chosen protection method

Common Mistakes to Avoid

Learning from others’ errors saves time, money, and frustration. Here are the most frequent mistakes that undermine trim restoration results:

1. Skipping or Rushing the Cleaning/Prep Stage

The Mistake: Applying restorer or protection to dirty, contaminated trim
Why It Fails: Products can’t penetrate or bond to surfaces coated with dirt, wax, or silicone
The Result: Blotchy, streaky appearance and dramatically reduced durability
The Fix: Always deep clean and degrease. The 20 minutes invested in prep determines whether your work lasts 2 weeks or 2 years.

2. Using Tire Shine Instead of Trim Restorer

The Mistake: Grabbing tire shine for bumper trim because “it’s all black plastic”
Why It Fails: Tire shine is formulated for rubber, contains heavy silicones, and sits on the surface rather than restoring
The Result: Slippery, greasy trim that attracts dirt and fades within days
The Fix: Use products specifically designed for automotive plastic trim restoration—the chemical formulations are completely different.

3. Applying Too Much Product

The Mistake: “More is better” mentality with chemical restorers
Why It Fails: Excess product can’t absorb, creates sticky residue, and attracts dirt
The Result: Streaky appearance, dust accumulation, potential transfer to clothing
The Fix: Start with less than you think you need. Multiple thin applications beat one heavy coat every time.

4. Not Sealing After Restoration

The Mistake: Stopping after the restoration step without UV protection
Why It Fails: Restored trim immediately begins oxidizing again without protection
The Result: Fading returns within 2-4 weeks even with quality restorers
The Fix: Always finish with appropriate sealant or ceramic coating—it’s not optional for lasting results.

5. Overheating Plastic with Heat Gun

The Mistake: Using high temperature or holding the heat gun too close/stationary
Why It Fails: Plastic reaches melting point, warps, or develops permanent glossy spots
The Result: Irreversible damage requiring expensive trim replacement
The Fix: Start with low heat (500-700°F), maintain 4-6 inches distance, keep constantly moving.

6. Working in Direct Sunlight

The Mistake: Performing restoration in hot sun or on sun-baked trim
Why It Fails: Products cure too quickly, don’t penetrate properly, or evaporate before bonding
The Result: Poor absorption, uneven finish, reduced effectiveness
The Fix: Always work in shade or garage. If trim is hot to touch, cool it with water spray and dry before starting.

7. Expecting One Method to Fix All Fading

The Mistake: Using the same approach on lightly faded and severely oxidized trim
Why It Fails: Different damage levels require different restoration intensity
The Result: Disappointing results, wasted products
The Fix: Assess each vehicle individually. Mild fading might need only restorer + sealant, while severe cases may require heat gun or dyeing.

8. Neglecting Textured Trim Details

The Mistake: Only wiping restorer across textured bumper surfaces
Why It Fails: Product doesn’t reach into recessed texture valleys
The Result: Light gray remaining in texture while raised surfaces darken
The Fix: Use circular scrubbing motions with applicator pad to work product into all texture depths.

9. Not Testing Products First

The Mistake: Applying new product to entire vehicle without testing
Why It Fails: Different products work better on different plastics; some create unwanted gloss levels
The Result: Potentially unhappy with finish on entire car
The Fix: Test on small, inconspicuous area first—lower rear bumper corner is ideal.

10. Ignoring Manufacturer Cure Times

The Mistake: Driving through rain or washing car before product fully cures
Why It Fails: Uncured products wash away or bond incompletely
The Result: Streaky, failed restoration requiring complete redo
The Fix: Read instructions! Respect listed cure times before water exposure.


How Long Does Trim Restoration Last?

One of the most common questions: “How long does plastic bumper trim restoration last?” The answer depends entirely on your chosen method, product quality, environmental factors, and maintenance routine.

Longevity Breakdown by Method

Basic Chemical Restorers (Budget Products)

  • Expected Duration: 2-6 weeks
  • Products: Meguiar’s Ultimate Black, Mothers Back-to-Black (standard formula)
  • Factors: Washes away gradually, UV exposure shortens lifespan
  • Best For: Those planning frequent reapplication as part of regular maintenance

Premium Chemical Restorers

  • Expected Duration: 3-12 months
  • Products: Solution Finish, CarGuys, Torque Detail
  • Factors: Better UV inhibitors and bonding agents
  • Best For: Quarterly maintenance schedule

Heat Gun Restoration (Unsealed)

  • Expected Duration: 2-4 weeks
  • Why So Short: You’ve only redistributed existing oils, not added protection
  • Critical Note: MUST be sealed with protectant for acceptable longevity
  • Best For: Combined approach—heat gun for restoration, then seal with ceramic coating

Heat Gun + Ceramic Coating

  • Expected Duration: 12-18 months
  • The Combination Advantage: Heat gun maximizes color restoration, ceramic provides UV barrier
  • Best For: Maximum results for minimum ongoing maintenance

Trim Dyes

  • Expected Duration: 6-18 months
  • Products: Forever Black, professional-grade dyes
  • Factors: Penetrating formulas resist washing but still oxidize over time
  • Best For: Those wanting semi-permanent solution without coating

Ceramic Coatings

  • Expected Duration: 1-2+ years
  • Products: Cerakote Trim Coat, Gtechniq C4, CarPro DLUX
  • Factors: True nanocoating creates physical UV barrier
  • Best For: Enthusiasts, show cars, anyone wanting maximum longevity

Professional Coating + Maintenance

  • Expected Duration: 2-3+ years
  • The Gold Standard: Professional-grade ceramic application with quarterly maintenance
  • Best For: High-end vehicles, those maximizing resale value

Comparison Chart: Method Longevity

Restoration MethodWithout ProtectionWith UV SealantWith Ceramic Coating
Basic Restorer2-4 weeks6-12 weeksN/A (redundant)
Premium Restorer6-12 weeks3-6 months6-12 months
Heat Gun2-3 weeks2-4 months12-18 months
Trim Dye6-12 months12-18 months18-24+ months
Ceramic CoatingN/A (is the protection)N/A12-24+ months

Factors Affecting Longevity

Climate Impact:

  • Intense Sun Regions (Southwest US, Florida): Reduce expected lifespan by 25-40%
  • Moderate Climates: Expect average stated durations
  • Garage-Kept Vehicles: Extend lifespan by 50-100%

Washing Habits:

  • Frequent automatic car washes: Reduce longevity significantly (harsh chemicals and brushes)
  • Hand washing with pH-neutral soap: Minimal impact
  • Touchless washes: Moderate impact
  • Pressure washing trim directly: Accelerates product removal

Driving Conditions:

  • Highway miles: More bug impacts and road debris
  • Off-road/dirt roads: Abrasive dust accelerates wear
  • City driving: Less environmental exposure
  • Winter road salt: Highly corrosive, dramatically shortens protection lifespan

Product Quality Truth:
You absolutely get what you pay for in trim restoration products. A $40 ceramic coating that lasts 2 years costs less per month than a $10 restorer requiring monthly reapplication:

  • Budget product: $10 × 12 months = $120/year
  • Premium ceramic: $40 ÷ 24 months = $1.67/month

Maintenance Tips for Long-Lasting Results

Extending your restoration beyond initial expectations requires strategic ongoing care. These maintenance practices help you protect plastic trim from fading again:

Weekly Washing Routine

Do:

  • Rinse trim first to remove abrasive dirt
  • Use pH-neutral car wash soap
  • Gently hand-wash trim with soft microfiber wash mitt
  • Rinse thoroughly to prevent soap residue buildup
  • Pat dry with dedicated trim towel

Don’t:

  • Blast trim directly with high-pressure washer
  • Use household cleaners or dish soap (too harsh)
  • Scrub aggressively with brushes
  • Let wash soap dry on the surface

Protection Reapplication Schedule

Every 2-3 Months (or After 8-10 Washes):

  • Inspect trim for signs of fading or protection breakdown
  • Clean thoroughly with trim cleaner
  • Reapply your chosen protectant (dressing, sealant, or ceramic booster)
  • This preventive maintenance stops oxidation before it becomes visible

Seasonal Deep Maintenance:

  • Spring: Deep clean to remove winter salt and grime; assess for damage
  • Summer: Check UV protection integrity; reapply as needed
  • Fall: Prepare for winter with fresh protective layer
  • Winter: Monthly inspection for salt damage; rinse frequently

Product Selection for Maintenance

Avoid These Harmful Products:

  • All-purpose cleaners containing solvents
  • Bleach-based tire cleaners
  • Petroleum-based products not formulated for automotive plastic
  • Household oils (olive oil, cooking spray, WD-40) – despite internet myths, these cause more harm than good

Use Trim-Safe Products:

  • Dedicated plastic trim cleaners
  • pH-neutral automotive soap
  • Isopropyl alcohol for spot degreasing
  • Products specifically labeled for automotive exterior plastic

UV Protection Strategies

Parking Habits:

  • Garage parking is the single most effective protection strategy
  • Covered parking dramatically extends restoration lifespan
  • Shade parking helps but doesn’t block all UV
  • Car covers work if used consistently, but can trap moisture
  • Avoid consistent direct sun exposure whenever possible

Additional UV Barriers:

  • Apply UV protectant spray every 2-3 months
  • Consider window tinting to reduce interior UV (also protects interior plastic)
  • For rarely driven show cars, apply heavier protective coatings

Touch-Up Strategy

Don’t wait for complete failure! The moment you notice slight fading beginning:

  1. Clean the affected area thoroughly
  2. Apply a maintenance coat of your original restorer
  3. Seal immediately with protectant
  4. Address early = minimal product needed

Waiting until trim is severely faded again requires complete restoration restart.

Winter-Specific Maintenance

Road Salt is Trim’s Enemy:

  • Rinse undercarriage and lower trim weekly during salt season
  • Consider applying extra protective layer before winter
  • Use touchless car washes more frequently
  • Hand-rinse wheel wells where salt accumulates

Cold Weather Application Notes:

  • Most restoration products require 50°F+ for proper bonding
  • Warm garage application is essential in winter
  • Allow extra cure time in cold conditions

Post-Restoration Care Timeline

First 24 Hours:

  • No water exposure
  • No touching or leaning against trim
  • Park in protected area
  • Allow complete cure

First Week:

  • Gentle washing only if necessary
  • No automated car washes
  • No waxing near trim (prevent contamination)

First Month:

  • Monitor for any issues or uneven areas
  • Touch up as needed
  • Begin regular maintenance schedule

Before & After Results: What to Expect

Understanding realistic expectations helps you gauge success and choose the appropriate method for your situation.

Typical Transformation Levels

Lightly Faded Trim (Minor Oxidation):

  • Starting Condition: Slightly grayed, chalky feel when touched
  • Best Method: Premium chemical restorer + sealant
  • Expected Result: 90-95% restoration to original appearance
  • Timeframe: 30 minutes total
  • Longevity: 6-12 months with protection

Moderately Faded Trim (Noticeable Discoloration):

  • Starting Condition: Obviously gray/white, especially on horizontal surfaces
  • Best Method: Heat gun restoration OR premium restorer + ceramic coating
  • Expected Result: 85-90% restoration
  • Timeframe: 1-2 hours
  • Longevity: 12-18 months with ceramic coating

Severely Faded Trim (Complete Oxidation):

  • Starting Condition: Uniform light gray or white, textured surface nearly smooth from degradation
  • Best Method: Trim dye or ceramic coating system
  • Expected Result: 80-85% restoration (some deep texture loss may be permanent)
  • Timeframe: 2-4 hours with proper prep
  • Longevity: 18-24+ months

Setting Realistic Expectations

You CAN Achieve:

  • Dramatic color restoration from gray to rich black
  • Smooth, uniform finish across all trim pieces
  • Results that look factory-fresh from 5+ feet away
  • Long-lasting protection with proper maintenance
  • Significant improvement in overall vehicle appearance

You CANNOT Achieve:

  • Restoration of physically damaged plastic (cracks, chips, deep gouges)
  • Permanent results without ongoing UV protection
  • Identical results to brand-new trim on 15+ year old severely degraded plastic
  • Texture restoration on plastic where surface has been worn completely smooth

Documentation Tips

Before You Start:

  • Take clear photos in consistent lighting
  • Shoot from multiple angles (straight-on, 45-degree, close-ups)
  • Include reference points (full car view showing all trim)
  • Note time of day (for consistent comparison lighting)

After Restoration:

  • Photograph in same location and lighting
  • Same angles as before shots
  • Close-ups showing texture and color depth
  • Full vehicle view to appreciate overall impact

Why Document:

  • Track which products/methods work best for your vehicle
  • Motivating to see dramatic improvement
  • Helpful for scheduling future maintenance
  • Great for sharing results or seeking advice in detailing communities

Real-World Results by Vehicle Age

Vehicles 0-3 Years Old:

  • Minimal restoration needed, mostly preventive protection
  • Expect 95-100% restoration with any quality method
  • Focus on prevention to avoid future fading

Vehicles 4-7 Years Old:

  • Moderate restoration typically required
  • 90-95% restoration achievable with premium products
  • Combination methods often unnecessary

Vehicles 8-15 Years Old:

  • Significant restoration needed
  • 80-90% restoration with advanced methods
  • May require dye or coating for best results
  • Heat gun method often most dramatic

Vehicles 15+ Years Old:

  • Severe degradation common
  • 70-85% restoration realistic
  • Coating or dye often mandatory for acceptable results
  • Some permanent texture/surface loss may be irreversible
  • Even 80% restoration creates dramatic before/after

Frequently Asked Questions (FAQ)

Can you permanently restore faded plastic trim?

While no restoration is truly permanent, modern ceramic coatings can provide 2+ years of like-new appearance with minimal maintenance. The key is combining thorough restoration with high-quality UV protection. For the longest-lasting results, use a trim dye or heat gun method followed by ceramic coating, then maintain with quarterly protectant reapplication.

Is a heat gun safe for car trim?

Yes, when used correctly. Start with low heat (500-700°F), maintain 4-6 inches distance, and keep the heat gun constantly moving. Never hold it stationary, and watch for color change as your guide. The plastic should darken without glossing or rippling. Improper use can cause permanent melting or warping, so practice on inconspicuous areas first.

What’s the best product for black plastic restoration?

For ease and budget: Meguiar’s Ultimate Black
For best value: Solution Finish Trim Restorer
For maximum longevity: Cerakote Trim Coat
For DIY enthusiasts: Heat gun + Gtechniq C4 ceramic coating

The “best” depends on your priorities: convenience, cost, durability, or results quality.

How often should I restore my trim?

  • With basic restorers: Every 4-8 weeks
  • With premium restorers: Every 3-6 months
  • With ceramic coating: Annual touch-up only
  • With professional coating + maintenance: Every 18-24 months

Frequency also depends on climate, parking situation, and washing habits. Garage-kept vehicles in moderate climates need less frequent restoration.

Can household products restore plastic trim?

Short answer: Avoid them. While internet myths suggest peanut butter, olive oil, or WD-40 can restore trim, these create temporary cosmetic improvement while accelerating long-term degradation. They:

  • Provide no UV protection
  • Attract dirt and contaminants
  • Can damage plastic molecular structure
  • Wash away within days
  • Complicate future proper restoration

Automotive-specific products cost only slightly more and actually work.

Does UV exposure permanently damage plastic bumper trim?

UV damage is cumulative and progressive but not necessarily permanent. Early-stage oxidation can be reversed with chemical restorers or heat guns. Severe, long-term UV exposure causes permanent structural changes, texture loss, and brittleness that no restoration can fully reverse—only cosmetically improve. This is why preventive UV protection is so important.

Why does my black plastic trim look faded even though the car is garaged?

Several possibilities:

  • Previous owner didn’t garage the vehicle during critical early years
  • Ambient UV exposure during driving
  • Improper cleaning products stripped protective coatings
  • Lower quality plastic from factory
  • Chemical contamination from car washes or detailing products

Even garaged vehicles experience UV exposure during driving and need periodic restoration/protection.

Is it better to paint or restore faded bumper trim?

Restore if:

  • Trim has only surface-level oxidation
  • You want to maintain original texture
  • Quick, budget-friendly solution needed
  • Trim is moderately faded

Paint/Dye if:

  • Trim is severely faded or cracked
  • You want 2+ years of durability
  • Perfect, uniform appearance is priority
  • Trim texture is already damaged

For most situations, restoration + ceramic coating provides the best balance of cost, time, and results.

What causes the white chalky appearance on plastic bumper trim?

The white/chalky coating is oxidized plastic molecules that have migrated to the surface and degraded. UV radiation breaks molecular bonds, causing plasticizers and pigments to separate and accumulate on the surface as white residue. This is the same process that turns old plastic lawn furniture white.

How do I restore textured plastic bumper trim without losing the texture?

Use circular application motions with chemical restorers to work product into texture valleys. Avoid sanding or abrasive compounds. Heat gun method works excellently on textured trim without affecting texture pattern. For severely faded textured trim, multiple thin coats of dye allow texture to remain visible while providing complete color coverage.


Final Verdict: Best Method for Most People

After examining all restoration approaches, here’s the recommended strategy for 90% of DIYers seeking maximum results with reasonable effort:

The Optimal Combination Approach

Step 1: Restore Color (Choose based on fading severity)

  • Light-Moderate fading: Premium chemical restorer like Solution Finish
  • Moderate-Severe fading: Heat gun method for deep restoration

Step 2: Protect Investment

Step 3: Maintain Quarterly

  • Reapply ceramic booster spray or light sealant every 3 months
  • Quick 10-minute process prevents oxidation from restarting

Why This Works Best

✅ Addresses both restoration AND protection (where most people fail)
✅ Provides 12-18+ months of results (excellent ROI on time/money)
✅ Beginner-friendly with professional results
✅ No expensive equipment required (heat gun is optional)
✅ Suitable for all vehicle ages and trim conditions

Quick Method Comparison

MethodCostTimeSkill LevelDurabilityBest For
Basic Restorer Only$20 minBeginner2-6 weeksQuick fixes
Premium Restorer + Sealant$$45 minBeginner3-6 monthsBudget-conscious
Heat Gun + Ceramic$$$2 hrsIntermediate12-18 moEnthusiasts
Trim Dye/Coating$$$3 hrsIntermediate18-24 moShow cars
Recommended Combo$$1 hrBeginner12-18 moMost people

The Complete Recommended Kit

For maximum results at reasonable cost, purchase:

  1. Cleaning: 303 Automotive All-Purpose Cleaner
  2. Restoration: Solution Finish Trim Restorer
  3. Protection: Cerakote Trim Coat
  4. Maintenance: CarPro Reload Spray Sealant
  5. Application: Microfiber Applicator Pack

Total Investment: $60-80
Results Duration: 12-18 months
Cost Per Month: $3.33-6.66

Compare this to professional detailing trim restoration at $150-300, and the DIY approach becomes obviously appealing.


Get Started Today

You now have everything needed to transform your faded, gray plastic bumper trim back to deep, rich black—and keep it that way for years.

Your Next Steps

1. Assess Your Trim Condition

  • Examine your vehicle in good lighting
  • Identify fading severity (light, moderate, or severe)
  • Choose appropriate restoration method

2. Gather Your Supplies

  • Order recommended products using the links throughout this guide
  • Ensure you have microfiber towels and applicators
  • Set aside 1-2 hours in your schedule

3. Follow the Process

  • Proper cleaning and prep (no shortcuts!)
  • Apply your chosen restoration method
  • Seal with appropriate protection
  • Document your before/after results

4. Establish Maintenance Routine

  • Calendar reminder for quarterly protectant reapplication
  • Include trim inspection in regular washing routine
  • Enjoy your refreshed vehicle appearance

Recommended Product Bundles

Budget Starter Kit ($30-40):

Professional Results Kit ($60-80):

  • Dedicated trim cleaner [AFFILIATE PRODUCT PLACEHOLDER]
  • Solution Finish Restorer [AFFILIATE PRODUCT PLACEHOLDER]
  • Cerakote Trim Coat [AFFILIATE PRODUCT PLACEHOLDER]
  • Quality applicators and towels [AFFILIATE PRODUCT PLACEHOLDER]

Advanced Enthusiast Kit ($100-140):

Related Guides You’ll Find Helpful

Continue Your DIY Detailing Journey:


Final Thought: Faded plastic bumper trim ages your car more dramatically than almost any other single factor. The transformation from oxidized gray to rich black takes less time than detailing your interior but creates an equal visual impact. Whether you’re preparing for resale, restoring an older vehicle, or simply maintaining your pride and joy, restored trim completely refreshes your vehicle’s appearance.

The methods in this guide work on any car—from economy sedans to luxury SUVs, from 3-year-old daily drivers to 20-year-old project cars. Start with proper cleaning, choose the restoration method matching your needs, seal your work with UV protection, and maintain quarterly. The difference is immediate, dramatic, and completely achievable.

Your car’s transformation is one afternoon away. Get started today.

Disclaimer: This article contains affiliate links. If you purchase an item through the link I will earn a small commission at no extra cost to you.
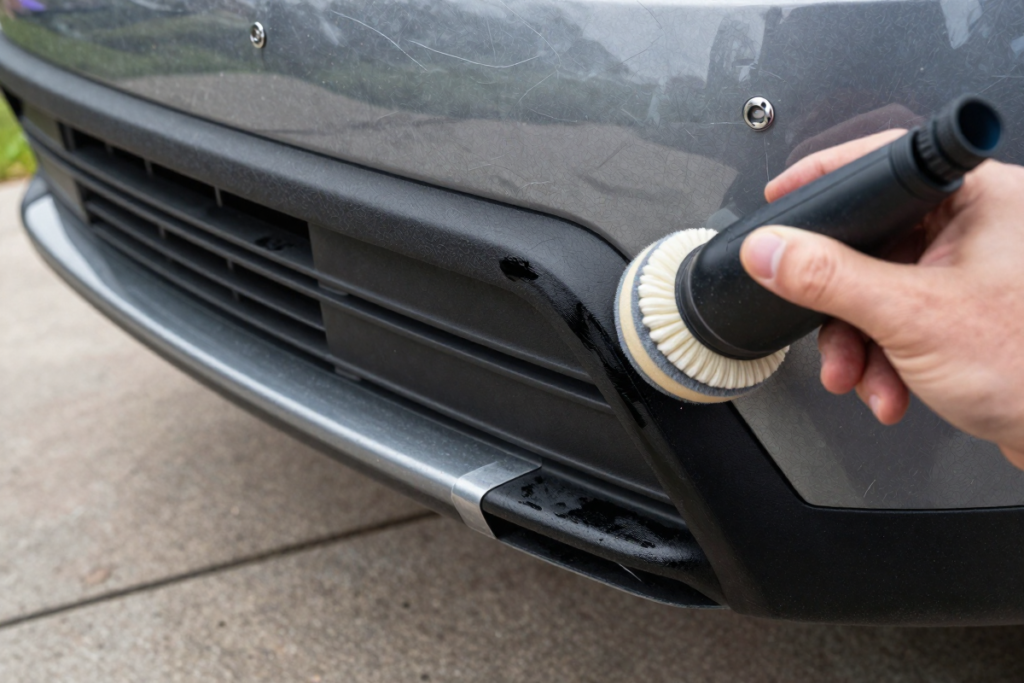
Best Way to Clean Car Upholstery: Stains, Spills, and Everything Else

Your car’s interior tells a story—one of morning coffee mishaps, impromptu road trips, and the occasional muddy paw print. But over time, these memories can turn into unsightly stains and lingering odors that detract from the joy of driving. Imagine sliding into a car with upholstery so clean it feels like new, a space where every seat is fresh, inviting, and free from the remnants of yesterday’s spills. Sounds like a dream, right? It doesn’t have to be.

In this guide, we’re uncovering the best way to clean car upholstery, tackling everything from stubborn coffee stains to that mysterious, ever-present odor in the back seat. With a blend of expert tips, clever tricks, and must-have products, you’ll learn how to rejuvenate your car’s interior, transforming it into a sanctuary on wheels. Whether you’re battling everyday spills or ready to conquer deep-set grime, we’ve got you covered. Ready to reclaim the comfort and cleanliness of your car? Let’s dive in.

Let’s Keep It Squeaky Clean

Why Keeping Your Car Upholstery Clean Matters

Your car is more than just a vehicle; it’s an extension of your personal space, a moving sanctuary that accompanies you on life’s journeys. Keeping your car upholstery clean isn’t just about aesthetics—although who doesn’t love a spotless interior? It’s about preserving the value of your vehicle, ensuring a healthier environment for you and your passengers, and simply making every drive a more pleasant experience. Dirty upholstery can harbor bacteria, allergens, and odors that make every ride uncomfortable. Plus, over time, stains can become permanent, leading to costly repairs or replacements. Clean upholstery isn’t just a luxury; it’s an essential part of maintaining your car’s longevity and your peace of mind.

The Struggles of Stains and Spills: A Common Problem

We’ve all been there—coffee cups that tip over during a sharp turn, muddy shoes that find their way onto the seats, or that fast-food ketchup packet that somehow bursts in the worst possible spot. Stains and spills are an inevitable part of car ownership, but they don’t have to be a permanent scar on your vehicle’s interior. The real struggle lies not just in the mess itself, but in knowing how to effectively clean it without damaging your upholstery. Many car owners make the mistake of using harsh chemicals or improper techniques that can worsen the situation, leading to discoloration or even fabric deterioration. Understanding the unique challenges of different types of stains—and the best ways to tackle them—is key to keeping your car’s interior looking as good as new.

What You’ll Learn: The Best Techniques and Tools

In this comprehensive guide, we’re diving deep into the world of car upholstery care. From the essential tools you need to keep on hand, to the best car cleaners for every type of stain, you’ll find everything you need to become a master of car interior cleaning. We’ll explore how to handle common spills like coffee and food, as well as more stubborn stains like ink and grease. Whether your car seats are fabric, leather, or synthetic, you’ll learn the most effective upholstery cleaning techniques to clean them without causing damage. By the end of this guide, you’ll be equipped with the knowledge to not only clean your upholstery but also to protect it from future mishaps. Ready to restore your car’s interior to its former glory? Let’s get started.

Understanding Different Types of Car Upholstery

Fabric Upholstery: Common Materials and Their Challenges

Fabric upholstery is a mainstay in many vehicles, offering a cozy, familiar touch that makes any car ride more comfortable. Its affordability and versatility make it a popular choice, yet it’s not without its challenges. Fabric, by nature, is porous, meaning it acts like a sponge when it comes into contact with liquids, oils, or dirt. This makes cleaning and maintenance a bit more intricate than simply wiping down a leather seat.

Consider polyester, one of the most common materials used in car upholstery. It’s durable, resistant to fading, and generally holds up well against everyday wear and tear. But when faced with a stubborn stain, polyester can be unforgiving. Without prompt and proper care, a simple spill can become a permanent blemish. Then there’s nylon, another widely used fabric. Known for its strength and resistance to abrasion, nylon is a solid choice for families and frequent travelers. However, it has a tendency to cling to dirt, making deep cleaning essential to keep it looking its best. Lastly, there’s microfiber, a luxurious fabric that’s incredibly soft to the touch. While it offers a high-end feel, it’s also a magnet for dust and debris, requiring regular upkeep to maintain its pristine condition.

Synthetic Upholstery: Durable but Tricky

Synthetic upholstery, often seen as a modern alternative to leather, brings durability and style to the table without the hefty price tag. Commonly referred to as faux leather or leatherette, these materials mimic the look and feel of real leather, but with added resilience. Synthetic upholstery is highly resistant to spills, stains, and even scratches, making it a smart choice for pet owners and parents alike.

However, synthetic materials are not without their quirks. One of the main advantages is that they don’t absorb liquids as quickly as fabric, giving you a bit more time to clean up a spill before it sets. But there’s a catch—certain substances, like ink or dye, can permanently mark synthetic surfaces if not addressed immediately. The key to maintaining synthetic upholstery is using the right cleaning products. Harsh chemicals can strip the material of its natural oils, leading to a sticky or stiff texture that’s uncomfortable to sit on. Additionally, synthetic upholstery can crack over time, particularly in extreme temperatures, if not properly conditioned.

Understanding the nuances of fabric and synthetic materials is essential for effective car care. With the right approach, including the use of the best car cleaners and car detailing products, you can keep your car’s interior looking sharp, no matter what type of upholstery you’re dealing with.

Essential Tools and Products for Cleaning Car Upholstery

Must-Have Cleaning Tools: Brushes, Vacuums, and More

To tackle car interior cleaning like a pro, you need the right arsenal of tools. A simple cloth won’t cut it when you’re dealing with deep-seated dirt or stubborn stains. Start with a good quality vacuum cleaner. A portable, handheld vacuum with strong suction and various attachments is your first line of defense. It’s perfect for pulling out crumbs, dust, and pet hair from those hard-to-reach crevices.

Next up is a set of detailing brushes. These are indispensable for loosening dirt trapped in the fibers of your upholstery. Look for brushes with soft, synthetic bristles to avoid damaging delicate fabrics. A stiff-bristled brush is ideal for tougher materials, while a smaller, more precise brush can help with intricate stitching and seams. For those really tough spots, a steam cleaner can be a game-changer. It not only lifts stains but also sanitizes the fabric, killing off bacteria and allergens lurking within.

Don’t forget about microfiber cloths—they’re the unsung heroes of auto interior upkeep. These cloths are gentle yet effective at wiping away residues without leaving streaks or scratches. Keep a few on hand for different purposes: one for applying cleaning products, another for wiping, and a third for buffing.

Top-Rated Upholstery Cleaners: What to Buy

When it comes to choosing car detailing products, the market is flooded with options. But not all cleaners are created equal. For general use, a foaming fabric cleaner is versatile and effective, capable of lifting stains without saturating the fabric. These cleaners are designed to penetrate deep into the fibers, breaking down dirt and grime at the root. Products like Chemical Guys Foaming Citrus Fabric Clean are great all-rounders that work on a variety of materials.

For those dealing with leather or synthetic upholstery, specialized cleaners are a must. Leather cleaners like Lexol or Leather Honey not only clean but also condition the leather, preventing it from drying out and cracking. If you’re working with synthetic materials, products like Meguiar’s Gold Class Rich Leather Cleaner and Conditioner offer a similar effect, cleaning while preserving the integrity of the material.

For pet owners, an enzymatic cleaner is a must-have. These cleaners target pet stains and odors at a molecular level, ensuring that your car doesn’t just look clean—it smells clean too. Brands like Nature’s Miracle are highly effective at neutralizing even the most stubborn pet odors.

DIY Solutions: Making Your Own Cleaning Products

If you prefer a more natural approach or are looking to save some money, DIY car cleaning solutions can be just as effective as store-bought products. A simple mixture of white vinegar and water can work wonders on fabric upholstery care. The vinegar helps to break down stains, while the water dilutes the acidity to prevent damage. For a fresh scent, add a few drops of essential oil, like lavender or lemon.

Baking soda is another household staple that’s perfect for tackling odors and light stains. Simply sprinkle it over the affected area, let it sit for 15-20 minutes, and then vacuum it up. For tougher stains, create a paste using baking soda and a bit of water. Apply it to the stain, let it dry, and then brush it off.

For leather upholstery, a mixture of olive oil and white vinegar can serve as both a cleaner and conditioner. The vinegar cuts through grime, while the oil replenishes the leather’s natural moisture. Just be sure to buff the surface thoroughly afterward to avoid any greasy residue.

With the right tools and products, both store-bought and homemade, keeping your car upholstery in pristine condition becomes a manageable task, leaving your interior looking and feeling like new. By incorporating best practices for upholstery cleaning and using high-performance car cleaning methods, you ensure effective car cleaning results.

Pre-Cleaning Prep: Getting Ready to Tackle the Job

Step-by-Step Guide to Vacuuming Your Seats

Before diving into any upholstery cleaning, it’s essential to lay the groundwork with a thorough vacuuming. This step is crucial for removing loose dirt, crumbs, and debris that can hinder your cleaning efforts and potentially scratch your upholstery. Start by removing any items from your car that might obstruct your cleaning, such as mats, car seats, or personal belongings.

Once your car is clear, equip yourself with a handheld vacuum or a vacuum with a hose attachment. Begin at the top of the seats and work your way down, using the vacuum’s upholstery attachment to gently suction away surface dirt. Pay extra attention to seams and crevices where crumbs and dirt often accumulate. These areas can be particularly challenging to clean and require a bit more diligence.

For fabric upholstery, use the vacuum’s brush attachment to agitate the fabric lightly. This helps to lift dirt and debris from the fibers, making the subsequent cleaning process more effective. For synthetic or leather upholstery, switch to a softer brush or a microfiber cloth attachment to avoid any risk of scratching.

Don’t forget the floor area around your seats. Vacuuming the entire cabin ensures that no dirt or debris ends up back on your freshly cleaned upholstery. After vacuuming, take a moment to inspect the seats for any visible stains or spots that might need extra attention. This step is crucial for a comprehensive clean.

Spot Test: Ensuring Your Cleaner Won’t Damage the Upholstery

Before applying any cleaning solution to your upholstery, always perform a spot test. This simple yet vital step ensures that your chosen cleaner won’t cause discoloration or damage to your upholstery. Choose an inconspicuous area of your seats—such as a corner or under a seat cushion—where any potential damage will be less noticeable.

Apply a small amount of the cleaner to a clean, white cloth or cotton ball. Gently blot the test area, being careful not to rub or scrub. Observe the area for a few minutes to check for any adverse reactions, such as color bleeding or fabric deterioration. If you notice any negative effects, it’s best to choose a different cleaner or consult with a professional.

For fabric upholstery, the spot test can reveal how well the cleaner interacts with the fibers and if it will leave any residues. For synthetic or leather materials, the test helps to ensure that the cleaner doesn’t strip away essential oils or cause cracking.

Once the spot test is complete and you’re confident in the cleaner’s safety, proceed with applying it to the rest of the upholstery. Following these preparatory steps will ensure that your cleaning efforts yield the best results, preserving the integrity and appearance of your car’s interior.

With your car vacuumed and the spot test complete, you’re now ready to tackle the deep cleaning. These pre-cleaning steps set the stage for a thorough and effective upholstery refresh, paving the way for a clean, fresh interior. Employing upholstery cleaning guides and effective car cleaning methods will ensure your car interior care is top-notch.

The Best Way to Clean Fabric Car Upholstery

Step 1: Choosing the Right Cleaner for Fabric

Selecting the appropriate cleaner is paramount for effective fabric upholstery care. The market offers a myriad of car interior cleaning products, but not all are created equal. Look for a cleaner specifically designed for automotive fabric. Products like Chemical Guys Fabric Clean or Meguiar’s Carpet & Upholstery Cleaner are well-regarded for their ability to penetrate deep into fibers and lift dirt without causing damage.

When choosing a cleaner, consider the type of stains and the fabric’s sensitivity. For general cleaning, a foaming cleaner works well as it expands into the fabric, loosening dirt and grime. If dealing with stubborn stains, a cleaner with enzyme-based formulas can break down organic matter, making it easier to remove tough spots. Always ensure the cleaner is compatible with your fabric type by checking product labels or manufacturer recommendations.

Step 2: Scrubbing Techniques for Different Stains

Once you have the right cleaner, the next step is to tackle stains with precision. Begin by applying the cleaner according to the instructions—usually, this involves spraying it onto the affected area or applying it with a clean cloth. For a more intense clean, use a soft-bristled brush.

For light stains, gently agitate the fabric in a circular motion. This helps to lift the dirt without embedding it further into the fibers. For more persistent stains, such as grease or ink, apply the cleaner directly and let it sit for a few minutes to break down the stain. Afterward, scrub the area with a brush, working from the outside in to avoid spreading the stain.

Be mindful of the amount of water used during the cleaning process. Excess moisture can lead to mold growth and unpleasant odors. If the fabric appears overly saturated, blot the area with a clean, dry cloth to absorb excess moisture. Utilizing upholstery cleaning techniques ensures that you effectively tackle even the toughest stains while maintaining the integrity of your fabric upholstery.

Step 3: Rinsing and Drying for a Fresh Finish

After scrubbing, the final steps are rinsing and drying. To remove any residual cleaner, lightly rinse the fabric with clean water. This can be done using a damp cloth or, if feasible, a wet vacuum to extract the excess moisture. Make sure to rinse thoroughly to avoid leaving behind any soapy residue, which can attract more dirt.

Once the fabric is rinsed, focus on drying. Proper drying is crucial to prevent mold and mildew. If possible, allow the upholstery to air dry by keeping your car windows open or parking in a well-ventilated area. For quicker results, use a clean, dry towel to blot the fabric and absorb as much moisture as possible.

For an extra touch, you can use a fan or a hairdryer set on a cool setting to expedite the drying process. Avoid direct heat sources as they can damage the fabric or cause it to shrink. By employing high-performance car cleaning methods and following best practices for upholstery cleaning, you’ll restore your fabric upholstery to its former glory, leaving it fresh and inviting.

The Best Way to Clean Leather Car Upholstery

Step 1: Picking a Leather-Safe Cleaner

Leather upholstery demands a touch of finesse when it comes to cleaning. The first step is selecting a cleaner that is gentle yet effective. Leather-safe cleaners, such as Lexol Leather Cleaner or Chemical Guys Leather Cleaner, are specially formulated to clean without stripping away the leather’s natural oils. Avoid harsh chemicals or all-purpose cleaners that can degrade the leather’s texture and appearance.

Look for a pH-balanced cleaner to ensure it maintains the leather’s integrity. Read the product instructions carefully to confirm compatibility with your type of leather. Whether your seats are full-grain or bonded, using a cleaner specifically designed for leather helps preserve their natural suppleness and luster.

Step 2: Gently Cleaning Without Damaging Leather

Once you have the right cleaner, it’s time to put it to use. Start by vacuuming the leather seats to remove any loose dirt and debris. This prevents particles from scratching the leather during the cleaning process. Apply a small amount of leather cleaner to a soft, lint-free cloth—microfiber works well for this purpose.

Gently rub the cleaner into the leather using circular motions. Avoid applying too much pressure or using abrasive scrubbing techniques, as these can damage the leather’s surface. Pay special attention to seams and crevices, where dirt often accumulates. For heavily soiled areas, let the cleaner sit for a few minutes to loosen the grime before wiping it away.

After cleaning, use a separate, clean cloth to wipe off any excess cleaner and residual dirt. This step ensures that no cleaner is left behind to dry out the leather or leave a sticky residue. Always work in small sections to maintain control over the cleaning process and achieve a uniform finish.

Step 3: Conditioning the Leather for Long-Lasting Shine

Cleaning alone isn’t enough to keep leather upholstery looking its best. Conditioning is crucial to replenish the leather’s natural oils and maintain its suppleness. Leather conditioners, like Leather Honey Conditioner or Meguiar’s Gold Class Leather Conditioner, are formulated to nourish and protect the leather from drying out and cracking.

Apply the conditioner using a clean, soft cloth, following the manufacturer’s instructions. Generally, you’ll want to apply a thin, even layer and allow it to penetrate the leather for 10 to 15 minutes. This allows the conditioner to deeply moisturize the leather, enhancing its flexibility and shine.

After conditioning, buff the leather with a clean, dry cloth to remove any excess product and bring out a glossy finish. Regular conditioning helps prevent wear and tear, keeping your leather seats looking elegant and feeling comfortable. Aim to condition your leather upholstery every few months or as needed, depending on the level of use and exposure to sunlight.

By choosing the right cleaner, applying gentle cleaning techniques, and conditioning regularly, you’ll maintain the luxurious appearance and feel of your leather car upholstery. With these steps, your seats will not only look fantastic but also stand the test of time, thanks to effective car cleaning methods and car interior care products.

The Best Way to Clean Synthetic Upholstery

Step 1: Selecting the Right Cleaner for Synthetics

When it comes to synthetic upholstery, choosing the right cleaner is essential for a pristine finish. Synthetic materials like microfiber or vinyl are more resilient than their natural counterparts but still require specialized care. Opt for a cleaner designed specifically for synthetic fabrics. Products like 303 Aerospace Protectant or Meguiar’s Quik Interior Detailer are excellent choices for maintaining both appearance and durability.

Avoid cleaners that are overly harsh or contain bleach, as these can damage the synthetic fibers and alter their texture. Check the label for compatibility with your upholstery type, and ensure the cleaner is non-toxic and safe for use in enclosed spaces. A pH-balanced cleaner will help maintain the integrity of the material while effectively removing dirt and stains. For effective car cleaning methods, ensure the cleaner you choose aligns with high-performance car cleaning standards.

Step 2: Cleaning Techniques for Tough Synthetic Material

With your cleaner in hand, it’s time to tackle the upholstery. Start by vacuuming the seats thoroughly to remove any loose dirt and debris. This prevents particles from becoming embedded in the synthetic material during cleaning.

Apply a small amount of cleaner to a soft cloth or sponge. For synthetic fabrics, a gentle touch is key. Lightly rub the cleaner into the material using circular motions. This technique helps to lift dirt without pushing it deeper into the fibers. For tougher stains, such as grease or coffee spills, apply the cleaner directly to the affected area and let it sit for a few minutes to break down the stain.

For stubborn grime, a soft-bristled brush can be used to agitate the surface gently. Be careful not to scrub too aggressively, as this can damage the synthetic fibers. Once you’ve treated the stains, wipe the area with a clean, damp cloth to remove excess cleaner and residue. These upholstery cleaning techniques will help ensure that your synthetic upholstery remains in top shape.

Step 3: Final Touches: Drying and Protecting Synthetic Seats

After cleaning, ensuring the upholstery is thoroughly dried is vital to prevent mold growth and unpleasant odors. Use a dry, clean towel to blot the seats, absorbing as much moisture as possible. If your vehicle is in a well-ventilated area, allow the seats to air dry completely. For quicker results, a fan or the vehicle’s air conditioning can help expedite the drying process.

To further protect your synthetic upholstery, consider applying a fabric protector designed for synthetic materials. These protectors help repel stains and spills, making future cleanings easier and extending the life of your upholstery. Apply the protector according to the manufacturer’s instructions, typically spraying a light, even coat over the clean, dry seats. This will also aid in car upholstery protection and auto interior upkeep.

Maintaining synthetic upholstery is all about regular care and the right products. By selecting a suitable cleaner, employing effective cleaning techniques, and applying protective treatments, you ensure your synthetic seats remain in top condition, looking fresh and feeling comfortable for years to come.

How to Remove Common Stains from Car Upholstery

Removing Coffee and Beverage Spills

Coffee spills can be the bane of car interiors. To tackle these stains, act swiftly. Start by blotting the area with a clean cloth to absorb as much of the liquid as possible. Avoid rubbing, as this can push the coffee deeper into the fibers.

For fabric upholstery, mix a solution of mild dish soap and warm water. Apply the solution with a soft cloth, gently dabbing and working from the outside in. Rinse with clean water and blot dry with a towel. For leather, use a leather cleaner suitable for coffee stains, followed by a leather conditioner to restore the material’s luster.

Beverage spills, especially those with sugar or dairy, can be trickier. Use a fabric cleaner with enzyme-based properties for fabric seats to break down sticky residues. For leather, a mixture of water and a few drops of mild soap can be effective. Clean, rinse, and dry thoroughly to avoid any lingering odors or residue. Employing car interior stain treatment methods ensures your upholstery remains spotless.

How to Handle Food Stains: Grease, Sauce, and More

Food stains can range from annoying to challenging, depending on the type. For grease stains, sprinkle baking soda over the area to absorb the grease. Let it sit for about 15 minutes, then vacuum it off. For fabric, use a fabric cleaner or a solution of vinegar and water to treat the spot. Scrub gently with a soft brush, rinse, and blot dry.

Sauce stains, especially those with tomatoes or curry, require immediate attention. For fabric, blot the stain first, then apply a mixture of dish soap and water. Work it in gently with a cloth, rinse, and blot dry. For leather, use a leather cleaner suitable for greasy or oily substances, followed by conditioning to prevent the leather from drying out.

Food stains on synthetic upholstery can often be cleaned with a simple soap-and-water solution. Apply the solution, scrub gently, rinse, and dry. For stubborn stains, a dedicated upholstery cleaner may be necessary. Regular car maintenance routine practices, including stain removal for car upholstery, will keep your vehicle looking its best.

Eliminating Pet Stains and Odors

Pet stains, including urine and vomit, can be particularly challenging. For fabric upholstery, start by blotting the area with a paper towel to absorb as much of the stain as possible. Apply a mixture of vinegar and water to the area, then sprinkle baking soda over it. Allow it to sit for several hours or overnight to neutralize odors. Vacuum up the baking soda, then clean the area with a fabric cleaner and rinse thoroughly.

For leather, use a cleaner specifically formulated for pet stains, followed by a leather conditioner. Pet urine can damage leather if not treated promptly, so ensure the cleaner is applied thoroughly and the area is dried well. Using car interior care products specifically designed for such issues can be highly effective.

Dealing with Ink, Makeup, and Other Tough Stains

Ink stains can be particularly stubborn. For fabric upholstery, dab the stain with rubbing alcohol using a cotton ball. Gently blot the area, working from the outside in to prevent spreading. Rinse with water and blot dry. For leather, use a leather cleaner or a special ink remover designed for leather.

Makeup stains, such as lipstick or foundation, can be handled by applying a small amount of rubbing alcohol to the stain. Blot gently with a cloth, then clean with a fabric cleaner. For synthetic upholstery, use a mild soap solution and scrub the area lightly before rinsing and drying.

Tough stains like paint or adhesive residue may require specialized cleaners. For these, follow the manufacturer’s instructions and test any product on a small, inconspicuous area first to ensure it does not damage the upholstery. Implementing effective car cleaning methods and car detailing advice will help address these challenging stains efficiently.

By following these targeted techniques for common stains, you can keep your car upholstery looking pristine and fresh, no matter what life throws your way.

Special Tips for Dealing with Stubborn Spills

Using Enzyme Cleaners for Organic Spills

Organic spills, such as food or pet accidents, can be particularly tricky due to their nature. Enzyme cleaners are a game-changer for these situations. These specialized car detailing products contain natural enzymes that break down organic matter, effectively neutralizing odors and lifting stains.

Start by blotting up any excess liquid with a clean cloth or paper towel. Apply the enzyme cleaner generously to the affected area, making sure it fully saturates the stain. Allow it to sit for the recommended time—usually 15 to 30 minutes—so the enzymes can work their magic. Once the time is up, blot the area with a damp cloth to lift the stain and remove any remaining cleaner. For particularly stubborn stains, you may need to repeat the process. Enzyme cleaners are ideal for fabric and synthetic upholstery but should be used with caution on leather to avoid damage. This approach is among the best practices for upholstery cleaning.

How to Lift Deep-Set Stains with Steam Cleaning

Steam cleaning offers a powerful solution for deep-set stains that resist conventional cleaning methods. The high temperature of steam helps to loosen dirt and grime embedded within upholstery fibers, making it easier to extract. A steam cleaner equipped with an upholstery attachment is your best tool for this job.

Begin by vacuuming the area thoroughly to remove loose debris. Fill your steam cleaner with water and, if recommended, a small amount of upholstery cleaner. Start steaming from a distance, gradually moving closer as the steam loosens the stain. Use the upholstery attachment to gently scrub the area while steaming. The combination of heat and agitation helps to lift even the most stubborn stains, providing effective car cleaning methods for deep-set grime.

After steaming, blot the area with a clean, dry cloth to absorb any moisture. Allow the upholstery to air dry completely. Steam cleaning is particularly effective for fabric and synthetic materials but should be used cautiously on leather to avoid potential damage from excessive moisture. These steam cleaning techniques are among the top car upholstery cleaning hacks.

Removing Gum, Wax, and Sticky Residue

Dealing with gum, wax, or sticky residue requires a strategic approach to avoid further damage to your upholstery. For gum, the best method is to freeze it. Place an ice pack or a bag of ice over the gum for a few minutes until it hardens. Once hardened, gently scrape it off with a dull knife or a plastic scraper. Vacuum the area to remove any remaining particles.

Wax spills can be managed with a similar freezing method. After the wax has hardened, gently scrape it off with a plastic scraper. For any remaining residue, place a paper towel over the area and apply heat with a hairdryer. The wax will melt and be absorbed by the towel. Gently wipe away any remaining residue with a clean cloth.

Sticky residues, such as adhesive tape or glue, can be tricky. Use a solvent like rubbing alcohol or a commercial adhesive remover. Apply the solvent to a clean cloth and gently rub the residue until it dissolves. Be sure to test the solvent on an inconspicuous area first to avoid any damage. After removal, clean the area with a mild detergent solution to ensure no residue remains. These are essential car upholstery cleaning solutions for dealing with tricky residues.

These techniques will help you tackle even the most stubborn spills and stains, keeping your car upholstery in top condition. Whether dealing with organic messes, deep-set stains, or tricky residues, the right approach ensures a clean and fresh interior.

Preventing Future Stains and Spills

Protective Seat Covers: Your First Line of Defense

When it comes to safeguarding your car upholstery, protective seat covers are your first line of defense. These versatile covers act as a shield against spills, stains, and general wear and tear. Available in a variety of materials, including waterproof and stain-resistant options, seat covers offer a practical solution for maintaining your car’s interior.

Select seat covers that fit snugly and are easy to remove for cleaning. For a more customized fit, consider covers tailored to your vehicle’s make and model. Whether you choose neoprene, leather, or fabric, ensure that the covers are durable and can withstand daily use. Regularly remove and wash the covers according to the manufacturer’s instructions to keep them in top condition. With seat covers in place, you’ll add an extra layer of car upholstery protection and auto interior upkeep.

Scotchgard and Other Fabric Protectors: Are They Worth It?

Fabric protectors, such as Scotchgard, can be a worthwhile investment for those seeking to enhance the durability of their car upholstery. These products create a protective barrier that repels liquids and stains, making it easier to clean up spills before they set in. Applying a fabric protector can help prevent long-term damage and keep your upholstery looking fresh.

Before applying any fabric protector, ensure that the upholstery is thoroughly cleaned and dry. Follow the product instructions carefully to achieve the best results. While Scotchgard and similar products can be effective, they are not a cure-all. Regular cleaning and maintenance are still crucial to keeping your upholstery in pristine condition. Additionally, test the fabric protector on a small, inconspicuous area first to ensure it does not alter the appearance or texture of your upholstery. This is a key element of car upholstery maintenance routine.

Regular Maintenance: Tips for Keeping Upholstery Clean Over Time

Consistent maintenance is key to preserving the cleanliness and appearance of your car upholstery. Establish a routine cleaning schedule to address dirt, dust, and minor spills before they become major issues. Vacuuming regularly is an essential step in removing loose debris that can lead to staining and deterioration.

For fabric upholstery, use a vacuum with an upholstery attachment to reach crevices and seams where dirt tends to accumulate. Follow up with periodic spot cleaning using appropriate cleaning products for car seats. For leather and synthetic materials, wipe down surfaces with a damp cloth and a suitable cleaner to remove grime and prevent buildup. Conditioning leather regularly helps to maintain its suppleness and prevent cracks.

In addition to cleaning, consider using odor-neutralizing products to keep your car smelling fresh. Products such as activated charcoal bags or odor-eliminating sprays can help maintain a pleasant environment inside your vehicle. This proactive approach is part of effective car cleaning methods and essential for long-term interior car care.

By implementing these preventative measures, you’ll not only protect your upholstery from future stains and spills but also extend the lifespan of your car’s interior. A proactive approach ensures that your vehicle remains in top shape, ready for every journey.

When to Call in the Professionals

Signs It’s Time for Professional Upholstery Cleaning

Knowing when to call in the experts can make a significant difference in maintaining your car’s interior. If your upholstery has become heavily soiled, or if you’ve tried various cleaning methods without success, it may be time to seek professional help. Persistent stains, deep-set grime, and strong odors that refuse to dissipate despite your best efforts are key indicators that professional upholstery cleaning is necessary.

Another sign is visible wear and tear that goes beyond surface-level dirt. Professionals can address issues like discoloration, fabric deterioration, and stubborn residues that home methods struggle to handle. If you’ve recently had a significant spill or your car has been exposed to extreme conditions, professional cleaning ensures that underlying problems are effectively tackled, offering high-performance car cleaning and expert auto interior upkeep.

What to Expect from a Professional Service

When you hire a professional upholstery cleaner, expect a thorough and meticulous approach. Professional services typically start with a detailed inspection of your upholstery to assess the type of material and the extent of cleaning required. This allows them to choose the most suitable cleaning methods and products for your specific needs, including effective car cleaning methods and top car upholstery cleaners.

The process usually involves advanced cleaning techniques such as hot water extraction or specialized steam cleaning. These methods are more powerful than typical home solutions and can remove deep-seated dirt and stains more effectively. Additionally, professionals often use high-quality car detailing products that are not available for consumer use, providing a more thorough clean.

After the cleaning is completed, most services offer conditioning treatments that help protect and rejuvenate your upholstery. This ensures a fresh appearance and helps maintain the fabric’s durability. Be prepared for the process to take a few hours, and remember that you might need to allow additional time for drying.

Finding a Reputable Upholstery Cleaner Near You

Finding a reliable upholstery cleaner involves a bit of research. Start by asking for recommendations from friends or family members who have had positive experiences with professional upholstery cleaning services. Online reviews and ratings can also provide insights into the reputation and quality of different companies.

When selecting a service, check for certifications and affiliations with professional organizations, which can indicate a commitment to industry standards and best practices for upholstery cleaning. Ensure that the company uses modern, well-maintained equipment and offers transparent pricing with no hidden fees. It’s also helpful to inquire about their specific experience with car upholstery, as different materials may require specialized care.

Before committing, request a detailed quote and ask about their cleaning process to ensure it aligns with your needs. Some companies offer free estimates or consultations, which can help you make an informed decision.

By understanding when to seek professional help and knowing what to expect, you can ensure that your car upholstery receives the expert care it needs to look and feel its best. Whether dealing with stubborn stains or seeking a deep clean, professional services offer a valuable solution for maintaining your vehicle’s interior.

Top Product Recommendations for Upholstery Care

Best Upholstery Cleaners: Reviews and Recommendations

When it comes to choosing the best upholstery cleaners, a few standout products consistently receive high praise for their effectiveness and ease of use. One top contender is Folex Instant Carpet Spot Remover. Renowned for its versatility, Folex tackles everything from food and beverage spills to pet accidents with impressive results. Its non-toxic formula is safe for various upholstery types, making it a reliable choice for any car interior. It’s one of the top choices among cleaning products for car seats.

For a more specialized approach, consider Chemical Guys Fabric Clean. This cleaner is designed specifically for automotive fabrics and boasts a powerful yet gentle formula that lifts dirt and stains without causing damage. It’s an excellent option for those who want a product tailored to the unique demands of car upholstery care.

Another exceptional cleaner is Bissell Professional Pet Urine Eliminator. Ideal for households with pets, this product not only cleans but also neutralizes odors at the source. It’s particularly effective for tackling stubborn stains and lingering smells, providing a thorough clean and fresh scent.

Top Tools and Gadgets for Easy Upholstery Cleaning

When it comes to tools, the Shark Rocket Corded Hand Vac is a game-changer. Its powerful suction and compact design make it perfect for reaching tight spots and removing embedded dirt from upholstery. The various attachments, including the upholstery tool, add versatility to your car detailing routine.

Another must-have is the Bissell SpotClean ProHeat Portable Spot Cleaner. This gadget combines powerful suction with a heating function that helps to dissolve and lift stains more effectively. Its compact size makes it ideal for spot cleaning, and the included brush attachments ensure a deep clean.

For those who prefer a more hands-on approach, the Harris Professional Grade Cleaning Brush is highly recommended. With its sturdy bristles and ergonomic handle, it’s excellent for scrubbing away tough stains and ensuring that your upholstery gets a thorough clean.

Where to Buy: Affiliate Links to the Best Deals

Disclaimer: This article contains affiliate links. If you purchase an item through the link I will earn a small commission at no extra cost to you.
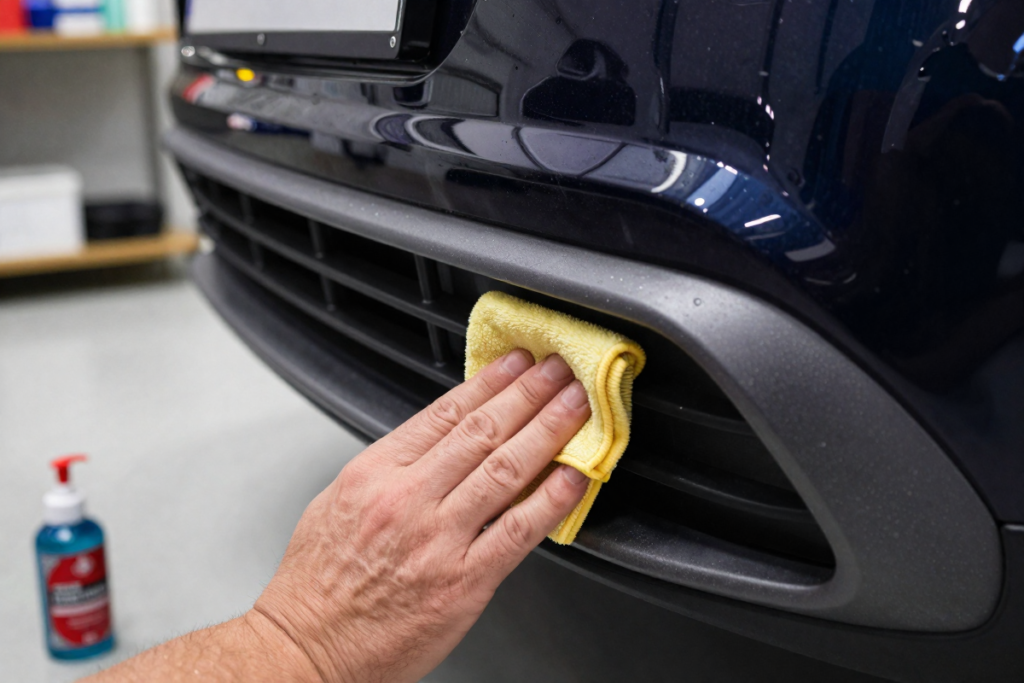
By investing in these recommended cleaners and tools, you’ll ensure that your car upholstery remains in top condition, handling any stains and spills with ease. With the right car care products in your arsenal, maintaining a pristine car interior becomes a straightforward task.

Frequently Asked Questions About Cleaning Car Upholstery

Can I Use Household Cleaners on My Car Upholstery?

Using household cleaners on car upholstery might seem like a convenient option, but it’s essential to proceed with caution. Many household products contain chemicals that can damage or discolor car fabrics. For instance, standard all-purpose cleaners often have strong solvents or bleaches that could strip the color from upholstery or harm the delicate fabric.

Instead, opt for car interior cleaning products specifically designed for automotive use. These products are formulated to address the unique challenges of fabric upholstery care and leather seat cleaning without causing harm. They are pH-balanced and less likely to leave residue, ensuring that your car’s interior stays looking fresh and vibrant. Always check the label to make sure the cleaner is compatible with your upholstery type—fabric, leather, or synthetic.

How Often Should I Clean My Car Seats?

The frequency of cleaning your car seats depends on various factors, including usage, climate, and personal habits. For most car owners, a thorough cleaning every six to twelve months is a good rule of thumb. However, if you frequently eat or drink in your vehicle, have pets, or live in an area with high dust levels, more frequent cleanings may be necessary.

Regular maintenance, such as vacuuming your seats weekly, can help prevent dirt buildup and extend the time between deep cleanings. Spot-cleaning any spills or stains as soon as they occur will also reduce the need for extensive treatments later. A proactive approach to auto interior upkeep ensures that your car seats remain in excellent condition and preserves their longevity.

What’s the Best Way to Remove Odors from Car Upholstery?

Eliminating odors from car upholstery requires a targeted approach. For persistent smells, baking soda is a highly effective and natural solution. Sprinkle baking soda generously over the upholstery, let it sit for several hours or overnight, and then vacuum it up. Baking soda neutralizes odors and absorbs moisture, leaving your car smelling fresh.

For more challenging odors, such as those from smoke or mildew, an enzyme cleaner can be particularly effective. These cleaners break down organic matter that causes smells, making them ideal for tackling stubborn odors. Spray the enzyme cleaner on the affected areas, let it sit for the recommended time, and then blot with a clean cloth.

Additionally, consider using an air purifier or odor-neutralizing spray designed for automotive interiors. These products help to freshen the air and eliminate residual smells, ensuring a pleasant driving experience. Regularly airing out your car and keeping it clean will also help prevent odors from becoming a recurring issue. Implementing these car interior stain removal techniques can greatly enhance the freshness of your vehicle.

By addressing these common concerns with the right upholstery cleaning techniques and products, you can maintain a clean, fresh-smelling car interior that enhances your driving experience.

Conclusion

Recap: The Best Methods to Keep Your Upholstery Spotless

In our journey through maintaining pristine car upholstery, we’ve uncovered a treasure trove of tips and techniques. From understanding the unique needs of different materials—be it fabric, leather, or synthetic—to deploying the right car detailing products and methods, keeping your car’s interior spotless has never been more manageable.

Start by selecting appropriate cleaners that cater specifically to your upholstery type. For fabric, a meticulous cleaning process with the right detergent and scrubbing techniques will help eradicate stains. Leather demands a gentler touch with specialized products to ensure its longevity and luster. Synthetic materials, while durable, require specific care to maintain their appearance and functionality.

Don’t overlook pre-cleaning prep, including vacuuming and spot testing, which sets the stage for effective cleaning. When dealing with stubborn spills or odors, leveraging enzymatic cleaners and steam methods can work wonders. Finally, routine maintenance and protective measures, such as seat covers and fabric protectors, will keep your car looking fresh and new. Incorporate these best practices for upholstery cleaning into your car maintenance routine to maintain a high level of cleanliness.

Final Thoughts: Making Upholstery Care a Routine

Incorporating these upholstery care practices into your regular vehicle maintenance routine will not only enhance the appearance of your car but also extend the life of your interior. Treating stains promptly, regularly vacuuming, and conditioning leather seats will keep your upholstery in top-notch condition.

By adopting a consistent approach to cleaning and auto cleaning solutions, you’ll find that maintaining a clean car interior becomes second nature. It’s not just about the aesthetics; it’s about preserving the value of your vehicle and ensuring every ride is a pleasure.

Start Cleaning Today with the Right Products

Ready to give your car’s interior the care it deserves? Don’t wait for the next spill or stain—take action now! Explore our top product recommendations for upholstery care and equip yourself with the best tools and cleaners available. Click through our affiliate links to find the best deals on high-quality cleaning products and make your car’s interior look as good as new.

Transform your vehicle’s upholstery from dull and stained to spotless and vibrant. Start today and experience the satisfaction of a clean and inviting car interior with the right car detailing services and products.

How to Clean Car Tires at Home: Step-by-Step Guide

You scrub your hood until it gleams, polish the windows until they disappear, and vacuum every crumb from the interior — then you drive away on four filthy, brown-stained tires that undo all of it in seconds. Sound familiar?

Most car owners treat tire cleaning as an afterthought, but here’s the truth: your tires are one of the first things people notice about your car. Clean, dark, well-maintained tires can make an average car look sharp. Neglected tires can make an expensive car look abandoned.

Beyond curb appeal, there are real, practical reasons to keep your tires clean. Brake dust, road grime, oil, and salt accumulate on rubber over time, accelerating oxidation and sidewall cracking. Regular cleaning removes these contaminants before they cause lasting damage, which means longer tire life and a safer ride.

The good news? Learning how to clean car tires at home is easier than most people think, and it costs a fraction of what a professional detailing service would charge. Whether you want a full DIY tire cleaning routine or a quick weekend refresh using household products, this step-by-step guide covers everything you need — the right tools, the best homemade tire cleaner recipes, how to apply tire shine, and the most common mistakes to avoid.

Let’s get your tires looking brand new.


Why Cleaning Your Tires Actually Matters

Before diving into the how-to, it’s worth understanding why tire cleaning deserves a permanent spot in your car care routine.

Brake dust is corrosive. Every time you hit the brakes, tiny metallic particles from your brake pads mix with road grime and bond to your tires and wheels. Left alone, this buildup becomes increasingly difficult to remove and can etch into rubber over time.

Road grime, salt, and oil break down rubber. If you live somewhere with winter road salt or rainy conditions, your tires are constantly exposed to chemicals that accelerate rubber degradation. Regular washing removes these before they set.

Tire sidewall cracking and fading are preventable. UV damage and oxidation cause tires to fade from deep black to a dull, brownish-gray. You may have noticed your tires turning brown shortly after cleaning — this is a process called antiozonant migration (also called tire blooming), where protective chemicals inside the rubber rise to the surface. While it’s a sign of a healthy tire, it looks unattractive. Proper cleaning and a quality tire protectant keep this under control.

Clean tires improve resale value. Car buyers notice details. A set of clean, shiny tires signals that a vehicle has been well maintained, and can meaningfully impact first impressions during a sale.


Tools and Materials You’ll Need

You don’t need a professional detailing kit to get great results. Here’s what to gather before you start your DIY tire cleaning session:

Essential Tools:

Cleaning Products:

Budget-Friendly DIY Alternatives:

  • Baking soda + dish soap + warm water
  • White vinegar diluted with water
  • Dawn dish soap alone

Pro Tip: Always use a dedicated tire brush — not the same brush you use on your paint or rims. Cross-contamination can scratch delicate surfaces and spread brake dust where you don’t want it.


Step-by-Step Guide: How to Clean Car Tires at Home

Step 1: Park and Prep Your Vehicle

Park on a flat, stable surface — your driveway works perfectly. Make sure your tires are cool to the touch before you begin. Hot rubber is more porous, which means cleaning chemicals absorb too quickly, making them harder to rinse off and potentially causing streaking or uneven results.

Gather all of your supplies before you start so you can move efficiently from tire to tire without stopping.

Step 2: Rinse Off Loose Dirt and Debris

Using your garden hose or pressure washer, give each tire a thorough rinse. Work from top to bottom, flushing away loose mud, dust, and road debris before applying any cleaner.

This pre-rinse step is important — scrubbing a dry, dirty tire grinds abrasive particles into the rubber, which can cause micro-scratches over time. A good rinse first makes the actual scrubbing far more effective.

Pressure Washer Note: Yes, it’s safe to pressure wash tires — just keep the nozzle at least 6–8 inches away from the rubber and avoid directing high-pressure water into the tire valve stem.

[RECOMMENDED – Electric Pressure Washer]

Step 3: Apply Tire Cleaner or Degreaser

Spray your tire cleaner or degreaser evenly across the entire tire sidewall, working around the full circumference. Don’t forget the inner shoulder and tread grooves if accessible.

Let the product dwell for 2–5 minutes. This gives the cleaning agents time to break down brake dust, road grime, grease, and oxidized rubber. Don’t let it dry completely — if you’re working in direct sunlight or heat, work one tire at a time.

For an eco-friendly option, look for biodegradable, pH-neutral tire cleaners that won’t harm your driveway, lawn, or nearby plants when they rinse off. (==>> Best Eco-Friendly Tire Cleaner)

Step 4: Scrub the Tires Thoroughly

This is where the real work happens. Using your stiff-bristle nylon brush, scrub the entire tire sidewall using firm circular motions. Pay extra attention to:

  • The sidewall lettering where grime tends to collect
  • The upper and lower bead areas near the rim
  • The tread grooves if accessible from outside

Apply firm but controlled pressure. If you’re dealing with heavy buildup, brown staining, or old tire dressing residue, you may need to repeat this step with a fresh application of cleaner before rinsing.

On Tire Blooming (Brown Tires): If your tires keep turning brown after cleaning, it’s likely antiozonant blooming — a natural chemical process. Using a water-based tire dressing after cleaning (rather than a solvent-based one) helps reduce this effect over time by not drawing out the antiozonants as aggressively.

Step 5: Clean the Wheel Area (Highly Recommended)

While your cleaner is working on the tires, take a moment to hit the rims with a dedicated wheel brush (Best Wheel Brush Set). Brake dust clings heavily to wheels, and cleaning them alongside the tires gives you a complete, cohesive result.

Use a smaller detail brush to get into lug nut recesses and tight spoke gaps. For this step, a non-acidic wheel cleaner is the safest choice — acidic formulas can damage certain wheel finishes, particularly polished aluminum.

Step 6: Rinse Thoroughly

Rinse each tire completely, making sure all cleaner, loosened grime, and degreaser residue is fully removed. Work methodically around the entire tire and check for any missed spots or remaining brown staining.

A clean rinse is critical before applying any tire dressing — residue trapped under tire shine will look uneven and won’t adhere properly.

Step 7: Dry the Tires Completely

Use a clean microfiber towel to dry each tire before applying protectant or tire shine. This prevents water spots, streaking, and dilution of any product you apply next.

Don’t skip this step — even if you’re in a hurry. Wet tire dressing application is one of the most common causes of sling (product flinging off the tire while driving) and blotchy, uneven finishes.


How to Apply Tire Shine for a Like-New Look

Tire shine is optional, but it makes a dramatic visual difference and provides UV protection that slows future fading and cracking. Here’s what you need to know:

Two Main Types of Tire Shine:

TypeFinishBest For
Water-basedNatural, matte-satinDaily drivers, a clean OEM look
Silicone-basedHigh gloss, wet lookShow cars, max visual impact

Water-based formulas are generally preferred for long-term rubber health since silicone-based products can occasionally accelerate antiozonant migration over repeated use.

Application Steps:

  1. Apply a small amount of tire shine to a foam applicator pad (Best Foam Applicator Pad)
  2. Spread in thin, even strokes across the sidewall only — avoid the tread area entirely
  3. Allow to absorb for 5–10 minutes before moving the vehicle
  4. Wipe away any excess with a clean microfiber cloth

Safety Note: Never apply tire shine to the tread surface. It creates a dangerously slippery contact patch and is a significant road hazard. Sidewalls only, always.


DIY Homemade Tire Cleaning Solutions

Don’t have a commercial tire cleaner on hand? These household solutions work surprisingly well and cost almost nothing.

Baking Soda Method

Mix 2–3 tablespoons of baking soda with a squirt of dish soap and enough warm water to form a thin paste. Apply directly to the tire and scrub with your brush. The baking soda acts as a gentle abrasive, making this ideal for light surface dirt and mild browning.

Dish Soap Solution

A few tablespoons of Dawn (or any grease-cutting dish soap) in a bucket of warm water is one of the most effective and budget-friendly tire cleaners available. It cuts through road grease and grime effectively and rinses cleanly. Best for regular maintenance cleaning between deeper sessions.

White Vinegar-Based Cleaner

Mix equal parts white vinegar and water in a spray bottle. This mild acidic solution works well for light grime and helps neutralize some mineral deposits from road salt. It’s a solid eco-friendly option, though it’s less effective on heavy brake dust or deep staining than a dedicated cleaner.

What NOT to use: Bleach, steel wool, or abrasive household scrubbers. Bleach degrades rubber compounds over time and can cause premature cracking. Abrasive pads strip the protective surface layer from tire sidewalls. Stick to the solutions above for safe, effective cleaning.


Common Tire Cleaning Mistakes to Avoid

Even well-intentioned car owners make these errors. Here’s what to watch out for:

  • Cleaning hot tires — Always let tires cool before applying any chemical cleaner
  • Using the same brush on tires and paint — Cross-contamination can scratch your clear coat
  • Skipping the pre-rinse — Scrubbing dry, dirty tires causes micro-abrasion damage
  • Overapplying tire shine — More product doesn’t equal better results; thin coats adhere better and last longer
  • Ignoring tire sidewalls — The sidewall is the most visible part of the tire and the area most prone to UV damage and cracking; never skip it
  • Using solvent-based dressings repeatedly — These can accelerate tire blooming over time

Pro Tips for Longer-Lasting Clean Tires

  • Clean tires every 2–3 weeks as part of your regular car washing routine — it’s far easier to maintain clean tires than to deep-clean neglected ones
  • Apply a UV-protective tire dressing after every cleaning session to slow oxidation and fading
  • Park in shaded areas when possible — prolonged sun exposure accelerates both tire browning and rubber degradation
  • Use dedicated tire brushes and label them so you never accidentally grab the wrong one
  • Consider a tire sealant or conditioner for older tires showing signs of oxidation — these products penetrate the rubber to condition from within (Best Tire Conditioner/Sealant)

Recommended Products at a Glance

(Affiliate links — update with your links before publishing)

Product CategoryRecommended PickBest For
Tire Cleaner SprayCAR GUYS Super CleanerBeginners and regular use
Professional DegreaserHolley Tire ShineHeavy buildup, neglected tires
Stiff Tire BrushTire Brush for CleaningEffective sidewall scrubbing
Wheel Brush Set9Pcs Wheel & Tire Brush KitRims and tight spoke areas
Microfiber Towel PackChemical Guys SetDrying and product application
Electric Pressure WasherWestinghouse ePX3500Great for Automobiles
High-Gloss Tire ShineChemical Guys Tire KickerShow-quality wet look
Microfiber Applicator PadsFONAROLL Microfiber PadsPrecise tire shine application
Tire ConditionerAero CosmeticsOlder/oxidized tires

Frequently Asked Questions

How often should I clean my car tires?
Every 2–3 weeks is ideal for most drivers. If you live in a region with heavy road salt, mud, or frequent rain, consider cleaning them weekly. Regular maintenance cleaning is much faster and easier than occasional deep cleaning of badly neglected tires.

Can I use dish soap on tires?
Yes — dish soap is one of the best budget-friendly options for DIY tire cleaning. A grease-cutting formula like Dawn effectively removes road grime and light brake dust. Just avoid using it repeatedly on your painted surfaces or trim, as it can strip wax.

Do I need tire shine?
You don’t need it, but it significantly improves appearance and adds UV protection that slows fading, browning, and sidewall cracking. If you want your tires to look new longer, a water-based tire dressing is worth adding to your routine.

Is pressure washing safe for tires?
Yes, with appropriate technique. Keep the nozzle 6–8 inches from the tire surface, use a wide fan spray rather than a pinpoint jet, and avoid directing high-pressure water into the valve stem or between the tire bead and rim.

What’s the best homemade tire cleaner?
A mix of dish soap, baking soda, and warm water is the most effective and versatile homemade option. For a spray solution, equal parts white vinegar and water works well for light maintenance. For heavy buildup, a commercial degreaser is your best bet.

Why do my tires keep turning brown after I clean them?
This is called tire blooming — a natural process where antiozonant chemicals (added by manufacturers to protect rubber from ozone cracking) migrate to the tire surface and oxidize, creating a brown tinge. It’s not harmful, but it’s cosmetically annoying. Using a water-based tire dressing after each cleaning session helps slow the process significantly.


Conclusion

Knowing how to clean car tires at home is one of the simplest, highest-impact car care skills you can develop. The process takes less than 30 minutes, requires no professional equipment, and delivers results that dramatically improve how your entire vehicle looks and wears over time.

To recap: rinse first, apply cleaner and let it dwell, scrub thoroughly with a dedicated tire brush, clean the wheels while you’re at it, rinse completely, dry, and finish with a quality tire dressing for protection and shine. Do it every few weeks, use the right tools, and avoid the common mistakes — and your tires will stay cleaner, longer, with far less effort.

The difference between a car that looks well-maintained and one that doesn’t often comes down to the details. Clean tires are one of the easiest details to get right.

Ready to get started? Check out the recommended products above to build your home tire detailing kit — and check out our related guides on [Can You Fix Car Paint Chips Yourself? DIY Guide to Touch-Ups] and [How to Wax a Car by Hand: Step-by-Step Guide for a Showroom Shine] for more ways to level up your car care routine.

Disclaimer: This article contains affiliate links. If you purchase an item through the link I will earn a small commission at no extra cost to you.
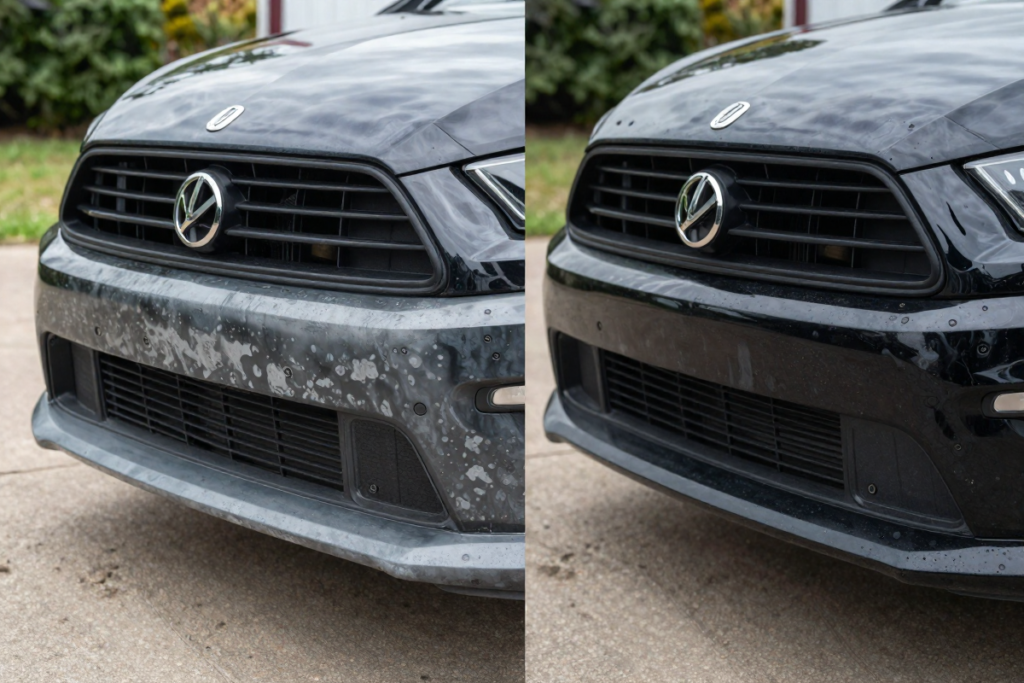
Faded Car Plastic: How to Revive Chalky Trim and Make It Shine Again

You’ve just finished washing your car, and it looks fantastic—except for one glaring problem. The black plastic trim around your doors, bumpers, and fender flares has turned an embarrassing shade of dull gray. That chalky, weathered appearance stands out like a sore thumb, aging your otherwise clean vehicle by years.

If this sounds familiar, you’re not alone. Faded car plastic is one of the most common cosmetic issues vehicle owners face, regardless of whether they drive a brand-new SUV or a ten-year-old sedan. The good news? You don’t need to replace those expensive trim pieces or visit a professional detailer. With the right approach, you can restore that deep, rich black finish yourself—and make it last.

In this comprehensive guide, we’ll walk you through everything you need to know about reviving chalky plastic trim, from understanding what causes the damage to choosing between quick fixes and permanent solutions.

What Causes Faded Car Plastic?

Before you can fix faded plastic trim, it helps to understand why it happens in the first place.

UV Damage and Oxidation: The Primary Culprits

The main villain behind that chalky appearance is ultraviolet (UV) radiation from the sun. Most automotive plastic trim is made from polypropylene or ABS plastic, which contains oils and plasticizers that give it flexibility and that deep black color. When UV rays bombard these materials day after day, they break down the molecular structure—a process called oxidation.

As oxidation progresses, those essential oils migrate to the surface and evaporate, leaving behind a dry, porous surface. The plastic literally loses its color at a molecular level, turning from black to gray or white. This isn’t just surface dirt you can wash off—it’s actual degradation of the material itself.

Environmental Factors That Accelerate Fading

UV exposure isn’t the only factor at play. Several environmental conditions speed up plastic deterioration:

  • Heat and temperature fluctuations: Extreme heat causes plastics to expand and contract, accelerating oil loss
  • Road salt and chemicals: Winter road treatments and harsh car wash chemicals strip protective layers
  • Improper washing habits: Using aggressive degreasers or abrasive brushes damages plastic surfaces
  • Moisture and humidity: Water penetration leads to deeper oxidation

Surface Fading vs. Deep Oxidation

Understanding the severity of your trim’s condition is crucial:

Surface fading appears as a light gray or slightly chalky texture. The plastic still retains some flexibility and hasn’t become brittle. This level of damage is highly reversible.

Deep oxidation manifests as a completely white, chalky coating that may even feel powdery to the touch. The plastic often becomes stiff and brittle. While still treatable, severely oxidized trim requires more aggressive restoration methods—and results may be less permanent.

Why Even New Cars Experience This Problem

You might assume newer vehicles would be immune to faded plastic, but that’s not always the case. Modern manufacturing often uses unpainted plastic trim to reduce costs and weight. While some manufacturers add UV inhibitors to their plastics, these additives gradually deplete over time. A car parked outside in a sunny climate can develop noticeable fading in as little as 12-18 months.

Can Faded Plastic Be Fully Restored?

Let’s set realistic expectations right from the start: it depends on the severity of the damage.

The Honest Answer

Light to moderate fading can absolutely be restored to near-original condition, often with impressive results that last months or even years with proper maintenance. Severely oxidized trim with deep white chalking can be significantly improved, but may never look factory-fresh again without more permanent solutions like dyeing or coating.

Temporary vs. Long-Term Restoration

This is a crucial distinction that affects which method you choose:

Temporary solutions (typically 3-6 months):

  • Trim restorer gels and liquids
  • Dressing products
  • Oil-based treatments

These products work by depositing pigments, oils, or silicones onto the surface to temporarily darken the plastic and create shine. They’re easy to apply but require regular reapplication.

Long-term solutions (6 months to 2+ years):

  • Ceramic coatings for plastic
  • Permanent trim dyes
  • Heat gun restoration (when done properly)

These methods either penetrate deeper into the plastic or create a bonded protective layer that resists UV damage and washing.

When Restoration Works Best

You’ll achieve the most dramatic results when:

  • Fading is light to moderate (gray, not completely white)
  • The plastic hasn’t become brittle or cracked
  • You’re willing to properly prep the surface
  • You choose the appropriate restoration method for your situation

When Replacement Might Be Necessary

Sometimes restoration isn’t worth the effort:

  • Physical damage (cracks, breaks, or chunks missing)
  • Extreme brittleness that causes the plastic to crumble
  • Warping or deformation from previous heat damage
  • When the cost of quality restoration products approaches replacement part prices

Best Methods to Restore Faded Car Plastic

Now let’s dive into the restoration methods that actually work, ranked from easiest to most advanced.

A. Quick Fix: Trim Restorer Products (Most Popular Solution)

Trim restorers are the go-to solution for most car owners, and for good reason.

What they are and how they work:

Trim restorers are specially formulated liquids or gels that combine darkening agents (pigments and dyes) with polymers or oils that penetrate the plastic surface. They essentially “re-oil” the dried-out plastic while depositing color to mask the gray oxidation.

[RECOMMENDED: Meguiar’s Ultimate Black Plastic Restorer]

Pros:

  • Fast application: Most products take 10-15 minutes for an entire vehicle
  • Beginner-friendly: No special skills or tools required
  • Immediate results: Dramatic before-and-after transformation
  • Affordable: Typically $15-30 per bottle
  • Forgiving: Mistakes are easily correctable

Cons:

  • Limited longevity: Results typically last 3-6 months depending on conditions
  • Requires reapplication: Becomes part of your regular car care routine
  • Variable quality: Not all products perform equally
  • Can attract dust: Some formulations leave a slightly sticky residue

Best for: Daily drivers, budget-conscious owners, those wanting quick results without commitment.

B. Heat Gun Method (Advanced DIY Option)

This controversial method has gained popularity through viral videos showing dramatic transformations—but it comes with significant risks.

How it works:

A heat gun (or sometimes a propane torch) is carefully applied to faded plastic trim. The heat temporarily brings the oils within the plastic back to the surface, reversing the appearance of oxidation. When done correctly, results can be impressive and relatively long-lasting.

Step-by-step overview:

  1. Thoroughly clean and dry the trim
  2. Mask surrounding painted areas with tape
  3. Apply heat evenly using sweeping motions
  4. Watch for the color to return (plastic darkens)
  5. Avoid overheating any single spot
  6. Allow to cool completely before touching

[RECOMMENDED: Heat gun with temperature control and
Heat-Resistant Work Gloves]

Risks you need to know:

  • Warping and melting: Too much heat permanently deforms plastic
  • Uneven finish: Requires steady hand and consistent technique
  • Fire hazard: Open flames or extreme heat near fuel systems and paint
  • Shortened plastic lifespan: Heat accelerates long-term degradation
  • Limited effectiveness on deeply oxidized trim

Our recommendation: While this method can work, we generally advise against it for beginners. The risk of permanent damage outweighs the benefits, especially when safer alternatives produce comparable or better results. If you do attempt this method, practice on inconspicuous areas first and invest in a quality heat gun with precise temperature control.

C. Permanent Restoration Solutions (Long-Term Fix)

For those seeking results that truly last, these advanced solutions deliver.

1. Ceramic Coatings for Plastic Trim

Ceramic coatings have revolutionized automotive detailing, and trim-specific formulations offer exceptional durability.

How they work:

Unlike traditional dressings that sit on the surface, ceramic coatings create a chemical bond with the plastic through a process called cross-linking. The coating forms a semi-permanent layer that’s highly resistant to UV rays, chemicals, and washing.

[RECOMMENDED: Cerakote Ceramic Trim Coat Restoration Kit]

Benefits:

  • Extreme longevity: 1-2+ years with proper application
  • Matte or satin finish: Looks factory-fresh, not overly shiny
  • UV protection: Prevents future fading
  • Hydrophobic properties: Repels water and contaminants
  • Wash-resistant: Won’t wash away like traditional dressings

Application requirements:

  • Meticulous surface preparation (the coating bonds to whatever’s there)
  • Proper application technique (many require layering)
  • Curing time (often 24 hours before water exposure)
  • Higher cost ($30-70 per application)

[SURFACE PREP NEEDS: Isopropyl alcohol, applicator, and microfiber towels]

Best for: Enthusiasts, newer vehicles, those wanting the longest-lasting professional-grade results.

2. Plastic Dye and Permanent Restorer Kits

These products actually dye the plastic rather than just coating it.

Difference between dye and dressing:

Traditional dressings sit on top of the plastic and wash away gradually. Dyes penetrate into the porous oxidized surface and chemically bond, creating a permanent color change. Think of it like dyeing fabric versus painting it.

Why this approach is more permanent:

Once the dye molecules bond with the plastic polymer structure, they can’t be washed away. The color becomes part of the plastic itself. Only UV exposure over many months will gradually fade the dye, and even then, you’re starting from a much better baseline than weathered gray plastic.

Popular options:

  • Back to Black Professional formula
  • Forever Black trim products
  • Specialized automotive plastic dyes

The trade-off is more involved application—you’ll need to thoroughly clean and sometimes lightly abrasive prep the surface for the dye to properly penetrate.

Step-by-Step Guide: How to Restore Faded Plastic Trim

Regardless of which restoration method you choose, proper preparation is critical. Here’s the complete process for achieving professional results.

Step 1: Thorough Cleaning

This is the most important step—and the one most people rush through or skip entirely.

Why cleaning matters:

Old dressings, wax, road grime, and oxidation residue prevent new products from bonding properly. If you apply a restorer over contamination, you’re essentially gluing it to dirt that will wash away in a few weeks.

What you’ll need:

[All-purpose cleaner]

[Detailing brushes with soft to medium bristles]

[Microfiber towels]

The process:

  1. Spray your chosen cleaner generously on the trim
  2. Agitate with a brush using firm circular motions
  3. You should see gray or brown residue coming off
  4. Wipe with a microfiber towel
  5. Repeat until the towel comes away clean
  6. For heavily contaminated trim, a second cleaning with a degreaser may be necessary

Pro tip: If you’ve used tire shine or dressings before, you may need to clean 2-3 times to remove all residue. Don’t skip this—it’s the difference between results that last weeks versus months.

Step 2: Surface Preparation

Now that the trim is clean, prepare it for product application.

Drying thoroughly:

Use a clean, dry microfiber towel to remove all moisture. For textured plastic, compressed air helps remove water from crevices.

Optional polishing for severe oxidation:

If your trim has heavy white chalking, consider a light polish before restoration:

  • Use a plastic-safe polish or extremely fine compound
  • Apply with a foam applicator pad
  • Work in small sections
  • This physically removes the oxidized surface layer
  • Wipe clean and dry completely

Isopropyl alcohol wipe:

For ceramic coatings or permanent dyes, a final wipe with 70% isopropyl alcohol ensures perfect surface cleanliness. This removes any oils (including from your hands) that could interfere with bonding.

Step 3: Applying the Restoration Product

Application technique varies by product type, but these principles apply universally.

General guidelines:

  • Work in the shade or a garage (never in direct sunlight)
  • Ensure surfaces are cool to the touch
  • Apply to one section at a time
  • Use an appropriate applicator for your product

For liquid restorers:

[Foam applicator pads (4 Pack)]

  1. Apply product to the applicator, not directly to trim
  2. Use even, overlapping strokes
  3. Work the product into textured areas
  4. Less is more—you can always add another layer

For ceramic coatings:

  1. Follow manufacturer instructions precisely
  2. Apply thin, even coats
  3. Some products require cross-hatching (vertical then horizontal passes)
  4. Watch for “flashing” (when the coating begins to cure)
  5. Remove excess immediately according to product directions

Common mistakes to avoid:

  • Over-applying: More product doesn’t equal better results, just waste and potential streaking
  • Uneven spreading: Creates blotchy appearance with dark and light areas
  • Getting product on paint or glass: Mask adjacent areas or work carefully
  • Rushing the process: Take your time for even coverage

Step 4: Buffing and Finishing

This step separates good results from great ones.

For traditional restorers:

After allowing the product to sit for the recommended time (usually 5-10 minutes):

  1. Use a clean microfiber towel
  2. Buff with light pressure using circular motions
  3. This removes excess product and evens out the finish
  4. Continue until the desired sheen is achieved
  5. Flip to a fresh section of towel frequently

Avoiding streaks:

Streaks typically occur from:

  • Too much product in one area
  • Not buffing thoroughly
  • Using a dirty or saturated towel
  • Applying in direct sunlight (causes flash drying)

If you notice streaks, apply a tiny amount more product and re-buff the area.

Achieving the right finish:

Most quality trim restorers produce a natural satin finish, not a high-gloss shine (which looks artificial on textured plastic). If your product dries too glossy, a light buff with a dry towel can tone it down.

Step 5: Curing and Protection

Don’t ruin your hard work by exposing your restoration too soon.

Letting the product set:

  • Traditional restorers: Allow at least 1-2 hours before driving
  • Ceramic coatings: Follow specific curing times (often 24-48 hours)
  • Dyes: May require 12-24 hours to fully bond

Avoiding water exposure:

Most products need time to fully cure before getting wet:

  • Don’t wash your car for at least 24 hours (48 hours for ceramics)
  • Avoid driving in rain if possible during curing period
  • Water exposure during curing can cause streaking or uneven finish
  • Morning dew is generally fine after the minimum curing time

Enhancing longevity:

Once cured, your restoration will last longer if you:

  • Park in shade when possible
  • Use pH-neutral car wash soap
  • Avoid tire shine overspray on trim
  • Reapply UV protectant periodically (for non-ceramic solutions)

Before and After: What Results Should You Expect?

Let’s set realistic expectations based on your trim’s condition and chosen restoration method.

Realistic Expectations by Damage Level

Slight fading (light gray):

  • Budget restorer: Excellent results, 85-95% restoration to original black
  • Ceramic coating: Near-perfect restoration, maintains appearance for 18+ months
  • Longevity: 4-6 months (restorer) to 2+ years (ceramic)

Moderate fading (medium gray with some chalking):

  • Budget restorer: Good results, 70-85% restoration
  • Premium restorer/dye: Excellent results, 85-95% restoration
  • Ceramic coating: Outstanding results approaching 95%
  • Longevity: 3-4 months (budget) to 12-18 months (ceramic)

Severe oxidation (white/heavily chalky):

  • Budget restorer: Fair to good results, 60-75% improvement
  • Dye or ceramic: Good to excellent results, 75-90% improvement
  • May require multiple applications or aggressive prep
  • Longevity: 2-3 months (budget) to 8-12 months (ceramic)

Product Longevity Comparison

Budget trim restorers ($10-20):

  • Duration: 6-12 weeks with washing
  • Best for: Quick fixes, cars washed frequently, budget-conscious buyers
  • Reapplication: Every 2-3 months

Premium trim restorers ($20-40):

  • Duration: 3-6 months
  • Best for: Regular maintenance, balanced performance/cost
  • Reapplication: 2-3 times per year

Ceramic coatings ($40-70):

  • Duration: 12-24+ months
  • Best for: Long-term protection, enthusiast vehicles, minimal maintenance
  • Reapplication: Annually or less

Permanent dyes ($25-50):

  • Duration: 12-18 months before noticeable fading
  • Best for: Severely faded trim, permanent solution
  • Reapplication: Once yearly

Maintenance Requirements

To maximize longevity regardless of product:

  • Wash regularly with pH-neutral soap (prevents buildup that degrades products)
  • Avoid automatic car washes with harsh brushes that strip protection
  • Reapply before complete fading (easier to maintain than fully restore)
  • Add UV protectant every few months for non-ceramic solutions

[RECOMMENDED: pH-neutral car wash soap and UV protectant spray]

How to Keep Car Plastic from Fading Again

Prevention is always easier than restoration. Here’s how to protect your investment.

A. Use UV Protectants

Why UV protection matters:

Even after restoration, your trim remains vulnerable to the same UV radiation that caused the original fading. UV protectant sprays contain ingredients that absorb or reflect harmful rays, acting like sunscreen for your plastic.

[TRY THIS: 303 Aerospace Protectant]

Application schedule:

  • After ceramic coating: Not necessary (coating provides UV protection)
  • After traditional restorer: Apply UV protectant every 4-6 weeks
  • Year-round: Even in winter, UV rays damage plastic

How to apply:

  1. Clean trim with quick detailer or water
  2. Spray protectant onto applicator pad
  3. Apply thin, even coat to all plastic surfaces
  4. Buff to desired sheen
  5. Takes just 5 minutes during regular car care

B. Proper Washing Techniques

How you wash your car significantly impacts trim longevity.

Best practices:

  • Use pH-neutral car soap: Harsh degreasers strip protective layers
  • Two-bucket method: Prevents recontaminating wash mitt with dirt
  • Soft wash mitts or microfiber towels: Avoid stiff brushes on trim
  • Rinse thoroughly: Soap residue accelerates fading
  • Dry completely: Water spots on trim can create uneven fading

What to avoid:

  • Automatic car washes with harsh chemicals and abrasive brushes
  • Household cleaners (dish soap, all-purpose cleaners) that strip protection
  • Pressure washing directly at trim edges (can lift coatings)
  • Tire shine overspray on trim (creates uneven, greasy buildup)

C. Parking Habits That Protect Trim

Where you park matters more than you might think.

Shade whenever possible:

  • Reduces UV exposure by 60-80%
  • Lowers surface temperatures that accelerate oil evaporation
  • Even partial shade helps significantly

Garages are ideal:

  • Complete UV protection
  • Stable temperatures prevent expansion/contraction cycles
  • Worth the effort if available

Car covers for long-term storage:

  • Essential for vehicles parked outdoors for extended periods
  • Use breathable covers to prevent moisture trapping
  • Particularly important in harsh climates

Strategic parking:

  • Face your car to minimize sun exposure on the most faded side
  • Park near buildings or trees when no garage is available
  • Avoid reflective surfaces (white buildings) that intensify UV exposure

Common Mistakes to Avoid

Learn from others’ errors to save time, money, and frustration.

Using Tire Shine on Trim

This is perhaps the most common mistake.

Why it’s problematic:

Tire shine products are formulated for rubber, not plastic. They typically contain:

  • Heavy silicones that attract dirt and dust
  • Petroleum distillates that can accelerate plastic breakdown
  • Glossy finishes that look unnatural on textured plastic trim

The result: A greasy, dust-magnet surface that looks worse within days and may actually accelerate long-term fading.

The solution: Use products specifically designed for plastic trim. They’re formulated to penetrate plastic’s porous surface and provide appropriate finish levels.

Skipping the Cleaning Step

We mentioned this earlier, but it bears repeating: surface preparation determines longevity.

Applying any product over old dressings or contamination means you’re bonding your new product to residue that will wash away, taking your fresh restoration with it. Those impressive before-and-after results you’re hoping for won’t last more than a couple washes.

Spend 80% of your time on prep and 20% on application for the best results.

Applying in Direct Sunlight

Direct sunlight causes several problems:

  • Products flash-dry before you can spread them evenly
  • Creates streaking and blotchy appearance
  • Reduces product penetration into the plastic
  • Makes achieving consistent coverage nearly impossible

Always work in shade or inside a garage. If you must work outside, do it early morning or evening when surfaces are cool and sun angles are low.

Using Household Products

The internet is full of “life hacks” claiming you can restore trim with:

  • Peanut butter
  • Olive oil
  • WD-40
  • Vaseline

The truth: While these may temporarily darken plastic, they:

  • Don’t provide UV protection
  • Wash away immediately
  • Attract dirt and grime
  • Can accelerate long-term degradation
  • Look greasy and unnatural

Quality trim restoration products cost $15-30 and are specifically engineered for this purpose. Don’t compromise results to save a few dollars with inappropriate substitutes.

DIY vs Professional Detailing: Which Is Better?

Let’s break down the cost-benefit analysis.

Cost Comparison

DIY restoration:

  • Basic approach: $20-40 (cleaner + restorer + applicators)
  • Premium approach: $60-100 (degreaser + prep kit + ceramic coating)
  • Tool investment: $15-30 (brushes, towels, applicators – reusable)
  • Time investment: 1-3 hours depending on vehicle size

Professional detailing:

  • Trim restoration service: $75-200 (standalone service)
  • Full exterior detail with trim: $150-400
  • Ceramic coating package: $300-1,000+ (usually includes trim)
  • Time investment: Drop-off service, 0 hours of your time

Results Comparison

DIY can achieve professional results when:

  • You follow proper preparation techniques
  • You use quality products appropriate for your trim’s condition
  • You take your time and work methodically
  • You’re willing to learn and potentially redo areas

Professional detailing advantages:

  • Experience with challenging cases (severely oxidized trim)
  • Commercial-grade products not available to consumers
  • Specialized tools and perfect working environment
  • Warranty or satisfaction guarantees
  • Consistent, even results across entire vehicle

DIY advantages:

  • Significant cost savings (70-90% less expensive)
  • Learn valuable skills for ongoing maintenance
  • Satisfaction of doing it yourself
  • Ability to take breaks and work at your own pace
  • No appointment scheduling necessary

When to Hire a Professional

Consider professional service when:

  • You have severe oxidation across the entire vehicle (would take many hours DIY)
  • Your time is more valuable than the cost difference
  • You’re considering ceramic coating and want professional application
  • You lack confidence in achieving even results
  • Your vehicle is high-value and you want guaranteed outcomes
  • You’re combining trim restoration with paint correction or full detail

When DIY Makes Sense

Go the DIY route when:

  • You have light to moderate fading
  • You enjoy car care and detailing
  • Budget is a primary concern
  • You want to maintain results yourself long-term
  • You’re willing to invest time learning proper techniques
  • Your schedule doesn’t align with detailer availability

Bottom line: For most car owners with typical fading, DIY restoration offers the best value. The products work extremely well, and with proper technique, you can achieve 90% of professional results for a fraction of the cost.

Frequently Asked Questions

How long does trim restorer last?

Answer: It depends on the product type and environmental conditions:

  • Budget restorers: 6-12 weeks with regular washing
  • Premium restorers: 3-6 months
  • Ceramic coatings: 12-24+ months
  • Permanent dyes: 12-18 months

Longevity decreases with frequent washing, sun exposure, and harsh weather. Cars parked in garages see significantly longer-lasting results.

Does WD-40 fix faded plastic?

Answer: WD-40 can temporarily darken faded plastic by depositing oils on the surface, but it’s not a proper solution.

Why not to use it:

  • Washes away after one or two rain showers
  • Attracts dirt and dust heavily
  • Provides zero UV protection
  • Creates greasy appearance
  • No actual restoration—just temporary masking

Invest in actual trim restoration products for lasting results.

Can you paint plastic trim?

Answer: Yes, but it’s more complicated than restoration and not always recommended.

The process involves:

  • Thorough cleaning and degreasing
  • Light sanding to create adhesion
  • Plastic-specific adhesion promoter
  • Multiple thin coats of plastic trim paint
  • Clear coat for durability (optional)

Considerations:

  • Paint may crack or peel if plastic flexes
  • Chips and scratches show more obviously than with restored plastic
  • Requires more skill than using restoration products
  • Permanent solution that can’t easily be undone

Best for: Severely damaged trim beyond restoration, or color-change projects. For typical fading, restoration products deliver better, more natural-looking results.

What is the best product for faded car trim?

Answer: It depends on your priorities:

Best overall value: Solution Finish Black Plastic & Trim Restorer—excellent results, good longevity (4-6 months), easy application

Best longevity: Cerakote Trim Coat or similar ceramic coating—lasts 18-24+ months with proper application

Best budget option: Meguiar’s Ultimate Black Plastic Restorer—affordable, easy to find, delivers good results for 2-3 months

Best for severe oxidation: CarPro PERL or Chemical Guys VRP (diluted)—penetrates deeply, can be layered

Is it worth restoring or replacing?

Answer: Restoration is almost always the better choice unless:

Restore when:

  • Trim is faded but not physically damaged
  • Replacement parts cost more than $100
  • You want to maintain original appearance
  • Fading is the only issue

Replace when:

  • Trim is cracked, broken, or warped
  • Plastic has become brittle and crumbles
  • Previous heat gun damage has caused melting
  • You’re doing a full restoration/modification project
  • Replacement parts are inexpensive (under $50)

Most faded trim can be restored to 80-95% of original appearance for under $50 in products, while replacement trim can cost $200-600+ for a full vehicle depending on make and model.

Conclusion

Faded, chalky plastic trim doesn’t have to ruin your car’s appearance or require expensive replacements. Whether you’re dealing with light gray fading or severe white oxidation, there’s a restoration solution that fits your budget, skill level, and time commitment.

The key takeaways:

  • Proper preparation is everything—spend time cleaning and prepping for lasting results
  • Match the solution to your situation—quick restorers for maintenance, ceramic coatings for longevity
  • Prevention pays dividends—regular UV protection and proper washing extend restoration dramatically
  • DIY delivers real value—you can achieve professional-quality results with the right products and techniques

Ready to transform your car’s appearance? Start with a thorough cleaning, choose a restoration product that matches your goals, and follow the step-by-step process we’ve outlined. In just a few hours, you can turn dull, gray plastic back to deep, rich black—and keep it that way with simple maintenance.

[GET STARTED WITH THIS: Chemical Guys Plastic Trim Restore Kit]

Your car deserves to look its best. With the knowledge you’ve gained from this guide, those chalky trim pieces that have been bothering you for months can become a satisfying DIY success story this weekend.

Disclaimer: This article contains affiliate links. If you purchase an item through the link I will earn a small commission at no extra cost to you.
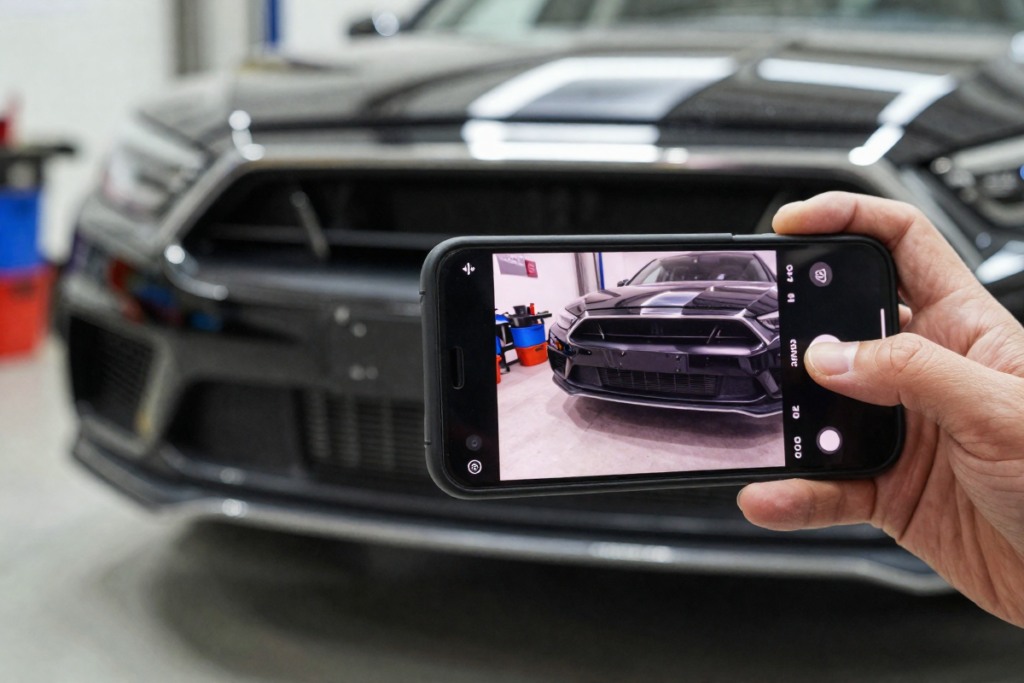
How to Wax a Car by Hand: Step-by-Step Guide for a Showroom Shine

Introduction

There’s something deeply satisfying about stepping back and seeing your car gleam like it just rolled off the showroom floor and you did it yourself. While dual-action polishers and detailing machines have their place, hand waxing your car remains one of the most rewarding, beginner-friendly, and cost-effective ways to protect your vehicle’s paint and bring out a deep, glossy shine.

Whether you’re a first-timer looking to learn the basics or a weekend warrior wanting to sharpen your technique, this comprehensive guide walks you through everything you need to know about how to wax a car by hand, from choosing the right products to buffing off the last trace of haze for a mirror-like finish.

In this guide, you’ll learn:

  • Why hand waxing is still the preferred method for many car enthusiasts
  • Exactly which tools and products you need (with buying tips)
  • A complete step-by-step waxing process with pro techniques
  • How to avoid the most common hand waxing mistakes
  • Our top product recommendations for every budget and paint type

Why Waxing Your Car Matters

Before diving into the how-to, it’s worth understanding why regular waxing is one of the most valuable habits you can build as a car owner.

Protection from the elements: UV rays are one of the biggest threats to your car’s paint. Over time, prolonged sun exposure causes paint to fade, oxidize, and develop that dull, chalky appearance. A good coat of wax creates a sacrificial barrier between your paint and the sun, dramatically slowing this process.

Defense against contaminants: Bird droppings, tree sap, road tar, and industrial fallout are mildly acidic and can etch into unprotected paint if left too long. Wax forms a protective layer that makes it far easier to remove these contaminants before they cause lasting damage.

Enhanced shine and depth: Wax fills in micro-scratches and surface imperfections, producing the glossy, “wet-look” finish that makes paint appear richer and more vibrant.

Maintained resale value: A well-maintained exterior communicates to buyers that the vehicle has been cared for. Regular waxing helps preserve that like-new appearance that commands a better price.

Quick note on waxing vs. polishing: Many beginners confuse these two processes. Polishing is a corrective step that removes surface defects (scratches, oxidation) using mild abrasives. Waxing is a protective step that seals and shines the paint. Ideally, you polish first and wax second but if your paint is in good condition, waxing alone is perfectly fine.

Hand Waxing vs. Machine Waxing

Both methods can produce excellent results, but each has its ideal use case.

Advantages of hand waxing:

  • No equipment investment — foam applicator pads cost just a few dollars
  • Greater control on curves, edges, and trim-adjacent areas
  • Far gentler — virtually eliminates the risk of burning through thin clear coat
  • Perfect for light maintenance coats between full details
  • Easy to do in a garage, driveway, or parking garage

Downsides of hand waxing:

  • More time-consuming than machine application
  • More physical effort, especially on larger vehicles

Bottom line: If you have a machine polisher and the experience to use it safely, it can speed up the process. But for most car owners, especially beginners, those with dark or delicate paint, or anyone without a DA polisher, hand waxing a car is the smarter, safer choice.

Tools and Materials You’ll Need

Gathering the right supplies before you start will make the entire process smoother. Here’s what you need and what to look for when buying:

Car Wax (Paste, Liquid, or Spray)

This is the most important purchase. Each form has trade-offs:

  • Paste wax: Thicker, lasts longer, produces the deepest shine. Ideal for dark paint and show cars. Slightly more effort to apply and remove.
  • Liquid wax: Easier to spread and buff off. Great for beginners and large vehicles. Still offers solid protection.
  • Spray wax: Fastest to apply, least durable (2–4 weeks). Best used as a maintenance coat between full waxes, not as a primary application.

👉 [Our Pick: Best Car Wax for Hand Application]

Foam Applicator Pads

Foam pads distribute wax evenly without scratching. Look for dense, smooth-faced foam pads rather than open-cell sponges. Keep a few on hand so you can swap out when one becomes saturated.

👉 [PRODUCT: Foam Applicator Pads]

Microfiber Towels

The most important tool for buffing. Use plush, high-GSM (grams per square meter) microfiber cloths; aim for 300–400 GSM minimum. Low-quality towels can cause micro-scratches. Have at least 4–6 clean towels available before you start.

👉 [BEST QUALITY: Microfiber Buffing Towels]

Car Wash Soap + Two-Bucket System

Use a dedicated car wash shampoo; never dish soap, which strips protective coatings. The two-bucket method (one for soapy water, one for rinsing your mitt) dramatically reduces swirl marks during the wash stage.

👉 [pH-Neutral: Car Wash Soap]

👉 [GREAT SET: Grit Guard + Bucket Set]

Clay Bar Kit (Optional but Recommended)

Before waxing, a clay bar removes bonded contaminants like tree sap, brake dust, and industrial fallout that washing can’t remove. Run your hand over the paint after washing and if it feels rough or gritty, claying is worth the extra 20 minutes.

👉 [GET IT HERE: Clay Bar Kit]

Preparing Your Car for Waxing

Wax applied to a dirty, wet, or contaminated surface simply won’t bond properly — and you risk trapping dirt particles under the wax, which can cause scratches during buffing. Prep is the step most beginners skip, and it’s the step that makes the biggest difference.

Step 1: Wash the Car Thoroughly

Use your two-bucket system and a quality microfiber wash mitt to remove all surface dirt, dust, and grime. Rinse from top to bottom, and don’t forget the wheel wells, lower rocker panels, and door jambs. A clean car is the only good canvas for wax.

Step 2: Dry Completely

Water left on the paint will prevent the wax from bonding. Use a clean, plush drying towel or chamois to dry the entire car. A quick detailer spray as a drying aid can help you achieve a streak-free result.

Step 3: Decontaminate with a Clay Bar (If Needed)

Fold your clay bar flat, spritz the panel with clay lubricant, and glide the clay in straight back-and-forth passes. You’ll feel (and hear) the clay picking up contaminants. Wipe the panel clean and move on. The paint should feel smooth like glass when you’re done.

Step 4: Work in the Right Environment

Shade is non-negotiable. Waxing in direct sunlight causes the product to dry too fast, making it nearly impossible to buff off cleanly and potentially leaving white residue baked into the paint. Aim for a cool, overcast day or work in your garage. Ideal temperatures are between 55°F and 85°F (13°C–29°C).

Step-by-Step Guide: How to Wax a Car by Hand

With your car clean, dry, and prepped, it’s time for the main event. Work one panel (hood, trunk lid, door, fender) at a time for the best results.

Step 1: Apply Wax to Your Applicator Pad

Dispense a small amount of wax — about the size of a quarter for paste wax, or a thin ribbon for liquid — directly onto your foam applicator. Less is more. Over-applying wastes product and makes buffing significantly harder.

💡 Pro Tip: Don’t apply wax directly to the paint. Always apply to the pad first for even distribution.

Step 2: Apply Wax to the Paint

Using light to medium pressure, spread the wax across the panel in overlapping, straight-line passes (back and forth, not circular). Work in small 2×2 foot sections for even coverage. Some detailers prefer circular motions — either method works as long as passes overlap and coverage is consistent. Avoid getting wax on rubber trim, plastic bumpers, or textured surfaces, as it can leave a white residue that’s hard to remove.

Step 3: Let the Wax Haze

Once you’ve covered a panel, let the wax sit and cure. You’ll notice it transitions from a wet sheen to a dull, hazy film — this is what you want. Depending on the product, ambient temperature, and humidity, this typically takes 2–5 minutes. Check the product’s directions, as some synthetic waxes can be removed immediately after application.

💡 Pro Tip: Do a ‘finger swipe’ test: drag a fingertip across the wax. If it comes away cleanly with no smearing, the wax is ready to buff.

Step 4: Buff Off the Wax

Fold a clean microfiber towel into quarters for a thick, even buffing surface. Using light pressure and straight-line strokes, buff away the haze. Flip your towel frequently — a saturated towel will push wax around rather than lift it. Use a second clean towel for a final light pass to eliminate any remaining haze or streaks.

💡 Pro Tip: Use ‘two-towel buffing’: one towel to lift the bulk of the wax, a second fresh towel to refine and reveal the final shine.

Step 5: Inspect and Apply a Second Coat (Optional)

Step back and inspect the panel in direct light or at a low angle. Look for any missed spots, uneven coverage, or swirl marks left by a dirty towel. For extra protection and depth — especially on dark-colored or show cars — apply a second thin coat after the first has fully cured (typically 20–30 minutes).

Common Mistakes to Avoid

Even experienced detailers occasionally fall into these traps. Being aware of them now will save you a lot of frustration:

  • Applying too much wax: Thick coats don’t provide more protection — they just create more work during buffing. Multiple thin coats are always better than one thick one.
  • Waxing in direct sunlight: This is the single most common mistake. Wax dries almost instantly in strong sunlight, making it nearly impossible to buff off without leaving residue.
  • Skipping surface prep: Waxing over a dirty or contaminated surface traps contaminants under the wax and can scratch the paint during buffing.
  • Using dirty or low-quality towels: Old cotton rags or cheap microfiber can scratch your clear coat. Invest in quality towels and keep them clean.
  • Not letting the wax haze properly: Buffing too early when the wax is still wet creates a smeared, streaky mess. Wait for that characteristic dull haze before buffing.
  • Getting wax on rubber or plastic trim: Wax can stain and discolor unpainted trim. If you do get wax on trim, remove it quickly with a dedicated trim cleaner.

Pro Tips for a Showroom Shine

Ready to take your results to the next level? These are the habits that separate a good wax job from a truly jaw-dropping one:

  • Layer for depth: Apply two or three thin coats, allowing each to cure before applying the next. Each additional layer adds depth and increases protection.
  • Use a detailing spray as a final step: A quick spritz of detail spray after your final buff adds an extra layer of gloss and helps remove any remaining haze.
  • Match your wax to your paint color: Carnauba-based waxes produce the warmest, deepest glow — ideal for black, dark red, and dark blue paint. Synthetic polymer waxes deliver a crisper, brighter shine well-suited to white and silver vehicles.
  • Maintain between full waxes: Use a spray wax or quick detailer every 2–3 weeks to extend the life of your wax coat and keep the paint looking fresh between full applications.
  • Work in a cross-hatch pattern: Apply wax in one direction (left to right), then buff in the perpendicular direction (top to bottom) for the most even coverage.

How Long Does Car Wax Last?

Wax durability depends on several factors working together. Understanding these helps you plan your maintenance schedule:

Wax type: Natural carnauba waxes typically last 4–6 weeks. Synthetic polymer waxes last longer — often 6–12 weeks. Hybrid ceramic waxes can last 3–6 months.

Exposure: Vehicles parked outdoors in hot, sunny climates will see wax break down significantly faster than garage-kept cars.

Washing frequency: Frequent washing — especially with harsh soaps or automated car washes with bristle brushes — accelerates wax wear.

Signs it’s time to re-wax: Water no longer beads up and sheets off the paint (it sits flat instead). The paint looks dull even after washing. You can feel microscopic texture when running your hand over clean paint.

💡 Pro Tip: The water bead test is the simplest way to know when your car needs waxing: splash a little water on the paint. If it beads up into tight droplets, you’re still protected. If it spreads flat, it’s time to wax.

Best Car Waxes for Hand Application (Top Picks)

Based on performance, ease of use, and value, here are five waxes we recommend for hand application. Whether you’re a first-timer or a seasoned detailer, there’s an option for you.

ProductTypeBest ForDurabilityDifficulty
Meguiar’s Gold ClassPasteBeginners & daily drivers4–6 weeksEasy
Chemical Guys Butter Wet WaxLiquidShowroom shine seekers6–8 weeksEasy
Collinite 845 Insulator WaxLiquidLongevity + protection6–12 weeksModerate
P21S Concours CarnaubaPastePremium/dark paint finish4–8 weeksModerate
Turtle Wax ICE LiquidLiquidBudget-conscious beginners4–6 weeksEasy

1. Meguiar’s Gold Class Carnauba Plus

An excellent all-rounder and the top choice for beginners. It spreads easily, hazes quickly, and buffs off with minimal effort. The result is a warm, glossy shine with solid UV protection. Ideal for daily drivers on any paint color.

👉 [PRODUCT OPTION 1 : Meguiar’s Gold Class Carnauba Plus]

2. Chemical Guys Butter Wet Wax

If showroom shine is the goal, Chemical Guys delivers. This liquid wax spreads like butter (hence the name) and produces a deep, wet-look gloss that’s especially stunning on dark paint. Easy enough for beginners, impressive enough for enthusiasts.

👉 [PRODUCT OPTION 2: Chemical Guys Butter Wet Wax]

3. Collinite 845 Insulator Wax

The go-to wax for longevity. Collinite 845 is beloved by detailing enthusiasts for its exceptional durability — many report it outlasting other waxes by weeks in harsh weather. It requires a little more elbow grease to remove, but the results are well worth it.

👉 [PRODUCT OPTION 3: Collinite 845 Insulator Wax]

4. P21S Concours Carnauba Wax

The premium option for those who want the absolute best carnauba shine. P21S is a favorite among show car enthusiasts and owners of dark, high-gloss paint. It produces an almost liquid-mirror depth that synthetic waxes struggle to match. Pricier, but worth it for special vehicles.

👉 [PRODUCT OPTION 4: P21S Concours Carnauba Wax]

5. Turtle Wax ICE Liquid Wax

The best budget pick. Turtle Wax ICE is widely available, affordable, and performs well above its price point. Great for first-timers who want to learn the process without committing to a premium product. A solid choice for older vehicles or daily commuters.

👉 [PRODUCT OPTION 5: Turtle Wax ICE Liquid Wax]

Frequently Asked Questions

How often should I wax my car?

For most drivers, waxing every 6–8 weeks strikes the right balance between protection and effort. If you park outdoors in a hot or harsh climate, aim for every 4–6 weeks. For garage-kept show cars, every 8–12 weeks is typically sufficient.

Can I wax over old wax?

Yes, in most cases. If the existing wax coat is still intact and relatively fresh, you can apply a new coat directly on top. However, if the old wax has broken down unevenly or you notice contamination buildup, it’s worth removing the old wax first with a pre-wax cleaner or clay bar for the best bond.

Is hand waxing better than spray wax?

Hand waxing with a paste or liquid wax provides significantly more protection and a deeper, more durable shine than spray wax. Spray wax is best used as a quick maintenance coat between full hand wax applications — think of it as a top-up, not a replacement.

Can I wax a dirty car?

No. Waxing over dirt and grime traps abrasive particles under the wax, which get dragged across the paint during buffing and cause scratches. Always wash, dry, and — ideally — clay bar the paint before waxing.

How long does the hand waxing process take?

For an average-sized sedan, plan on 1.5 to 2.5 hours for a single-coat application (including wash and prep). Larger vehicles or second coats will add time. As you develop your technique, the process becomes noticeably faster.

Does waxing protect against scratches?

Wax provides a modest buffer against very light surface abrasions (like fine swirl marks from improper washing), but it won’t protect against key scratches or parking lot door dings. For serious scratch protection, consider a paint protection film (PPF) or ceramic coating in addition to regular waxing.

Conclusion

Hand waxing your car is one of those rare DIY skills that pays dividends every time you do it. With the right preparation, quality products, and a bit of patience, you can achieve a level of shine and protection that rivals a professional detail — at a fraction of the cost.

Remember the essentials: always start with a clean, dry car; work in the shade; apply thin, even coats; and buff with clean, quality microfiber towels. Repeat the process every 6–8 weeks (or when water stops beading), and your paint will stay vibrant, protected, and showroom-ready for years to come.

Ready to get started? Browse our top-rated hand wax picks above, grab your foam applicator and microfiber towels, and give your car the care it deserves. Your future self — and anyone who sees your car gleaming in the driveway — will thank you.

PRODUCT CHECKLIST (Everything Featured In Article)

Best Car Wax for Hand Application
Foam Applicator Pads
Microfiber Buffing Towels
Car Wash Soap
Grit Guard + Bucket Set
Clay Bar Kit
Meguiar’s Gold Class Carnauba Plus
Chemical Guys Butter Wet Wax
Collinite 845 Insulator Wax
P21S Concours Carnauba Wax
Turtle Wax ICE Liquid Wax

Disclaimer: Links in this post contain affiliate links. If you purchase through these links I will earn a commission from the sale at no extra cost to you.
How Do I Deep Clean My Tires at Home? Expert Tips

You just finished washing your car, stepped back to admire your work — and there they are. Brown, faded, grimy tires dragging down an otherwise spotless vehicle. Sound familiar?

It’s one of the most frustrating parts of car care. No matter how many times you run through the automatic car wash or splash some soapy water on your tires, that dull, brownish residue just keeps coming back. The truth is, standard car washes simply aren’t designed to deep clean tire sidewalls — and without the right approach, you’re really just moving dirt around.

The good news? Learning how to deep clean your tires at home is easier than you think, and the results are dramatic. In this guide, you’ll learn exactly what causes tire browning, which tools and products professionals swear by, a simple step-by-step cleaning process, and expert tips to keep your tires looking deep black and protected for weeks at a time.

Let’s get into it.


Why Deep Cleaning Your Tires Actually Matters

Before we dive into the how-to, it helps to understand why tires get so dirty in the first place — and why a surface rinse just doesn’t cut it.

Tire Cleaning vs. Wheel Cleaning: Know the Difference

These two tasks are often lumped together, but they require completely different products and techniques. Wheel cleaning targets brake dust, road grime, and metal contamination on your rims. Tire cleaning focuses on the rubber sidewalls — and rubber is a porous material that traps contaminants deep in its surface.

What’s Actually Causing That Brown Color?

That ugly brown tint isn’t just dirt. It’s the result of a chemical process called tire blooming — a phenomenon caused by antiozonant migration. Tire manufacturers embed antiozonants into rubber compounds to prevent ozone cracking and dry rot. Over time, these chemicals naturally rise to the surface of the tire, where they oxidize and turn brown when exposed to air, UV rays, and road grime.

Add in brake dust, road tar, and general road grime, and you’ve got a multi-layered contamination problem that a garden hose alone will never fully solve.

Benefits of Regular Deep Cleaning

  • ✅ Dramatically improves curb appeal
  • ✅ Prevents premature cracking and dry rot
  • ✅ Removes antiozonant buildup that causes browning
  • ✅ Allows tire dressings to bond properly for longer-lasting results
  • ✅ Extends the overall life of your tires

Expert recommendation: Deep clean your tires every 2 to 4 weeks for daily drivers, or after any exposure to road salt, mud, or heavy rain.


What You’ll Need: Tools & Products for Deep Cleaning Tires

Having the right supplies makes all the difference. Here’s everything you need to do this job properly.

Essential Supplies


🛒 Product Comparison Table

ProductTypeBest ForPrice RangePRODUCT Link
[BUDGET TIRE CLEANER ]SprayEveryday maintenance cleaning$[Check Price]
[PREMIUM TIRE CLEANER]Foam/GelHeavily oxidized or browned tires$$[Check Price]
[BEST TIRE BRUSH]Stiff-bristle brushAggressive sidewall scrubbing$[Check Price]
[PRESSURE WASHER]EquipmentFaster pre-rinse & rinse cycles$$$[Check Price]
[FOAM CANNON]AttachmentApplying cleaner evenly at volume$$[Check Price]

Pro Tip: Always use a dedicated tire cleaner rather than an all-purpose cleaner. Formulas designed specifically for rubber are pH-balanced to clean effectively without drying out or degrading the sidewall compounds.


Step-by-Step Guide: How to Deep Clean Tires at Home

This is the core process used by professional detailers — simplified for home use. Work on one tire at a time, and try to work in a shaded area to prevent products from drying prematurely.

Step 1: Pre-Rinse the Tires Thoroughly

Start by hitting each tire with a strong stream of water from your garden hose or pressure washer. This removes loose surface dirt, mud, and debris before any product touches the rubber.

Why this matters: Scrubbing over dry, loose grit can cause micro-abrasions on the sidewall surface. A good pre-rinse also opens up the pores of the rubber slightly, allowing your tire cleaner to penetrate more effectively.

If you have a pressure washer, use it here — it cuts pre-rinse time significantly. 👉 [Recommended: PRESSURE WASHER]

Step 2: Apply Tire Cleaner Generously

Spray or apply your chosen tire cleaner liberally across the entire sidewall surface. Make sure to coat the full face of the tire, from the tread edge down to the rim edge.

Dwell time is key: Allow the product to sit and work for 30 to 60 seconds. This gives the formula time to break down oxidized antiozonants, brake dust, and embedded road grime at the chemical level — doing much of the heavy lifting before you even pick up a brush.

⚠️ Don’t let it dry. If you’re working in direct sunlight or heat, work faster and mist the tire with water if needed to keep the cleaner active.

👉 [PREMIUM TIRE CLEANER – AFFILIATE PLACEHOLDER]

Step 3: Scrub the Tire Sidewalls

Now grab your stiff-bristle tire brush and get to work. Use firm, circular scrubbing motions across the entire sidewall surface. Pay extra attention to areas with visible brown oxidation or heavy buildup.

What to look for: As you scrub, the foam should turn darker — that’s the dirt, oxidation, and antiozonant buildup being lifted from the rubber. Keep scrubbing until the foam begins to turn white or light gray, which signals that the surface is clean.

For severely browned tires, you may need to repeat the application and scrubbing process two or even three times before you’re satisfied with the result.

👉 [BEST TIRE BRUSH – AFFILIATE PLACEHOLDER]

Step 4: Rinse Thoroughly and Inspect

Rinse the tire completely with clean water, washing all product and lifted grime away from the rubber and off the wheel. Inspect the sidewall carefully in good lighting.

Still seeing brown patches? Apply a second round of cleaner, let it dwell, and scrub again. Heavily oxidized tires — especially those that haven’t been properly cleaned in months — may require multiple passes to fully restore.

Step 5: Dry the Tires Before Applying Dressing

Use a clean microfiber towel to blot and dry the sidewall surface. This step prevents water spots and — critically — prepares the rubber for tire dressing application.

Applying dressing over a wet or damp tire leads to poor adhesion, uneven coverage, and faster product breakdown. A properly dried tire allows dressing to bond directly to the rubber for a longer-lasting, more uniform finish.


Pro Tips for a Deeper, Longer-Lasting Clean

These are the details that separate a great DIY tire detail from a truly professional result:

  • Clean your tires first, before washing the rest of the car. Tire cleaner and scrubbing can splash onto painted panels and glass. Start at the bottom and work your way up.
  • Never use dish soap or household bleach on tires. Dish soap strips protective compounds from rubber, accelerating dry rot. Bleach is even more aggressive and can cause irreversible damage to the sidewall.
  • Keep your tire brush separate from your wheel brush. Cross-contaminating brushes can scratch delicate wheel finishes or transfer brake dust back onto clean tires.
  • Work in the shade whenever possible. Direct sunlight causes products to dry too quickly, leading to streaking and reduced cleaning effectiveness.
  • Use multiple passes for heavily oxidized tires. There’s no shortcut here — patience and repetition are what separate mediocre results from truly restored rubber.

Common Mistakes That Undermine Your Results

Even with good products, these mistakes will hold you back:

❌ Mistake✅ What to Do Instead
Letting cleaner dry on the tireWork in shade; mist with water if needed
Using harsh household chemicalsUse a dedicated rubber-safe tire cleaner
Relying on spray-only (no scrubbing)Always agitate with a stiff brush
Skipping the rinseRinse completely to remove all residue
Applying dressing to a dirty tireAlways deep clean before dressing

Should You Use a Tire Dressing After Cleaning?

Absolutely — and here’s why it matters beyond just aesthetics.

A quality tire dressing does two important jobs: it restores the deep black appearance of the rubber, and more importantly, it provides UV protection that slows down the oxidation process responsible for browning and dry rot. Think of it as sunscreen for your tires.

Water-Based vs. Solvent-Based Tire Dressing

Water-based dressings deliver a natural, satin finish that looks OEM-clean without the greasy “wet tire” look. They’re longer-lasting and less likely to sling onto your paint while driving.

Solvent-based dressings provide a higher-gloss, showroom shine but tend to fade faster and can accelerate browning if applied too frequently without a proper cleaning base.

Recommended Tire Dressings

(Affiliate placeholders — update with your links)

ProductFinishBest ForPRODUCT Link
[BEST LONG-LASTING DRESSING –
Chemical Guys Tire Kicker Extra Glossy Tire Shine]
Extra GlossyDaily drivers, long-term protection[Check Price]
[BEST MATTE FINISH DRESSING –
3D GLW Series Ceramic Matte Tire Shine]
MatteOEM / sleeper builds[Check Price]
[BEST BUDGET DRESSING –
Meguiar’s Endurance Tire Gel]
GlossQuick weekend detailing[Check Price]

👉 Apply tire dressing with a foam applicator pad for the most even, controlled coverage and to avoid product flinging onto your wheel wells or paint.


How Often Should You Deep Clean Your Tires?

There’s no single universal answer — it depends on how you use your vehicle and where you live.

Vehicle Type / ConditionRecommended Frequency
Daily driver, mixed conditionsEvery 2–4 weeks
Weekend or show carEvery 4–6 weeks or before events
Winter driving (salt, slush)After every major weather event
Dusty or dry climatesEvery 2–3 weeks

For day-to-day maintenance between deep cleans, a quick spray-and-rinse can help slow down the buildup of road grime. But nothing replaces periodic deep cleaning with a dedicated cleaner and stiff brush.


DIY vs. Professional Tire Cleaning: Is It Worth Doing Yourself?

FactorDIY at HomeProfessional Detailing
Cost$15–$40 in supplies$50–$150+ per detail
Time30–60 minutesDrop-off and wait
QualityExcellent with right productsProfessional-grade results
ConvenienceOn your scheduleRequires appointment
Long-term valueOngoing investmentOne-time service

Bottom line: DIY tire cleaning delivers professional-quality results at a fraction of the cost — especially once you have the right tools on hand. Professional detailing is worth considering for seasonal deep cleaning or heavily neglected tires that need specialized decontamination treatments.


Frequently Asked Questions

How do you remove brown stains from tires?
Brown staining is caused by antiozonant oxidation (tire blooming). Apply a dedicated tire cleaner, let it dwell for 30–60 seconds, and scrub vigorously with a stiff-bristle brush. Multiple passes may be needed for heavily oxidized rubber.

Can I use dish soap to clean tires?
It’s not recommended. While dish soap will remove surface dirt, it also strips the protective compounds embedded in the rubber, which accelerates drying, cracking, and long-term dry rot. Use a dedicated tire cleaner instead.

What is the best homemade tire cleaner?
A mixture of warm water, a few drops of castile soap, and a tablespoon of baking soda makes a reasonable DIY solution for light cleaning. For white vinegar alternatives, dilute with equal parts water. However, these won’t match the effectiveness of a dedicated tire cleaner for removing oxidation and brake dust.

Why do my tires turn brown after cleaning?
This is tire blooming — antiozonants rising to the rubber surface and oxidizing. It’s a natural process built into the tire’s manufacturing. The best defense is regular deep cleaning combined with a UV-protective tire dressing that slows down the oxidation cycle.

Do I need a pressure washer to clean tires?
No — a standard garden hose works fine for most situations. A pressure washer simply speeds up the pre-rinse and final rinse stages and is especially helpful for removing heavy mud or road tar. The scrubbing stage is where the real cleaning happens regardless of water pressure.

Is it safe to use bleach on car tires?
No. Bleach is far too harsh for rubber and will degrade the sidewall compounds, leading to premature cracking and dry rot. Stick to products specifically formulated for tire rubber.


Final Thoughts: Clean Tires Are a Game-Changer

Learning how to deep clean your tires at home is one of the simplest, highest-impact car care skills you can develop. The process takes under an hour, costs a fraction of a professional detail, and the visual improvement is immediate and dramatic.

The key takeaways: use a dedicated tire cleaner, always scrub with a stiff brush, work in the shade, and finish with a UV-protective tire dressing to lock in that deep black finish and slow down future oxidation.

Make it a habit every 2 to 4 weeks, and your tires will look professionally detailed year-round.


Ready to get started?

👉 [Check out our recommended tire cleaner – HOLLEY TIRE DEGREASER & DRESSING]
👉 [Grab the best tire brush for deep cleaning – STIFF BRISTLE TIRE BRUSH]
👉 [Protect your results with a long-lasting tire dressing – CHEMICAL GUYS TIRE KICKER]


Have questions about tire cleaning or detailing? Drop them in the comments below — we’d love to help.

Hand Waxing vs Machine Waxing: Which Method Is Best for Your Car?

Introduction

Here’s a detailing truth most car enthusiasts learn the hard way: your waxing method matters just as much as the wax itself. You can buy the most expensive carnauba wax on the market, but if you apply it incorrectly—whether by hand or machine—you’ll end up with streaks, swirl marks, and disappointing results.

Car waxing serves three critical purposes: protecting your paint from UV damage and environmental contaminants, creating that eye-catching showroom shine, and extending the longevity of your vehicle’s clear coat. But the age-old debate continues to divide detailing enthusiasts: should you wax your car by hand or use a machine?

In this comprehensive guide, we’ll break down the real-world differences between hand waxing and machine waxing. You’ll learn which method produces better results, which is more cost-effective, and—most importantly—which approach is right for your specific situation, skill level, and vehicle type.


What Is Car Waxing?

Before diving into the hand versus machine debate, let’s establish what car waxing actually does and why it’s an essential part of automotive care.

Car waxing is the process of applying a protective layer over your vehicle’s paint or clear coat. This barrier shields your car from UV rays, road salt, bird droppings, tree sap, and other environmental hazards that cause oxidation and paint deterioration.

Types of Car Wax

Not all waxes are created equal. Understanding the three main categories helps you choose the right product for your application method:

Carnauba Wax: Derived from Brazilian palm trees, carnauba wax delivers the deepest, warmest glow—especially on dark-colored vehicles. It’s prized for its natural formulation and stunning wet-look finish, though it typically lasts 4-8 weeks.

Synthetic Sealants: These polymer-based products bond chemically with your paint, offering superior durability (3-6 months) and excellent water beading. They’re ideal for those who want long-term paint protection without frequent reapplication.

Hybrid Waxes: Combining natural carnauba with synthetic polymers, hybrid waxes aim to deliver both exceptional shine and extended durability, making them popular among detailing enthusiasts who want the best of both worlds.

Benefits of Waxing Your Car

  • UV Protection: Prevents sun damage that causes paint fading and oxidation
  • Water Beading: Creates hydrophobic properties that repel water and contaminants
  • Enhanced Gloss: Amplifies paint depth and clarity for that showroom finish
  • Easier Cleaning: Waxed surfaces resist dirt adhesion, making future washes simpler

Where Waxing Fits in the Detailing Process

Waxing is the final protective step in proper car detailing. The complete workflow looks like this:

  1. Wash and dry
  2. Decontaminate (clay bar treatment)
  3. Polish (if needed for paint correction)
  4. Wax or seal
  5. Maintain

Skipping preparation steps—especially washing and decontamination—leads to poor wax adhesion and potentially scratches your paint.


What Is Hand Waxing?

Hand waxing is the traditional, manual method of applying car wax using foam or microfiber applicator pads and buffing with microfiber towels.

How Hand Waxing Works

The process is straightforward:

  1. Apply a small amount of wax to a foam applicator pad
  2. Spread the wax over a 2×2 foot section using circular or straight overlapping motions
  3. Allow the wax to cure (typically 1-5 minutes, or until it hazes)
  4. Buff off the residue with a clean microfiber towel using light pressure

Pros of Hand Waxing

Greater Control in Tight Areas: Hand application excels in complex areas like around emblems, trim pieces, door handles, and body lines where machines can’t easily reach.

Lower Risk of Paint Damage: With no moving parts or motors, hand waxing virtually eliminates the risk of heat buildup, over-polishing, or creating swirl marks—assuming you use proper technique.

No Special Equipment Required: You only need basic supplies: wax, applicator pads, and microfiber towels. Total startup cost: under $30.

Ideal for Beginners: The learning curve is minimal. If you can wash your car, you can hand wax it.

Cons of Hand Waxing

Time-Consuming: Expect to spend 2-4 hours on a mid-size sedan, depending on your thoroughness and the wax’s cure time.

Physically Demanding: Repeatedly buffing wax by hand requires significant arm strength and stamina, especially on larger vehicles like SUVs or trucks.

Potential for Uneven Application: Without the consistent motion of a machine, it’s easy to apply wax too thick in some areas or miss spots entirely, leading to streaking.

Best Situations for Hand Waxing

Hand waxing shines in these scenarios:

  • Small vehicles or spot treatments (coupes, sedans)
  • Classic cars or vehicles with delicate single-stage paint
  • Beginners learning detailing basics without investment in equipment
  • Detail work around complex body lines and trim

Recommended Tools for Hand Waxing

[Premium Foam Applicator Pads]
Soft, non-abrasive pads prevent scratching while evenly distributing wax.

[High-Quality Microfiber Towels (Pack)]
Look for at least 400 GSM (grams per square meter) for maximum absorbency and scratch-free buffing.

[Premium Carnauba Paste Wax]
A high-quality carnauba wax designed specifically for hand application delivers superior results.


What Is Machine Waxing?

Machine waxing uses dual-action polishers or rotary buffers to apply and distribute wax evenly across your vehicle’s surface.

How Machine Waxing Works

Instead of manual elbow grease, a polishing machine does the work:

  1. Apply wax directly to a foam finishing pad attached to the polisher
  2. Spread the product across a section at low speed
  3. Work the wax into the paint using overlapping passes at medium speed
  4. Wipe away residue with a microfiber towel

The machine’s oscillating or rotating motion ensures even distribution and consistent pressure.

Types of Machines

Dual-Action (DA) Polishers: Also called random orbital polishers, DA machines oscillate and rotate simultaneously. They’re beginner-friendly, produce minimal heat, and are extremely safe on clear coat finishes. Recommended for most car owners.

Rotary Buffers: Professional-grade tools that spin in one direction at high speeds. They’re powerful and efficient but require experience to avoid burning through paint or creating holograms. Best left to professionals or advanced users.

Pros of Machine Waxing

Faster Application: Machine waxing cuts application time by 50-70%. What takes 3 hours by hand might only take 45-90 minutes with a DA polisher.

More Uniform Coverage: Consistent machine motion eliminates streaking and ensures even product distribution across the entire panel.

Better for Large Surfaces: Hoods, roofs, and truck beds are covered quickly and efficiently without the physical fatigue of hand buffing.

Less Physical Effort: The machine does the work—you simply guide it. This makes frequent detailing sustainable long-term.

Cons of Machine Waxing

Higher Upfront Cost: A quality dual-action polisher costs $100-$300, plus pads and accessories. Budget $150-$400 for a complete setup.

Learning Curve: While DA polishers are user-friendly, there’s still technique to learn: proper speed settings, pressure application, and pad selection.

Risk of Paint Damage if Misused: Running a polisher too fast, using excessive pressure, or choosing the wrong pad can create swirl marks or heat damage.

Best Situations for Machine Waxing

Machine waxing is ideal for:

  • Large vehicles (SUVs, trucks, vans)
  • Frequent detailers who wax monthly or quarterly
  • Enthusiasts seeking professional-level results at home
  • Those who value time efficiency

Recommended Tools for Machine Waxing

[Dual-Action Polisher Kit]
Look for variable speed control (typically 2000-6000 OPM) and a 5-6 inch backing plate.

[Foam Finishing Pads Set]
Soft finishing pads (not cutting or polishing pads) are essential for waxing without marring.

[Machine-Friendly Liquid Wax]
Liquid or spray waxes distribute more evenly than paste when using a machine.


Hand Waxing vs Machine Waxing: Side-by-Side Comparison

FeatureHand WaxingMachine Waxing
Ease of UseBeginner-friendly, minimal setupModerate learning curve, requires practice
Time Required2-4 hours (mid-size car)45-90 minutes (mid-size car)
Cost$20-$50 (startup)$150-$400 (complete setup)
Finish QualityGood with proper techniqueExcellent, more consistent coverage
Risk LevelVery low (nearly damage-proof)Moderate if misused (safe with DA)
Physical EffortHigh (arm fatigue common)Low (machine does the work)
Best ForSmall cars, tight areas, beginnersLarge vehicles, frequent use, efficiency

Quick Summary Takeaway

  • Winner for Beginners: Hand waxing
  • Winner for Speed: Machine waxing
  • Winner for Cost: Hand waxing
  • Winner for Consistency: Machine waxing
  • Winner for Safety: Hand waxing (tie with DA polisher)
  • Winner for Large Vehicles: Machine waxing

Which Method Produces Better Results?

Let’s address the elephant in the room: is machine waxing better than hand waxing in terms of final appearance?

Shine and Gloss Comparison

Both methods can achieve stunning results when executed properly. The quality of the wax matters more than the application method for pure shine. That said, machine application tends to produce slightly deeper gloss due to:

  • More uniform wax distribution
  • Better product penetration into paint pores
  • Consistent buffing pressure across the entire surface

Real-world difference: In side-by-side comparisons, most people can’t distinguish between properly hand-waxed and machine-waxed panels unless they’re detailing professionals.

Durability of Protection

Wax longevity depends primarily on the product formula (carnauba vs synthetic), not the application method. However, machine waxing may offer marginally better durability because:

  • The polisher works the wax deeper into microscopic paint imperfections
  • More consistent coverage eliminates thin spots that wear faster

Typical durability: 4-8 weeks for carnauba (both methods), 3-6 months for synthetic sealants (both methods).

Consistency of Application

This is where machine waxing clearly wins. The oscillating motion of a DA polisher ensures:

  • No streaking or uneven haze
  • Consistent product thickness across all panels
  • Fewer missed spots or over-applied areas

Hand waxing requires meticulous attention to achieve the same uniformity—doable, but demanding.

Real-World Expectations vs Marketing Claims

Some manufacturers claim machine application “activates” their wax or produces superior bonding. This is mostly marketing. The truth:

  • Quality matters more than method
  • Proper paint prep (washing, claying) has more impact than application technique
  • Both methods produce excellent results in experienced hands

Cost Breakdown: Hand vs Machine Waxing

Initial Investment

Hand Waxing Costs:

  • Quality paste wax: $15-$35
  • Foam applicator pads (4-pack): $8-$15
  • Microfiber towels (6-pack): $15-$25
  • Total: $38-$75

Machine Waxing Setup Costs:

  • Dual-action polisher: $100-$300
  • Foam finishing pads (set of 4): $25-$50
  • Liquid wax suitable for machine use: $20-$40
  • Microfiber towels: $15-$25
  • Total: $160-$415

Long-Term Value

While machine waxing has higher upfront costs, consider the time savings:

  • If you wax 4 times per year, machine waxing saves approximately 8-12 hours annually
  • Over a 5-year period, that’s 40-60 hours saved
  • If your time is worth $20/hour, that’s $800-$1,200 in value

Cost per detail over time (assuming quarterly waxing):

  • Hand waxing: ~$10 per session (consumables)
  • Machine waxing: ~$15 per session initially (amortizing equipment), dropping to ~$10 after year 2

Budget Recommendations

Best Option Under $50: Hand waxing with quality paste wax
[Car Wax & Applicator Set]

Best Option for Serious Hobbyists: Entry-level DA polisher bundle
[DA Polisher Starter Kit]


Time and Effort Comparison

Average Time for Each Method

Hand Waxing:

  • Compact car: 1.5-2.5 hours
  • Mid-size sedan: 2-3.5 hours
  • Large SUV/truck: 3-5 hours

Machine Waxing:

  • Compact car: 30-45 minutes
  • Mid-size sedan: 45-90 minutes
  • Large SUV/truck: 90-120 minutes

Time variations depend on wax cure time, panel complexity, and your experience level.

Effort Required (Fatigue Factor)

Hand Waxing: Expect arm, shoulder, and upper back fatigue, especially during buffing. Large vehicles can be genuinely exhausting.

Machine Waxing: The polisher does the work—you simply guide it. Minimal physical strain, though holding the machine overhead (roof panels) can tire your arms.

Efficiency Tips for Both Approaches

For Hand Waxing:

  • Work in 2×2 foot sections
  • Use thin coats (less is more)
  • Wax in the shade to prevent premature curing
  • Switch hands periodically to prevent fatigue

For Machine Waxing:

  • Keep the pad primed with product (3-4 small dots per section)
  • Use speed setting 3-4 for waxing (lower than polishing)
  • Overlap passes by 50%
  • Wipe panels immediately after machine work

Common Mistakes to Avoid

Hand Waxing Mistakes

Applying Too Much Wax: The old adage is true—less is more. Thick wax layers are harder to buff and don’t provide extra protection. Use a thin, even coat.

Not Working in Small Sections: Attempting to wax entire panels at once leads to dried, difficult-to-remove residue. Stick to 2×2 foot areas.

Poor Buffing Technique: Using dirty towels, excessive pressure, or circular motions can create swirl marks. Use clean microfiber towels, light pressure, and straight-line motions.

Machine Waxing Mistakes

Using the Wrong Pad: Cutting or polishing pads are too abrasive for waxing. Always use soft finishing pads (typically black, white, or blue depending on brand).

Applying Too Much Pressure: Let the machine do the work. Excessive pressure slows the oscillation, creates heat, and can damage paint.

Running the Machine Too Fast: Waxing should be done at lower speeds (setting 3-4 out of 6) compared to polishing. High speeds fling product off the pad.

Skipping Paint Prep: Waxing over contaminated paint locks in dirt, brake dust, and iron particles. Always wash and clay bar first.


Pro Tips for Better Waxing Results

Regardless of your chosen method, these professional techniques elevate your results:

Always Wash and Decontaminate First

Waxing over dirty or contaminated paint is the #1 mistake. Follow this sequence:

  1. Thorough wash with pH-neutral car shampoo
  2. Clay bar treatment to remove embedded contaminants
  3. Dry completely
  4. Wax

Use the “Thin Coat” Rule

A single thin layer of wax provides the same protection as thick coats—with easier application and removal. Think “barely there.”

Work in the Shade

Direct sunlight causes wax to cure too quickly, making it difficult to buff and increasing the risk of streaking. Work in a garage or shaded area.

Use High-Quality Microfiber Towels

Not all microfiber is equal. Look for:

  • 400+ GSM (thickness)
  • Plush weave (not waffle or terry)
  • Clean towels (wash separately without fabric softener)

[AFFILIATE LINK PLACEHOLDER: Professional-Grade Microfiber Towel Set]

Layering Wax: Myth vs Reality

Myth: Multiple wax coats provide exponentially better protection.
Reality: Most benefits come from the first coat. A second coat may add 10-20% more durability, but three or more layers offer diminishing returns.

If you want extra protection, wait 12-24 hours between coats.


Hybrid Approach: Best of Both Worlds

Many professional detailers use a combination approach that leverages the strengths of both methods.

Using a Machine for Application, Hand for Finishing

The Process:

  1. Apply and work the wax with a DA polisher on large, flat panels (hood, roof, doors, trunk)
  2. Hand apply in tight areas (grilles, emblems, trim, mirrors)
  3. Final buff by hand for show-car perfection

When Combining Methods Makes Sense

This hybrid approach is ideal when:

  • You want efficiency on large panels but precision on details
  • You’re preparing for car shows or photos
  • You’re working with complex body lines (sports cars, luxury vehicles)

Recommended Workflow

  1. Wash and decontaminate entire vehicle
  2. Machine wax all flat, accessible panels
  3. Hand wax intricate areas
  4. Final inspection and hand buffing of entire car
  5. Total time: 60-90 minutes for mid-size sedan

Frequently Asked Questions

Is machine waxing better than hand waxing?

Neither method is inherently “better”—it depends on your priorities. Machine waxing is faster and more consistent, making it better for large vehicles and frequent detailing. Hand waxing offers more control in tight spaces and has zero learning curve, making it better for beginners or classic cars. Both produce excellent results when done properly.

Can beginners use a polisher safely?

Yes, dual-action polishers are safe for beginners. Unlike rotary buffers, DA polishers won’t burn paint even if you make mistakes. Start at low speeds, use finishing pads, and practice on less visible panels first. Avoid rotary buffers until you gain experience.

How often should you wax your car?

Carnauba wax: Every 4-8 weeks
Synthetic sealants: Every 3-6 months
General rule: When water stops beading or paint feels rough, it’s time to rewax.

Climate, garage parking, and wash frequency affect durability.

Does machine waxing remove scratches?

No. Wax fills and hides minor imperfections temporarily but doesn’t remove them. To actually remove scratches, you need polishing (paint correction) with abrasive compounds—a separate process done before waxing.

What’s the safest method for new car paint?

Both hand and machine (DA) waxing are safe for new cars. Modern clear coat finishes are durable. For added caution, hand wax for the first 3-6 months, then transition to a DA polisher as you gain confidence. Avoid rotary buffers on new paint unless you’re experienced.


Final Verdict: Which Method Is Best for You?

After comparing every angle—cost, time, results, and ease of use—here’s your decision framework:

Clear Recommendations Based on User Type

Beginners → Hand Waxing
Start with hand application to learn proper technique without equipment investment. Once you understand waxing fundamentals, consider upgrading to a DA polisher.

Enthusiasts → Machine Waxing
If you detail regularly and own a mid-size or larger vehicle, a dual-action polisher is worth every penny. The time savings and consistent results justify the upfront cost.

Professionals → Machine + Hybrid Approach
Combine machine efficiency on flat panels with hand precision on details. This delivers the fastest, most consistent professional-grade results.

Decision Checklist

Choose Hand Waxing if you:

  • ✓ Own a small vehicle (coupe, compact sedan)
  • ✓ Wax 1-2 times per year
  • ✓ Have a budget under $50
  • ✓ Are new to detailing
  • ✓ Own a classic car with delicate paint

Choose Machine Waxing if you:

  • ✓ Own a large vehicle (SUV, truck, van)
  • ✓ Detail quarterly or more often
  • ✓ Can invest $150-$300 in equipment
  • ✓ Value time efficiency
  • ✓ Want professional-grade results

Choose the Hybrid Approach if you:

  • ✓ Want the best of both worlds
  • ✓ Detail for car shows or photography
  • ✓ Have a vehicle with complex body lines
  • ✓ Already own a DA polisher

Take Action: Start Waxing Smarter Today

Now that you understand the real differences between hand waxing and machine waxing, it’s time to choose your approach and get started.

Continue Your Detailing Education

Ready to master the complete car care process? Check out these related guides:

What’s your preferred method—hand or machine waxing? Let me know in the comments!


Disclaimer: This article contains affiliate links. If you purchase through these links, we may earn a small commission at no additional cost to you. This helps us create more detailed, helpful content for car enthusiasts like you.
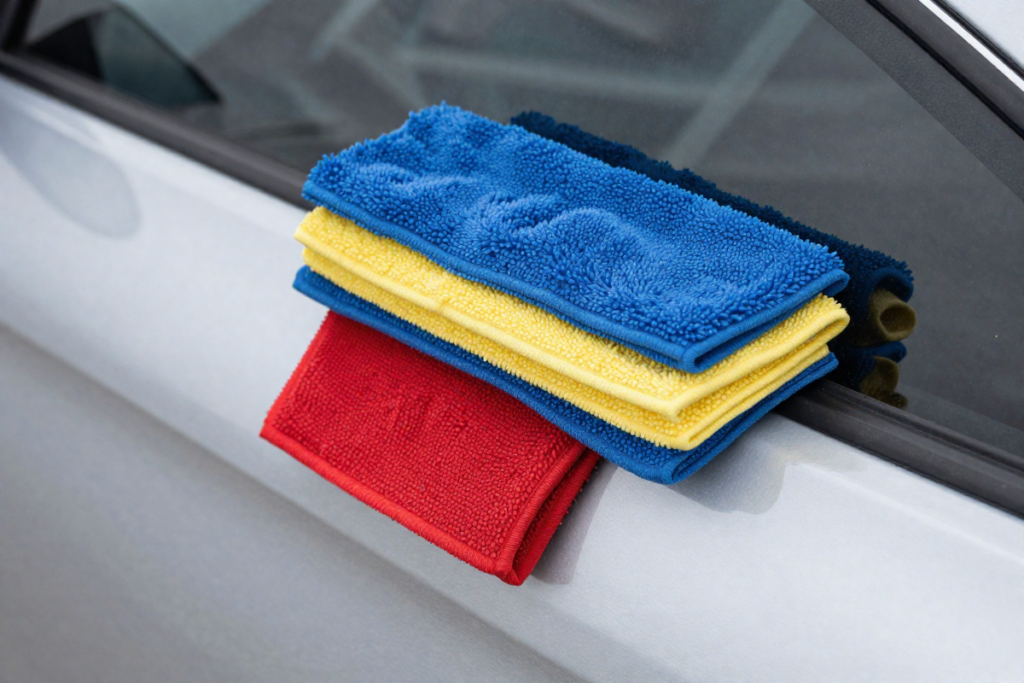
How to Clean Wheels on Car: Get That Showroom-Ready Look

Your car’s wheels are more than just functional components—they’re the crowning jewels that complete its look. Yet, they’re also the first to betray the wear and tear of daily driving. Brake dust, road grime, and stubborn dirt can dull their shine, leaving your entire vehicle looking tired and neglected. Imagine pulling into a parking lot, and instead of gleaming rims, you’re met with lackluster, dirty wheels. Not a great first impression, right? But with the right techniques and tools, you can transform those dingy wheels into head-turning, showroom-ready stunners. Whether you’re prepping for a car show or just want to drive with pride, knowing how to clean your wheels properly is an essential skill. Let’s dive into the secrets of achieving that dazzling, just-off-the-lot look that will make your car the envy of the road.

Introduction: The Importance of Clean Wheels

Why Clean Wheels Matter: First Impressions and Maintenance

When it comes to making a statement on the road, nothing speaks louder than a set of impeccably clean wheels. They’re the unsung heroes of your car’s appearance, often overlooked yet crucial in creating that polished, head-turning look. Picture this: you’ve just spent hours waxing and polishing your car’s body, but if the wheels are dull, covered in brake dust, and grime, the overall effect falls flat. Clean wheels aren’t just about aesthetics—they’re a vital part of regular vehicle maintenance. Over time, brake dust, road salt, and other contaminants can cause irreversible damage if left unchecked. By regularly cleaning your wheels, you’re not only keeping them looking pristine but also extending their lifespan, preventing corrosion, and saving yourself from costly repairs down the line.

The Role of Wheel Care in Your Car’s Overall Appearance

Your car’s wheels are like the shoes that complete an outfit—they might not be the first thing people notice, but they’re certainly the detail that makes or breaks the look. Imagine rolling up to an event with your car sparkling clean, the paint gleaming under the sun, but your wheels are caked with dirt and dust. It doesn’t matter how shiny the rest of your car is; those dirty wheels will steal the spotlight for all the wrong reasons. Clean wheels add that extra level of sophistication and care to your vehicle. They reflect the pride you take in your car, showcasing that you don’t just care about how it drives, but also how it’s perceived. Whether you’re a car enthusiast or someone who simply enjoys the satisfaction of a clean vehicle, taking the time to properly care for your wheels is an investment in your car’s overall aesthetic appeal.

Common Mistakes to Avoid When Cleaning Wheels

Cleaning your wheels might seem straightforward, but it’s easy to fall into common traps that can do more harm than good. One of the biggest mistakes is using the wrong cleaning products. Harsh chemicals can strip the finish from your wheels, leaving them vulnerable to corrosion. Always opt for cleaners specifically designed for your wheel type, like Meguiar’s Ultimate All Wheel Cleaner, which is formulated to be tough on grime but gentle on your wheels. Another frequent error is neglecting to rinse thoroughly. Leaving cleaner residue on your wheels can cause streaks and even damage the finish over time. It’s essential to rinse well and dry with a microfiber towel to avoid water spots. Lastly, skipping regular maintenance is a surefire way to allow dirt and grime to build up, making the cleaning process much more difficult. By incorporating wheel cleaning into your regular car care routine, you can avoid these pitfalls and keep your wheels looking their best year-round.

Properly maintained wheels aren’t just about looks—they’re a testament to your vehicle’s overall health and your attention to detail as an owner. Taking the time to care for your wheels will not only enhance your car’s appearance but also preserve the integrity of one of its most crucial components. So, the next time you wash your car, don’t forget to give your wheels the attention they deserve. They’re not just the finishing touch; they’re the foundation of your car’s good looks.

Essential Tools and Supplies for Cleaning Wheels

Must-Have Cleaning Products for a Professional Finish

Achieving that showroom-ready look isn’t just about elbow grease—it’s about using the right products that do the job without damaging your wheels. A professional finish begins with the essentials: a high-quality wheel cleaner, a protective polish, and a sealant to lock in that shine. For most car enthusiasts, these three items form the holy trinity of wheel care. But not all products are created equal. Your cleaner should be tough on dirt but gentle on your wheels’ finish. A reliable polish will remove any residual grime and enhance the shine, while a durable sealant will protect against future damage. Choosing the right products can make all the difference in how your wheels look after a good cleaning session.

Why Meguiar’s Products Are Top Choice for Wheel Care

When it comes to wheel care, Meguiar’s is a name that stands out in the crowd. Known for their high-performance formulas, Meguiar’s products have been trusted by car enthusiasts and professionals alike for decades. Their Ultimate All Wheel Cleaner, for instance, is a game-changer—designed to dissolve stubborn brake dust and road grime with minimal effort. The best part? It’s safe for all wheel finishes, so you can use it with confidence whether you’re cleaning alloy, chrome, or painted wheels. Meguiar’s Hot Rims Metal Polish is another favorite, leaving your wheels with a mirror-like shine that’s hard to beat. And for that extra layer of protection, their Wheel Sealant offers long-lasting defense against the elements, ensuring your wheels stay clean and shiny for longer.

Alternative Quality Brands for Wheel Cleaning Supplies

While Meguiar’s is a go-to for many, there are other quality brands out there that deliver excellent results. For those who like to explore alternatives, consider brands like Chemical Guys and Griot’s Garage. Chemical Guys Wheel Cleaner is a formidable contender, offering a powerful formula that cuts through grime while being environmentally friendly. Griot’s Garage also offers a range of wheel care products, including their Heavy Duty Wheel Cleaner, which is perfect for tackling the toughest dirt. Each brand brings something unique to the table, so don’t be afraid to experiment and find what works best for your specific needs.

The Right Brushes, Cloths, and Towels for the Job

Having the right tools on hand is just as important as the products you use. A high-quality wheel brush is a must for getting into those hard-to-reach areas, like the lug nuts and the inside of the rim. Look for brushes with soft, synthetic bristles that won’t scratch your wheels. Microfiber cloths are another essential—they’re perfect for wiping down your wheels after rinsing and applying polish without leaving behind lint or streaks. And don’t forget about a dedicated drying towel. A large, absorbent microfiber towel will make quick work of drying your wheels, preventing water spots and streaks from forming. Investing in the right tools will not only make the cleaning process easier but will also help you achieve a professional-level finish every time.

With the right products and tools, cleaning your wheels can be a satisfying part of your car care routine, delivering results that make your car look like it just rolled off the showroom floor. Whether you stick with the tried-and-true Meguiar’s products or explore other high-quality brands, the key is consistency and care. With a little effort and the right supplies, your wheels will stay looking their best, mile after mile.

Pre-Cleaning Prep: Getting Ready to Shine

How to Safely Jack Up Your Car for Easy Access

Before you start your wheel cleaning routine, it’s essential to ensure your wheels are easily accessible and safe to work on. Jacking up your car might sound daunting, but with the right approach, it’s a straightforward process. First, make sure you’re on a level surface—this is non-negotiable for safety. Engage the parking brake, and place wheel chocks behind the tires that won’t be lifted. Locate your car’s jacking points, usually outlined in the owner’s manual, and position the jack securely under these points. Slowly lift the car until the wheels are off the ground and secure the vehicle with jack stands. This step not only gives you better access to the wheels but also allows you to clean the entire surface area, including those hidden spots on your car rims you can’t reach when the car is on the ground.

Protecting Your Tires and Surrounding Area

Now that your car is lifted and stable, it’s time to prep the area around your wheels. Start by covering your tires with a protective cloth or plastic sheet. This prevents any cleaning solutions for wheels from accidentally splashing onto the rubber, which can cause discoloration or damage if they’re not specifically designed for tire and wheel care. Next, consider placing a tarp or old towels under the car to catch any drips or runoff from the cleaning process. This not only keeps your driveway clean but also ensures that you don’t leave a mess behind when you’re done. It’s all about working smart—protecting the surrounding area means you can focus entirely on getting those wheels to shine without worrying about unintended consequences.

Spotting Trouble Areas: Dirt, Brake Dust, and Grime Buildup

Before diving into the cleaning process, take a moment to inspect each wheel closely. This step is crucial because it helps you identify the trouble spots that need extra attention. Look for areas with heavy brake dust removal needed, which often accumulates in the crevices around the spokes and lug nuts. Dirt and grime tend to settle in the tight spaces where the wheel meets the brake caliper, and these areas can be stubborn to clean if not addressed properly. If you notice any spots with caked-on dirt or grime, make a mental note to give these areas a little extra elbow grease during the cleaning process. Identifying these trouble spots early ensures that you can tackle them effectively, leaving no part of the wheel untouched and guaranteeing a spotless finish.

Getting your wheels ready to shine starts with proper preparation. By safely lifting your car, protecting your tires and surrounding area, and identifying the dirtiest spots, you’re setting yourself up for success. This pre-cleaning routine might seem like extra work, but it’s what separates an average wheel cleaning from a truly professional detailing job. When you take the time to prepare, you’re not just cleaning your wheels—you’re ensuring they’ll look their absolute best once you’re done. So, roll up your sleeves and get ready to transform those wheels from dull to dazzling, one step at a time.

Step-by-Step Guide to Cleaning Wheels on Car

Rinse First: Removing Loose Dirt and Debris

The first step in transforming your wheels from drab to dazzling is a thorough rinse. Begin by using a hose or pressure washer to remove loose dirt, dust, and debris. This step is crucial because it washes away the surface grime, making the cleaning process much easier and more effective. Start at the top of each wheel and work your way down, ensuring that every part is rinsed. By doing this, you prevent scratching the surface with particles that could be lingering on your wheels. A proper rinse sets the stage for deeper cleaning and ensures that your wheel cleaner can work its magic without interference.

Applying Wheel Cleaner: Why Meguiar’s Wheel Cleaner Stands Out

With the initial rinse complete, it’s time to bring out the big guns—your wheel cleaner. Meguiar’s Ultimate All Wheel Cleaner is a top choice for a reason. Its powerful formula is designed to break down even the toughest brake dust and road grime, all while being gentle on your wheels’ finish. Whether you’re dealing with alloy wheels, chrome wheels, or high-performance wheels, this cleaner can handle it all. Spray the cleaner generously onto the wheel, making sure to cover all areas, including the spokes, lug nuts, and the inner barrel of the wheel. Allow the cleaner to sit for a few minutes, but don’t let it dry. This dwell time is when the cleaner starts working on the grime, lifting it away from the surface. Meguiar’s cleaner stands out because it changes color as it works, giving you a visual cue that it’s breaking down the dirt. This feature not only adds a bit of satisfaction but also ensures you know when it’s time to move on to the next step.

Scrubbing Technique: Getting into the Nooks and Crannies

Now comes the part that requires a bit of elbow grease—scrubbing. Armed with a good wheel brush, preferably one with soft, non-scratch bristles, start scrubbing the wheel, focusing on those tricky spots like around the lug nuts and in between the spokes. Use a back-and-forth motion, applying steady pressure to dislodge any stubborn grime. Don’t forget to clean the inner barrel of the wheel, as this area often accumulates the most dirt. For tight spaces, a smaller detailing brush can be incredibly helpful. Take your time here; meticulous scrubbing ensures that no part of the wheel is left untouched. The goal is to reach every nook and cranny, ensuring a thorough clean that will leave your wheels sparkling.

Rinsing Off: The Right Way to Avoid Streaks

After you’ve scrubbed each wheel to your satisfaction, it’s time for another rinse. But this one is just as important as the first. Use a hose or pressure washer to thoroughly rinse away all traces of the wheel cleaner and loosened dirt. Start from the top and work your way down, ensuring that all the cleaner is washed away. Any residue left behind can cause streaking or water spots, so take your time and be thorough. If possible, use filtered water to avoid mineral deposits that can leave spots on your freshly cleaned wheels. Finally, dry your wheels with a microfiber towel to prevent water spots and give your wheels a brilliant, streak-free finish. This final step locks in all your hard work, leaving your wheels looking their absolute best.

By following these steps, you’ll be able to achieve a professional-level clean that not only enhances the appearance of your car but also protects your wheels from the wear and tear of daily driving. Incorporating products like Meguiar’s into your car care routine will ensure your vehicle’s appearance stays top-notch. Whether you’re a seasoned car enthusiast or just someone who takes pride in a clean ride, this step-by-step guide will help you get those wheels showroom-ready in no time.

Dealing with Stubborn Stains and Brake Dust

How to Tackle Caked-On Dirt with Meguiar’s Ultimate All Wheel Cleaner

Stubborn stains and caked-on dirt can be the bane of wheel cleaning, but Meguiar’s Ultimate All Wheel Cleaner is up to the challenge. This powerful formula is designed to handle the most obstinate grime, breaking it down efficiently without harming your alloy wheels or chrome wheels. For particularly tough spots, apply the cleaner liberally and let it dwell a bit longer than usual. This extended contact time allows the cleaner to penetrate deeper into the dirt and brake dust, loosening it for easier removal. After applying, use a wheel brush to agitate the cleaner, focusing on the areas with the most buildup. Meguiar’s cleaner will change color as it works, providing a visual confirmation that it’s breaking down the stubborn stains. Rinse thoroughly to ensure that all the cleaner and loosened dirt are washed away, leaving your wheels looking fresh and spotless.

Alternative Methods for Removing Tough Stains

Sometimes, even the best cleaners need a bit of extra help. If you’re dealing with particularly persistent stains or brake dust that won’t budge, there are alternative methods worth trying. One effective approach is using a clay bar treatment, which can lift contaminants embedded in the wheel’s surface that regular cleaners can’t reach. Simply lubricate the area with a clay lubricant and gently rub the clay bar over the stains. Another option is to use a specialized wheel cleaning gel or paste, which can cling to the dirt and brake dust, providing a more intense cleaning action. Apply the gel or paste according to the manufacturer’s instructions, allowing it to sit for a few minutes before scrubbing and rinsing. These alternative methods can be a game-changer for wheels that require a little extra attention to achieve a pristine finish.

When to Consider a Second Application

In some cases, one application of cleaner just isn’t enough to tackle all the grime. If after your initial cleaning, you find that some stains or brake dust are still lingering, don’t hesitate to apply a second round of Meguiar’s Ultimate All Wheel Cleaner or your chosen product. Reapply the cleaner in the same manner, ensuring it covers the troublesome areas thoroughly. Allow it to dwell once more, then scrub and rinse as before. A second application can be particularly effective if you’re dealing with extremely dirty wheels or if you’ve left the buildup untreated for a while. This extra step ensures that you’re not just masking the dirt but removing it completely, leading to a truly spotless finish that will keep your wheels looking their best.

Dealing with stubborn stains and brake dust removal doesn’t have to be a headache. With the right products and techniques, you can conquer even the most challenging grime. Meguiar’s Ultimate All Wheel Cleaner, along with alternative methods and a second application when needed, will ensure your wheels stay pristine, enhancing the overall vehicle appearance. Embrace these strategies and enjoy the satisfaction of wheels that shine with a showroom-quality gleam, every time you drive.

Polishing and Protecting Your Wheels

The Benefits of Wheel Polish: Adding Extra Shine

Once you’ve cleaned your wheels to perfection, the next step is to elevate their appearance with a good wheel polish. Wheel polish not only adds a dazzling wheel shine but also helps to smooth out any micro-scratches or imperfections that may remain after rim cleaning. It’s like giving your wheels a luxurious spa treatment that enhances their luster and brings out a deeper, richer finish. The polish fills in minor blemishes, giving your wheels that glossy, mirror-like quality that catches the eye. Applying polish is especially beneficial if you want your wheels to look their absolute best, reflecting light and showcasing your car’s overall detail.

Using Meguiar’s Hot Rims Metal Polish for a Mirror Finish

When it comes to achieving a mirror-like finish, Meguiar’s Hot Rims Metal Polish stands out as an exceptional choice. This high-performance polish is designed to restore and enhance the shine of chrome wheels and alloy wheels, including aluminum surfaces. To use, apply a small amount of the polish onto a clean microfiber towel and gently rub it into the wheel using circular motions. The formula works to remove oxidation and grime while imparting a brilliant, reflective finish. For best results, apply the polish in a well-ventilated area and avoid over-applying, as a thin layer is often sufficient to achieve that striking mirror effect. Meguiar’s Hot Rims Metal Polish ensures your wheels will dazzle and shine, adding a touch of elegance to your vehicle.

Sealing the Deal: Applying a Protective Coating

After polishing, it’s crucial to seal the deal with a protective coating. This final step not only locks in the shine but also provides a barrier against future grime and contaminants. A good wheel sealant forms a protective layer over the polished surface, making it easier to clean and less susceptible to damage from brake dust, road salt, and other environmental factors. Apply the sealant according to the manufacturer’s instructions, usually by applying a thin layer and allowing it to cure before buffing off any excess. This protective sealant will help maintain the pristine condition of your wheels and ensure they continue to look their best for longer periods.

Comparing Top Wheel Sealants for Long-Lasting Protection

Choosing the right wheel sealant is essential for long-lasting protection. There are several top-rated options available, each offering different benefits. Meguiar’s Ultimate Wheel Cleaner is known for its advanced formula that provides excellent protection against brake dust and road grime. Another popular choice is Chemical Guys Wheel Guard, which offers durable protection and repels water effectively. For those seeking a high-tech solution, Griot’s Garage Wheel Sealant uses polymer technology to create a tough, long-lasting shield. Compare these options based on your needs and preferences to find the best products for wheels. Each product provides robust protection, so selecting one depends on your desired level of durability and ease of application.

By polishing and protecting your wheels, you’re not just enhancing their appearance but also investing in their longevity. The shine from a quality polish and the protective barrier from a top-notch sealant ensure that your wheels remain pristine and eye-catching, mile after mile. With these steps, your wheels will not only look great but also withstand the rigors of daily driving with ease.

Caring for Different Wheel Types

Cleaning Alloy vs. Chrome vs. Steel Wheels: What You Need to Know

When it comes to car wheel care, understanding the different types of wheels and their specific care requirements is crucial. Alloy wheels, known for their lightweight and stylish appearance, generally require regular wheel cleaning with pH-balanced cleaning solutions for wheels. These automotive cleaning supplies are designed to lift brake dust and grime without damaging the alloy finish. Chrome wheels, on the other hand, demand a bit more attention. They can be prone to tarnishing and require a non-abrasive metal polish that restores shine and prevents surface corrosion. Steel wheels, often found on more utilitarian vehicles, are more robust but can still rust if not properly cared for. Use a degreaser for wheels and a sturdy brush to scrub away dirt and grime, followed by a protective sealant to prevent rusting. Each type of wheel has its unique wheel maintenance needs, so tailoring your approach ensures they all stay in top shape.

Special Tips for Maintaining Painted and Powder-Coated Wheels

Painted and powder-coated wheels offer a unique look but come with their own set of car care routine maintenance requirements. Painted wheels need gentle cleaning agents to avoid damaging the finish. Opt for safe cleaning products like a mild, pH-balanced wheel cleaner and avoid harsh chemicals or abrasive detailing brushes that can scratch the paint. For powder-coated wheels, which have a more durable finish, you can use slightly stronger cleaners but still avoid anything too abrasive. Regular wheel cleaning and applying a protective coating can help preserve the finish and prevent fading or chipping. Both types benefit from periodic inspections to catch and address any minor issues before they become major problems, ensuring your vehicle’s appearance remains impeccable.

Avoiding Damage: Products to Use and Products to Avoid

Selecting the right products for car detailing is essential to avoid causing damage to your wheels. Avoid using general-purpose household cleaners or strong acids, as these can damage the finish or strip away protective coatings. Instead, use wheel-specific cleaning methods for wheels that are formulated for the type of finish you’re working with. For example, avoid using an all-purpose cleaner on chrome wheels; instead, choose a cleaner designed for chrome. Similarly, steer clear of abrasive pads or brushes, which can scratch delicate finishes. Opt for soft, microfiber towels and non-abrasive wheel scrubbers to safely clean all wheel types. Paying attention to the products you use—and avoiding those that can cause harm—ensures your wheels remain in excellent condition and continue to enhance your vehicle’s overall appearance.

Understanding how to care for different wheel types helps maintain their shine and longevity. Whether dealing with alloy, chrome, steel, painted, or powder-coated wheels, using the right cleaning methods and techniques ensures that your wheels stay pristine and perform well over time. With proper care, your wheels will not only look great but also continue to complement your vehicle’s overall style and high-performance.

DIY vs. Professional Wheel Cleaning

When to Clean Your Wheels at Home vs. Hiring a Professional

Deciding whether to tackle DIY wheel cleaning yourself or hire a professional often depends on a few key factors. If your wheels are in decent shape and you’re comfortable with basic car washing techniques, DIY cleaning can be a rewarding and cost-effective option. Cleaning wheels at home allows for a personalized approach, with control over the products and techniques used, such as using detailing brushes and tire protectant for a thorough job. However, if your wheels are heavily soiled, have significant brake dust removal needs, or are in need of specialized treatment, professional detailing might be the better route. Professionals have access to advanced tools, such as heavy-duty wheel cleaner and high-grade protective sealants, that can effectively address tougher grime and restore your wheels to their original brilliance. Ultimately, the choice between DIY and professional cleaning should consider both the condition of your wheels and your confidence in handling the cleaning process.

Cost Comparison: DIY Supplies vs. Professional Services

When evaluating the cost of wheel cleaning, comparing DIY supplies to professional services is crucial. DIY cleaning typically involves purchasing various products, such as wheel cleaners, car polish, wheel brushes, and sealants, often from brands like Meguiar’s products. While the upfront investment in high-quality supplies may seem steep, these products can be used multiple times, offering long-term value. On the other hand, professional cleaning services usually come with a one-time fee, which can vary based on the extent of the service and the condition of your wheels. Although professional services might appear more expensive initially, they often include thorough cleaning, tire sidewall cleaning, polishing, and rust prevention protection that can justify the cost. Weighing these factors helps you determine whether the investment in professional cleaning or the cost of DIY supplies aligns better with your needs and budget.

Pros and Cons of Professional Detailing Services

Professional auto detailing services offer a range of benefits, but they also come with some trade-offs. On the plus side, professionals bring expertise, specialized equipment, and best products for wheels that can achieve superior results. They can tackle severe grime, surface contaminants, stubborn stains, and delicate finishes with precision, ensuring that your wheels are cleaned and protected to the highest standard. Additionally, using a professional service saves you time and effort, allowing you to enjoy a pristine finish without the hassle of doing it yourself.

However, there are downsides to consider. Professional services can be pricey, especially if you opt for high-end detailing packages that include surface preparation, wheel coating, and UV protection for wheels. Additionally, the frequency of professional cleanings might be less than what you can achieve with regular DIY maintenance. Some services may also have limited availability or scheduling constraints. Weighing these pros and cons helps you decide if the benefits of professional detailing align with your expectations and budget, or if DIY cleaning provides sufficient value and satisfaction.

Whether you choose to clean your wheels at home or enlist the help of a professional, understanding the differences and making an informed decision ensures your wheels stay in top condition. Both approaches have their merits, and the right choice depends on your specific needs, preferences, and budget. By keeping your wheels well-maintained, you contribute to the overall vehicle detailing and enhance your car’s longevity and aesthetic appeal.

Maintaining Clean Wheels: Regular Care Tips

How Often Should You Clean Your Car’s Wheels?

Maintaining pristine wheels is about consistency. Ideally, you should perform regular wheel cleaning every 2 to 4 weeks. Frequent cleaning helps prevent the buildup of brake dust, road grime, and other contaminants that can dull the finish and cause long-term damage. If you drive in harsh conditions—such as frequent rain, snow, or on gritty roads—consider cleaning your wheels more often to counteract the effects of these elements. Incorporating wheel maintenance into your car care routine is essential. For those who prefer a less frequent schedule, a monthly car wash that includes thorough tire cleaning and rim cleaning should suffice. However, always be attentive to any visible grime, dirt, and grime, or brake dust that may accumulate between sessions. Regular care keeps your wheels looking sharp and protects your investment in both time and automotive cleaning supplies.

Quick Maintenance Tips for Keeping Wheels Looking New

Keeping your wheels looking brand new doesn’t have to be a time-consuming task. Start by rinsing off loose dirt and brake dust every time you wash your car. This simple step prevents buildup and reduces the need for heavy-duty wheel scrubbers or a heavy-duty wheel cleaner. Use a gentle, pH-balanced wheel cleaner regularly to maintain the finish without risking damage, especially on alloy wheels and chrome wheels. A quick wipe down with a microfiber towel after washing can also help remove any remaining water spots and keep the wheels gleaming. Additionally, applying a protective sealant or tire protectant every few months enhances the wheels’ resistance to grime and makes future cleaning easier. Small, consistent efforts can make a big difference in preserving the wheel shine and extending the life of your wheels.

Seasonal Wheel Care: Adapting to Weather Conditions

Adapting your wheel care routine to seasonal weather conditions ensures optimal maintenance throughout the year. In the winter, road salt and grime can quickly accumulate and cause rust or surface corrosion. To combat this, clean your wheels more frequently and consider applying a winter-specific wheel coating or a protective sealant designed to repel salt and prevent rust. During the summer, the heat can exacerbate the effects of brake dust, making regular cleaning crucial. Use a high-quality wheel cleaner to tackle the buildup and apply a protective coating to shield against UV protection for wheels. In fall and spring, falling leaves and pollen can also impact your wheels, so regular rinsing and gentle cleaning methods for wheels can help remove these elements and prevent any lasting damage. Adjusting your maintenance routine based on the weather conditions helps preserve the appearance and integrity of your wheels year-round.

By following these regular care tips, you’ll keep your wheels in top condition, ensuring they remain a standout feature of your vehicle. Consistent cleaning, quick maintenance, and seasonal adjustments all contribute to maintaining that showroom-ready look, allowing you to enjoy the full benefits of your vehicle’s appearance and performance.

Troubleshooting Common Wheel Cleaning Problems

What to Do When Wheel Cleaner Isn’t Working

Sometimes, despite your best efforts, wheel cleaner might not deliver the results you expect. If your cleaner isn’t effectively removing grime or brake dust, start by ensuring you’re using the right cleaning agents for your wheel type and condition. Check the product label to confirm it’s suitable for your specific wheels and that you’re following the recommended application instructions. If the cleaner isn’t performing as expected, it could be due to a buildup of surface contaminants that require a more robust solution. Consider trying a different cleaner formulated for tougher grime or brake dust removal. Additionally, allowing the cleaner to sit for a few minutes before scrubbing can give it time to break down stubborn residues. For extreme cases, a multi-step cleaning process or a clay bar treatment might be necessary to remove embedded contaminants before applying a new cleaner.

How to Fix Scratches and Scuffs on Wheels

Scratches and scuffs on wheels can detract from their overall appearance, but addressing these issues can restore their look. For minor scratches, start by using a wheel-specific polish or metal polish designed to smooth out imperfections. Apply the polish with a soft microfiber cloth, following the product’s instructions to blend the scratch with the surrounding surface. For deeper scratches, consider using a touch-up paint kit matched to your wheel’s color. Carefully apply the paint using a fine brush and allow it to dry thoroughly before polishing the area to blend it seamlessly with the rest of the wheel. If the damage is extensive or if you’re unsure about the repair process, seeking professional detailing help can ensure a more precise and lasting fix.

Addressing Rust and Corrosion Issues

Rust and corrosion can be particularly challenging, especially on steel wheels or wheels with damaged coatings. Begin by assessing the extent of the rust. For light surface rust, use a rust remover or a mild abrasive to gently scrub away the corrosion. Follow up with a thorough cleaning to remove any residue. For more severe rust, you may need to sand down the affected area to the bare metal before applying a rust-inhibiting primer and a fresh coat of paint. If the corrosion is extensive or affects the structural integrity of the wheel, replacement might be the safest option. Applying a protective sealant regularly can help prevent rust and corrosion from recurring, keeping your wheels looking their best and extending their lifespan.

By addressing these common wheel cleaning problems with the proper wheel cleaning technique, you can ensure your wheels remain in excellent condition. Whether dealing with ineffective cleaners, scratches, rust, or wheel nut care, taking prompt and appropriate action will help maintain the appearance and durability of your wheels, preserving their showroom-ready look for years to come.

FAQs About Cleaning Wheels on Car

Can You Use Household Cleaners on Car Wheels?

While it might be tempting to reach for a household cleaner, it’s important to choose products specifically designed for car wheels. Household cleaners often contain harsh chemicals that can damage the finish or cause discoloration on your alloy wheels or chrome wheels. These cleaners may also not be effective against the unique types of dirt and grime and brake dust that accumulate on wheels. Opt instead for cleaning solutions for wheels that are pH-balanced and formulated to tackle brake dust removal and road grime without harming your wheels. These specialized automotive cleaning supplies not only ensure a safer cleaning process but also enhance the longevity and appearance of your wheels. If you’re in a pinch, look for a cleaner that explicitly states it’s safe for car detailing and automotive use, but always test in a small area first to ensure it won’t affect the car rims or other components.

Is It Safe to Pressure Wash Car Wheels?

Pressure washing can be a powerful tool for DIY wheel cleaning, but it must be used with caution. A pressure washer’s force can dislodge stubborn grime and brake dust effectively, but using too high a pressure or getting too close to the wheels can risk damaging the finish or even the wheel itself. It’s essential to use a moderate pressure setting and maintain a safe distance to avoid causing any harm, especially to sensitive areas like the wheel arches and wheel wells. Additionally, ensure that the nozzle is set to a wide spray pattern to distribute the water evenly. For best results, use the pressure washer in combination with a wheel cleaner and detailing brushes. This method allows for effective cleaning while minimizing the risk of damage. Always remember, proper wheel cleaning technique is key to preserving the integrity and appearance of your wheels.

What’s the Best Way to Clean Wheel Nuts and Bolts?

Cleaning wheel nuts and bolts requires a delicate approach to ensure they’re free of grime without risking damage. Start by using a mild wheel cleaner and a soft brush to gently scrub around the nuts and bolts. Avoid using abrasive materials that could scratch the surface. For stubborn dirt, a detailing brush with a narrow head can help reach into tight spaces without causing damage. After cleaning, rinse thoroughly to remove any residue from the cleaner. If your wheel nuts and bolts are particularly dirty or corroded, a specialized metal polish can be used to restore their shine. For added protection, consider applying a protective sealant after cleaning. Always ensure that the nuts and bolts are completely dry before driving to avoid rust prevention issues and surface corrosion. Regular cleaning of these components helps maintain their functionality and appearance, contributing to the overall look of your high-performance wheels.

By addressing these frequently asked questions, you’ll have a clearer understanding of how to effectively clean and maintain your wheels. Using the right cleaning agents, applying techniques with care, and focusing on specific components like wheel nuts and bolts will help you achieve a pristine finish while preserving the integrity of your wheels.

Conclusion: Achieving the Perfect Showroom-Ready Look

Recap of Essential Steps for Sparkling Clean Wheels

Achieving that showroom-ready gleam for your wheels requires a well-executed cleaning routine. Start by gathering the right tools and products, including a quality wheel cleaner, wheel brushes, and microfiber towels. Begin your wheel care by rinsing off loose dirt and debris to prevent scratching during the main cleaning process. Apply your chosen wheel cleaner, allowing it to break down grime and brake dust before scrubbing thoroughly. For stubborn stains and brake dust removal, don’t hesitate to use more intensive methods or repeat the cleaning if necessary. After cleaning, polish your wheels to enhance their wheel shine and apply a protective coating or tire dressing to safeguard against future dirt and damage. Regular maintenance, including quick cleanings and seasonal adjustments, will help you maintain that perfect finish and prolong the life of your wheels.

Final Thoughts on Using Meguiar’s Products for Best Results

When it comes to achieving exceptional results, Meguiar’s products stand out for their effectiveness and reliability. Their wheel cleaners, such as the Meguiar’s Ultimate All Wheel Cleaner, are formulated to tackle tough grime without damaging your alloy wheels or chrome wheels. Meguiar’s Hot Rims Metal Polish delivers a brilliant mirror-like finish, adding an extra layer of shine that makes your wheels pop. Their protective sealants offer long-lasting protection, helping to keep your wheels looking pristine despite environmental challenges like dirt and grime. For those who seek top-tier performance and a hassle-free cleaning experience, Meguiar’s products are a trusted choice in both DIY wheel cleaning and professional detailing. By incorporating these high-quality products into your car care routine, you ensure the best possible results and a finish that rivals even the most meticulously maintained show cars.

Encouragement to Keep Your Wheels Looking Their Best Year-Round

Maintaining clean, shiny wheels is more than just an aesthetic choice—it’s a commitment to preserving your vehicle’s overall appearance and value. Regular cleaning and care not only keep your wheels looking their best but also protect them from long-term damage caused by surface contaminants. Embrace a routine that fits your lifestyle and vehicle needs, and don’t be afraid to invest in quality products like car polish, tire protectant, and UV protection for wheels that make the process easier and more effective. Remember, the effort you put into keeping your wheels immaculate pays off in the form of a vehicle that consistently turns heads and performs at its peak. Make wheel care a priority, and your car will always have that showroom-ready look, regardless of the season.

Call to Action: Upgrade Your Wheel Care Routine Today

Recommended Products for Superior Wheel Care

Elevate your wheel cleaning routine with top-tier products that deliver exceptional results. Begin by integrating Meguiar’s Ultimate All Wheel Cleaner into your car wheel care arsenal. This powerful formula tackles the toughest grime and brake dust removal while being gentle on your alloy wheels or chrome wheels. For a brilliant wheel shine, Meguiar’s Hot Rims Metal Polish is your go-to, providing a mirror-like finish that enhances the overall look of your vehicle. Seal the deal with a protective sealant or coating, such as Meguiar’s Ultimate Liquid Wax, to shield your wheels from dirt and grime, surface contaminants, and damage. If you’re exploring alternatives, consider other high-quality brands like Sonax, which offers innovative wheel cleaning solutions for DIY wheel cleaning, or Chemical Guys for their comprehensive range of automotive cleaning supplies and detailing products. Investing in these superior products ensures your wheels receive the best car detailing care and wheel protection, maintaining that flawless appearance you’ve worked so hard to achieve.

Where to Buy Meguiar’s and Other Top Wheel Cleaning Brands

Securing these exceptional products for your car care routine is easier than ever. Meguiar’s products are available at major retailers such as AutoZone, Advance Auto Parts, and Walmart. You can also find them online through Amazon or the Meguiar’s official website, offering the convenience of home delivery. For alternative brands like Sonax or Chemical Guys, check out specialized auto detailing stores or their respective online shops. Websites like Detail King and Car Care Products provide a wide selection of vehicle detailing kits and supplies, often including exclusive offers and detailed product information on cleaning agents, wheel scrubbers, wheel brushes, and microfiber towels. By purchasing from reputable sources, you ensure you’re getting authentic products that deliver the performance and results you expect, whether it’s for rim cleaning, brake caliper cleaning, tire sidewall cleaning, or rust prevention.

Share Your Wheel Cleaning Success Stories and Tips

Your journey to sparkling clean wheels can inspire others in their wheel maintenance efforts. Share your experiences and the car maintenance tips you’ve learned along the way. Did a specific product like a heavy-duty wheel cleaner make a significant difference in your routine? Perhaps you discovered a proper wheel cleaning technique that saved time and effort. Join online forums, social media groups, or community blogs to exchange insights with fellow car enthusiasts. Your success stories not only contribute to a shared knowledge base but also foster a community of car care aficionados focused on tire and wheel combo care. Engaging with others helps you stay updated on the latest car washing techniques, detailing brushes, and tire protectant products, and your feedback might just help someone else achieve their dream wheel finish, complete with UV protection for wheels and surface corrosion prevention.

Enhance your wheel care routine today by selecting the right cleaning methods for wheels, purchasing from reliable sources, and sharing your achievements. With a commitment to superior care and seasonal maintenance, your wheels will continue to shine and impress, reflecting the attention and effort you put into maintaining your vehicle’s appearance and overall vehicle detailing.

Products Checklist

Meguiar’s Ultimate All Wheel Cleaner

Meguiar’s Hot Rims Metal Polish

Meguiar’s Marine/Wheel Sealant

Chemical Guys Wheel Cleaner

Griot’s Heavy Duty Wheel Cleaner

Wheel Brush

Microfiber cloths

Greenworks pressure washer

Garden hose

Chemical Guys Clay Bar Set

Chemical Guys Clay Bar Lubricant

Chemical Guys Diablo Gel

Chemical Guys Wheel Guard

Meguiar’s Ultimate Liquid Wax

Affiliate Disclaimer: If you choose to purchase a product through these links I will earn a small commission at no cost to you.
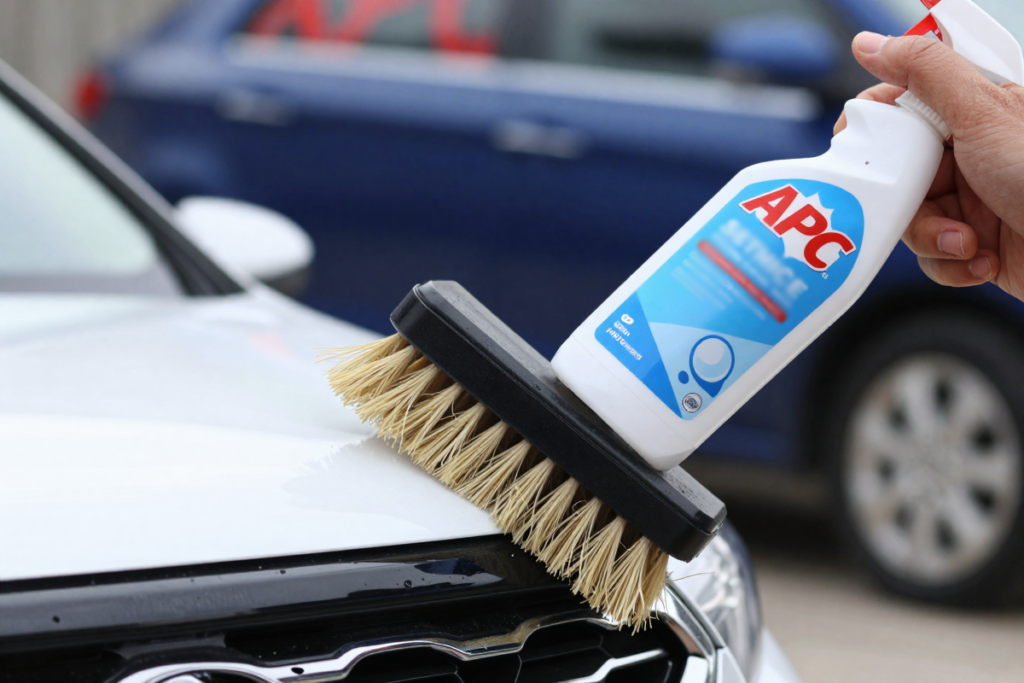
Can You Fix Car Paint Chips Yourself? DIY Guide to Touch-Ups

You’re driving down the highway, enjoying the ride, when suddenly—ping. A rogue piece of gravel kicked up by a semi-truck strikes your hood. You pull over, heart sinking, to inspect the damage. There it is: a tiny, jagged white spot where your pristine paint used to be.
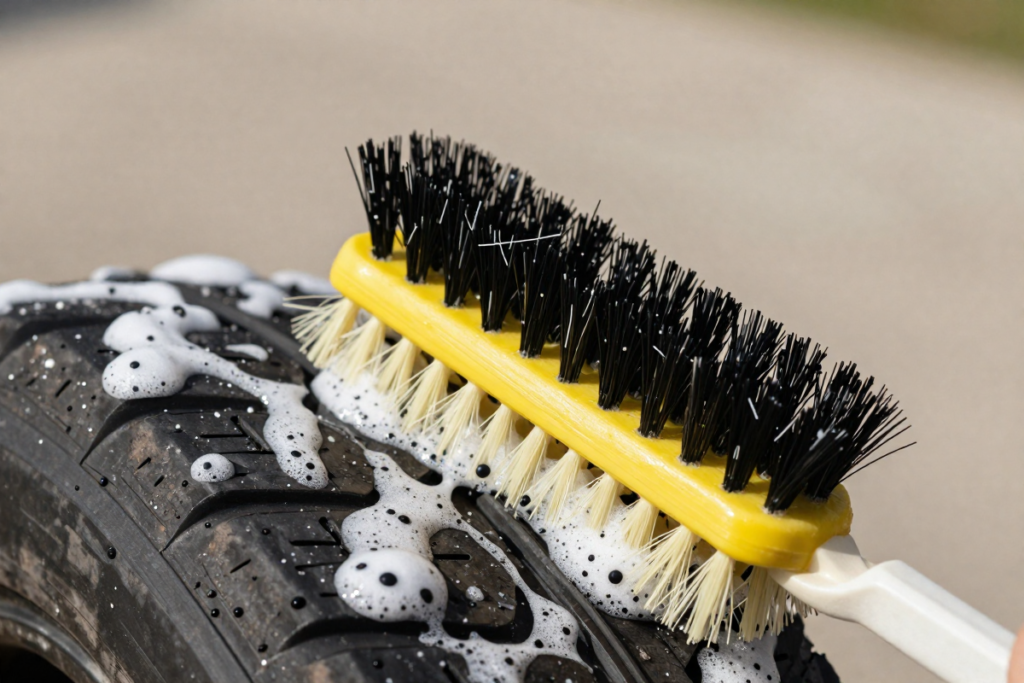
It’s a universal car owner experience. But before you freak out and punch out the nearest mailbox or rush to book a $500 appointment at a body shop, take a deep breath. The question on every driver’s mind is simple: Can you fix car paint chips yourself?

The short answer is a resounding yes. With the right tools, a bit of patience, and the correct technique, you can perform a DIY car paint chip repair that looks professional and protects your vehicle from rust.

In this comprehensive guide, we will walk you through exactly how to fix paint chips on car surfaces, from finding your paint code to blending the final coat. Whether you are dealing with a minor scratch or a deep chip down to the metal, this guide will help you restore your vehicle’s finish without breaking the bank.


II. What Causes Car Paint Chips?

Before we dive into the repair, it helps to understand the enemy. Car paint chip repair isn’t just about cosmetics; it’s about fighting the elements.

  • Road Debris: The most common culprit. Rocks, gravel, and road salt kicked up by tires act like sandblasters on your front bumper and hood.
  • Weather Exposure: Extreme heat, freezing temperatures, and UV rays can make paint brittle, causing it to flake or chip more easily upon impact.
  • Improper Washing: Using dirty sponges or automatic car washes with stiff brushes can create micro-scratches that weaken the clear coat, leading to chipping.
  • Daily Wear and Tear: Parking lot dings, shopping cart impacts, and door edges all contribute to auto paint blemish fix scenarios.

Ignoring these chips isn’t an option. Once the clear coat and base coat are breached, moisture reaches the metal underneath, leading to rust. Rust spreads like a cancer under the paint, turning a $20 fix into a $2,000 panel replacement.


III. Can You Really Fix Car Paint Chips Yourself?

Let’s be honest: Is it hard to touch up car paint yourself? It requires a steady hand, but it is not rocket science.

Types of Chips You Can Fix

  • Small Surface Chips: These are superficial and only affect the clear coat or the very top layer of base coat.
  • Minor Scratches with Paint Loss: If the scratch is narrow (like a keying or a branch scrape) and hasn’t dented the metal, it is perfect for DIY methods for repairing chipped automotive paint.
  • Rock Chips: The classic “bug splat” size chips on the hood are the easiest to fix.

When DIY Might Not Be Enough

  • Deep Chips Exposing Large Areas of Metal: If the metal is bent or the chip is larger than a quarter, a professional might be needed to fill the dent first.
  • Rust Already Forming: If you see orange bubbling, you need to treat the rust chemically before painting.
  • Specialty Paints: Tri-coat pearls or matte finishes are notoriously difficult to blend invisibly without professional equipment.

Cost Comparison: DIY vs. Professional

  • DIY Cost: A high-quality car paint repair kit costs between $20 and $60.
  • Professional Cost: A body shop will typically charge $150 to $500 per panel, or even more for luxury vehicles.

IV. Tools and Materials You’ll Need

To achieve a seamless vehicle finish restoration, you need the right gear. You cannot simply dab paint on with a toothpick and expect perfection.

Essential Tools

  • Touch-Up Paint (OEM Color Match): This is critical. Generic “silver” paint will not match your “Sterling Silver Metallic.”
  • Primer: Essential for chips that have gone down to the bare metal or plastic. It helps the paint adhere and prevents rust.
  • Clear Coat: This provides the gloss and protection. Without it, your repair will look dull and flat.
  • Fine-Tip Applicators or Brushes: Most kits come with a brush, but a fine-tip brush or even a syringe offers more precision.
  • Microfiber Cloths: For cleaning and buffing.
  • Sandpaper: You will need various grits, specifically 2000-grit and 3000-grit wet sandpaper.

Optional but Helpful

  • Paint Leveling Solution: Helps flatten the repair so it doesn’t look like a raised bump.
  • Polishing Compound: To blend the repair into the surrounding area.
  • Dual-Action Polisher: For the final buff (optional for small chips).

[Best All-in-One Car Paint Chip Repair Kit for Beginners]
[Premium OEM Match Touch-Up Paint Finder]
[High-Grit Wet Sandpaper Assortment]


V. How to Find Your Car’s Paint Code

The number one reason DIY repairs fail is poor color matching. You need automotive color matching precision.

Your paint code is not your VIN. It is a specific alphanumeric code usually found on a sticker or plate in one of these locations:

  1. Driver’s Side Door Jamb: Look for a sticker with tire pressure info; the paint code is often labeled “C/TR” or “Paint.”
  2. Under the Hood: Sometimes located on the firewall or strut tower.
  3. Glove Box or Trunk: Common in European cars like BMW or Mercedes.

Once you have the code (e.g., “NH-731P” for Honda Crystal Black Pearl), search for OEM touch up paint using that specific code. Do not guess the color name.


VI. Step-by-Step Guide to Fixing Car Paint Chips

Ready to learn how to fix paint chips on car hood and other panels? Follow this step-by-step guide to fixing auto paint damage.

Step 1: Clean the Area Thoroughly

You cannot paint over dirt. Wash the area with car soap and water. Then, use an alcohol wipe or wax and grease remover to ensure the surface is completely sterile. Any wax residue will prevent the paint from sticking.

Step 2: Assess the Damage

Look closely at the chip.

  • Clear Coat Only? You might just need a polish.
  • Base Coat/Metal Exposed? You need primer and paint.
  • Plastic Bumper? You need a flexible primer designed for plastic.

Step 3: Sand the Chip (If Necessary)

If the edges of the chip are jagged or peeling, use a piece of fine sandpaper (around 1000-grit) wrapped around a toothpick to gently smooth the edges. This is called “feathering.” It helps the new paint blend in. Be careful not to sand the surrounding good paint.

Step 4: Apply Primer (For Deep Chips)

If you see bare metal or black plastic, apply a tiny drop of primer.

  • Tip: Use a toothpick to dab the primer only inside the chip.
  • Drying Time: Let it dry for at least 30 minutes, or according to the bottle instructions.

Step 5: Apply Touch-Up Paint

This is where patience pays off. Apply thin coats of touch-up paint.

  • Do not try to fill the chip in one go. It will blob and run.
  • Dip your brush (or use the applicator) and place a tiny drop in the center of the chip. Capillary action will pull the paint into the crevice.
  • Let it dry for 15-20 minutes.
  • Repeat this process 3 to 5 times until the paint is slightly higher than the surrounding surface (it will shrink as it cures).

Step 6: Add Clear Coat

Once the base coat is level and dry, apply the clear coat using the same dabbing method. This seals the repair and adds shine. Apply 2-3 thin layers.

Step 7: Level and Polish (The Secret to Invisibility)

After the clear coat has cured for at least 24 hours (48 is better), the repair might feel like a raised bump.

  • Wet Sanding: Soak 2000-grit sandpaper in water. Gently sand the raised paint chip until it is flush with the surrounding panel. Be extremely gentle.
  • Buffing: Apply a small amount of rubbing compound or polishing compound to a microfiber cloth. Rub the area in circular motions to remove the sanding marks and restore the gloss.

[Professional Grade Polishing Compound]
[ScratchX by Meguiar’s for Final Blending]


VII. Common Mistakes to Avoid

Even with the best car paint chip filler, things can go wrong if you rush.

  1. Using Too Much Paint: This creates a “fingernail catch” bump that is impossible to hide. Less is more.
  2. Skipping Prep Work: Painting over wax or dirt guarantees the paint will peel off in a few weeks.
  3. Not Allowing Proper Drying Time: Automotive paint cures chemically. If you layer too fast, solvents get trapped, causing bubbling.
  4. Choosing the Wrong Color Match: As mentioned, always use the paint code.
  5. Over-Sanding: Sanding through the clear coat of the surrounding area will ruin the panel and require a full repaint.

VIII. Pro Tips for a Seamless Finish

Want your repair to look like it came from the factory? Use these pro tips.

  • Work in a Controlled Environment: Do not paint outside on a windy or dusty day. Dust settling on wet paint ruins the finish. A garage is ideal.
  • Temperature Matters: Paint flows best between 60°F and 80°F. Cold paint is thick and globs; hot paint dries too fast.
  • The “Dot” Technique: Instead of brushing back and forth, just touch the tip of the brush to the chip and lift.
  • Practice First: If you are nervous, practice your dabbing technique on a piece of glass or metal before touching your car.

IX. How Long Does a DIY Paint Chip Repair Last?

A common question is: How long does touch-up paint last on a car?

If done correctly with proper prep and clear coat, a DIY repair can last the lifetime of the vehicle. However, several factors affect longevity:

  • UV Exposure: Cars parked outside constantly will see the repair fade faster.
  • Washing Habits: Aggressive scrubbing can wear down the clear coat over the repair.
  • Quality of Materials: Cheap hardware store paint will fade and peel faster than OEM-matched automotive paint.

Maintenance Tip: Apply a coat of wax or sealant over the repaired area after it has fully cured (about 30 days) to add an extra layer of protection.


X. When to Call a Professional Instead

While DIY car paint chip repair is cost-effective, there are times to call a pro.

  • Large Damage: If the chip is larger than a quarter or involves a dent.
  • Rust: If the metal is already corroded, you need professional rust treatment.
  • Lease Returns: If you are returning a leased vehicle, inspection standards are strict. A professional repair ensures you don’t get hit with excessive wear-and-tear fees.
  • High-End Vehicles: If you drive a Ferrari or a car with tri-coat pearl paint, the risk of a visible mismatch is high.

XI. DIY vs Professional Repair: Cost Breakdown

Let’s look at the numbers.

Repair TypeEstimated CostTime RequiredDurability
DIY Touch-Up$20 – $60 (Kit)1 – 2 Hours (plus drying)High (if done right)
Mobile Repair Tech$100 – $200 per panel1 – 2 HoursHigh
Body Shop$300 – $800+ per panel2 – 4 DaysVery High

For the average driver, the DIY vs Professional Repair decision comes down to perfectionism. If you want it 100% invisible from 0 feet away, go to a pro. If you want it to look 95% perfect from 5 feet away and stop the rust, DIY is the winner.


XII. Preventing Future Paint Chips

Once you’ve fixed your chips, you want to keep them away. How do you prevent paint chips on a new car?

  1. Paint Protection Film (PPF): This is a clear, urethane film applied to the hood and bumper. It absorbs rock impacts so your paint doesn’t have to. It is the gold standard for paint chip prevention.
  2. Ceramic Coatings: While they don’t stop rocks, they make the surface harder and easier to clean, reducing swirl marks.
  3. Safe Driving Habits: Increase following distance behind trucks and gravel vehicles.
  4. Proper Washing: Use the two-bucket method and high-quality microfiber towels to avoid inflicting self-damage.

[DIY Paint Protection Film Kits]
[Ceramic Coating Spray for Long-Term Protection]


XIII. Recommended Products

To help you get started, here are our top picks for the best car paint chip repair kit for beginners.

1. Best Overall Touch-Up Kit

[Dr. ColorChip Automotive Paint Chip Repair System]

  • Why: Uses a unique leveling solution that makes blending incredibly easy for novices.

2. Best Budget Option

[Dupli-Color Scratch Fix 2-in-1]

  • Why: Affordable and widely available at auto parts stores. Good for small nicks.

3. Best for Precision

[Affiliate Link: Langka Paint Chip Repair Kit]

  • Why: Comes with a leveling solvent and detailed instructions for invisible repairs.

4. Essential Tools

[3M Wetordry Sandpaper Assortment]
[Chemical Guys Microfiber Towels]


XIV. FAQs

Here are answers to the most common questions about auto body paint repair.

1. Can touch-up paint make chips invisible?
It can make them nearly invisible from a normal viewing distance. However, up close, you may still see a slight texture difference unless you wet sand and polish perfectly.

2. How long should touch-up paint dry?
Touch-up paint feels dry in 30 minutes but needs 24 hours to cure before wet sanding. Full hardness takes about 30 days.

3. Do I need clear coat for small chips?
Yes. Without clear coat, the base coat will look dull and will not be protected from UV rays or washing.

4. Can I fix chips without sanding?
For very tiny chips, you can skip sanding. However, for a smooth finish, light sanding is recommended to feather the edges.

5. Will DIY repairs affect resale value?
Generally, no. In fact, fixing rust-prone chips increases value. A car with peeling paint and rust spots is worth less than a car with minor, well-done touch-ups.

6. Can I use nail polish to fix car paint chips?
Technically yes, but we don’t recommend it. Nail polish doesn’t bond well to automotive clear coat and will eventually peel or turn yellow. Use actual automotive paint.

7. How do you fix paint chips on a black car without it showing?
Black shows imperfections easily. Use multiple very thin layers and spend extra time polishing the clear coat to match the surrounding gloss.

8. Does fixing paint chips prevent rust?
Absolutely. The paint acts as a barrier. Sealing the exposed metal stops oxygen and water from causing oxidation.


XV. Conclusion

So, can you fix car paint chips yourself? Absolutely. It is a manageable weekend project that saves you hundreds of dollars and protects your investment from rust.

The key to success lies in preparation. Clean the area, find your exact paint code, and most importantly, be patient with the application. Remember, multiple thin layers are better than one thick glob.

Don’t let that tiny chip on your hood turn into a rust spot. Grab a car paint repair kit, follow this guide, and restore your car’s showroom shine today.

Ready to start? Check out our recommended [Top-Rated Touch-Up Paint Kits] to find the perfect match for your vehicle.

Have you tried fixing paint chips yourself? Share your before-and-after photos in the comments below!